- Attachment Management
Attachment Management
Introduction
Almost every record in iPassport allows adding attachments under the Attach tab.
This provides an extremely useful tool for adding documents to a given record. Attachments are not handled by iPassport in the same way that Controlled Documents are. They don’t follow review processes or get tracked like controlled prints, nor can they be previewed on screen, but access can be restricted and they are backed up along with everything else.
Permissions
The permissions that govern access to attachments are:
- Attachments: Add Attachments
- Attachments: Delete Attachments
- Attachments: Add/Delete Authorised
- Attachments: Delete Attachment Types
Viewing Attachments
The general process is the same wherever an Attach tab is available. As a special case, attachments added to controlled documents can be locked against specific versions and then opened for general access in the next version. This is useful to prevent attachments from becoming inaccessible when the people who review a document change between versions.
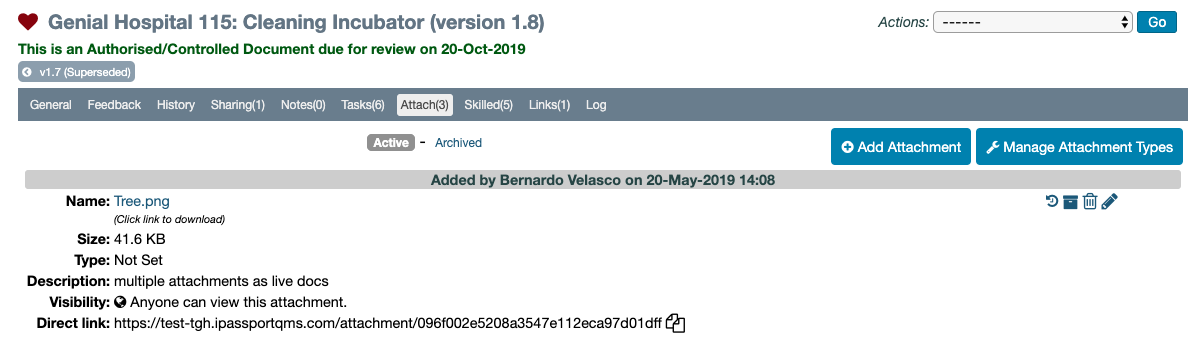
Any record that has attachments will display the number of items attached with a number in brackets next to the tab title (e.g., Attach(3)).
When the Attach tab is clicked, Active attachments are displayed by default and if there are any archived attachments, they can be viewed by clicking the filter, Archived.
Manage Attachment Types
The ‘Manage Attachment Types’ allows the user to categorise their attachments. This makes searching for an attachment easier if there are a lot of attachments within a record.
There is no requirement to use attachment types when adding an attachment. However, iPassport does not search text within attachments so this can be useful for locating information quickly.
Instructions on how to manage this configurable look-up field can be found by clicking this LINK.
Adding a New Attachment
To add a new attachment:
-
Click the Attach tab to open the attachments page
-
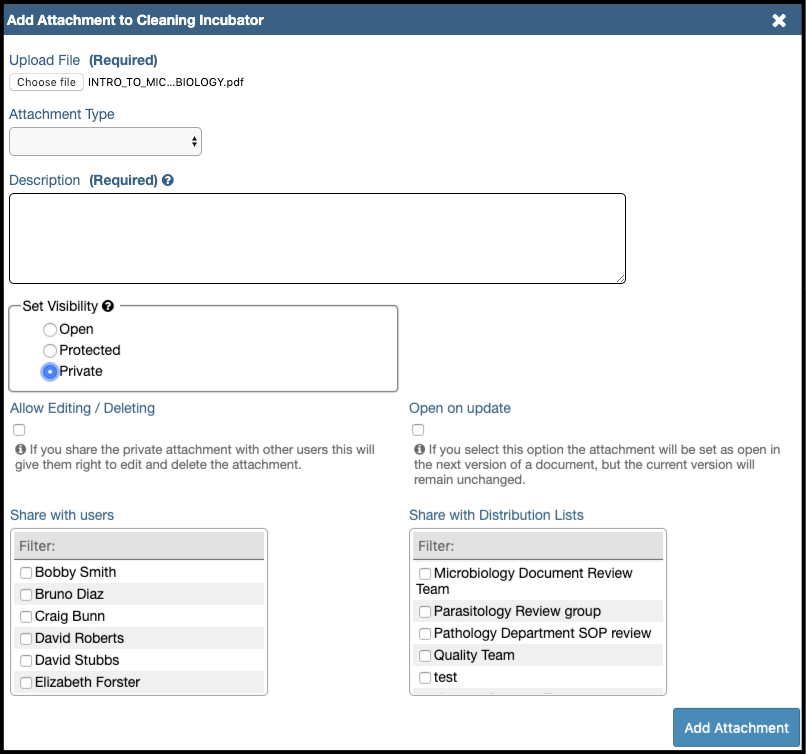
Click Add Attachment to open the Add Attachment… lightbox
-
Under Upload File, click Choose File
-
Find and select the file to attach, using the browser window that appears (once selected, the file title should appear next to the Choose File button)
-
Click the field under Attachment Type and select a type from the dropdown menu
-
Enter a Description in the field provided
-
Choose a visibility option by clicking one of the radio buttons under, Set Visibility
The visibility options provide the following functionality:
- Open - The attachment will be visible to everyone who can access the record and they can remove or archive it
- Protected - The attachment can be viewed by anyone but it can only be edited by the creator and Site Admins. When selected for a controlled document, the option Open on update appears; it can be ticked to make the visibility Open in the next version of the document.
- Private - The attachment will only be visible to those with whom it is shared. When selected for a controlled document, the option Open on update also appears, as well as an option to Allow Editing/Deleting the attachment by those it is shared with. Two search filters are provided, one to Share with users and one to Share with Distribution Lists.
-
Click Add Attachment
It is only possible to upload one document/attachment at a time but there are no restrictions on the type of file that can be uploaded.
It is important to note that attachments cannot be previewed within iPassport. In order to open the file the user would require the relevant software installed on their computer. For example, in order to open a .pdf attachment the user would need to have Adobe Acrobat installed.
Editing Attachments
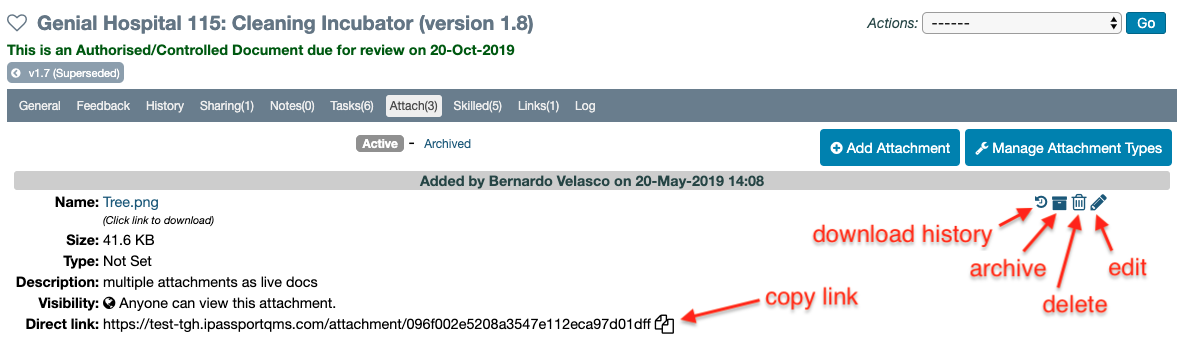
An attachment can be edited once it has been added to iPassport, based on access restrictions imposed on the attachment when it was added. These access restrictions can be edited under the Attach tab by clicking the edit (pencil) icon for the attachment.
The edit option opens the attachment management lightbox, allowing the user to change the Attachment Type, its Description and its Visibility (access level).
Archiving Attachments
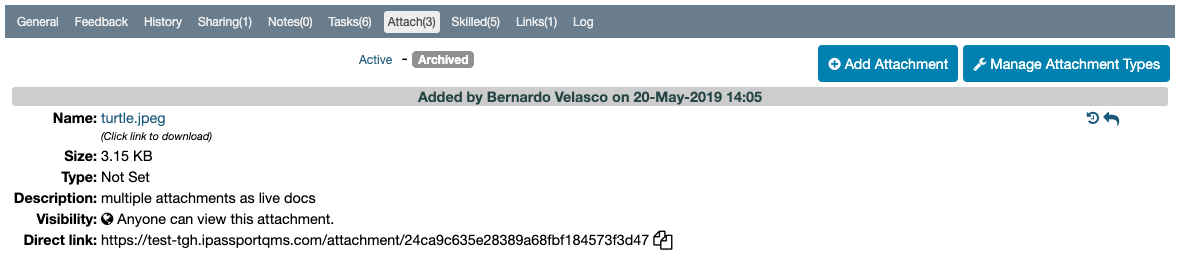
Should an attachment no longer be required but needs to still be associated to the record, it can be archived instead of deleted. This allows the attachment to still be accessed if needed but remain hidden behind the Archive view filter, ensuring it is not used by accident.
To archive an attachment, click its archive (folder) icon and then click OK to confirm, in the dialog box that appears.
To reactivate an attachment, click its Activate (return) icon and then click OK in the dialog box that appears.
Copy Link for external use
There is a direct link for every attachment that can be copied for external use by clicking the Copy icon on the Direct Link line.
When this link is pasted in a browser, the attachment will become available for download or will download automatically, depending on browser settings.
Download History
By clicking the Download History icon, any downloads of the attachment can be monitored. Both internal downloads, made by clicking on the attachment title within iPassport or, external downloads, made by using the copied link, will be recorded.