- Incident Management
Incident Management
Introduction
The incident/ accident module within iPassport can be used to record any type of incident or accident depending upon individual departments requirements. It is possible to create a new incident report internally through the standard iPassport system and externally through a web based input form. Both options will be covered as part of this overall guide.
There are three distinct Types of incident within iPassport. These Types are:
- General Incident
- Sample Incident
- Adverse Incident
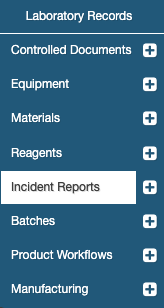
The incident module can be found as part of the Laboratory Records main menu item, and the sub-menu of: Incident Reports.
Adding a New Incident – External Input
Please note that it is only possible to create a ‘General’ Incident Type from the external input form.
The External Input form allows a non-iPassport user to report an incident directly to iPassport without having be logged in. The form is an addition to an iPassport account and can be accessed via: https://account url.ipassportqms.com/report_incident.
For example, if the account url was: https://hospital.ipassportqms.com the external incident form would be located at: https://hospital.ipassportqms.com/report_incident.
The ‘Incident Type’ field is required within the external input form but this area is actually populated from iPassport. To add a new ‘Incident Type’, enter iPassport and go to: Laboratory Records -> Incident Reports -> New Incident Report -> select an OU (any one is fine) and the Select Incident Type of ‘General’. Once the new incident record is open click the spanner icon for ‘Incident Category’ which opens the ‘Incident Report General Categories’ light-box, click ‘Add Incident Report General Category’ to add the new category (type). This will now be selectable within the external form. There is no need to actually create a new incident to populate this area.
As this is a required field (see below) it is advisable to populate this area before requesting staff to use the external form as without an option the form would not submit.
To create a new incident using the external web entry form go to the address/ shortcut provided, this should show a scroll down entry form.
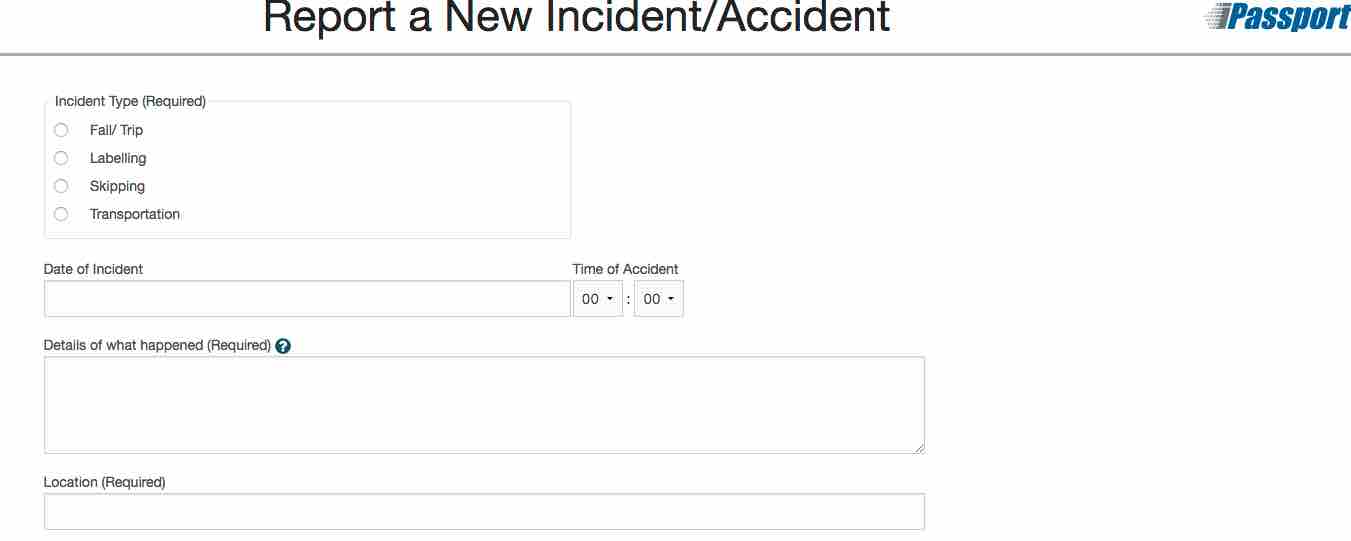
The new incident entry form showing the incident type and description.
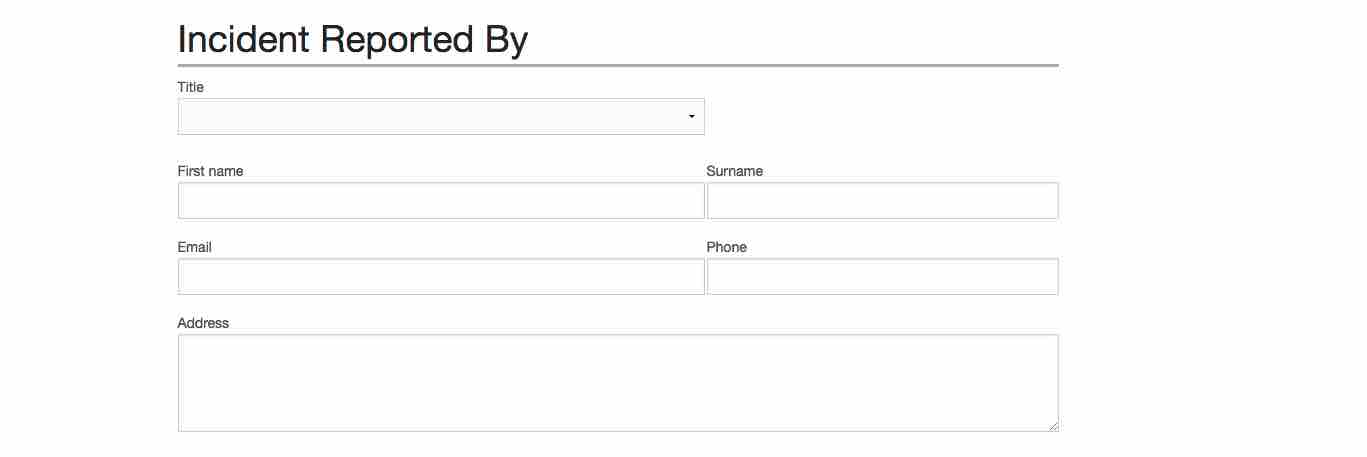
The new incident entry form showing the incident reported by.

The new incident entry form showing the first aider (if applicable).
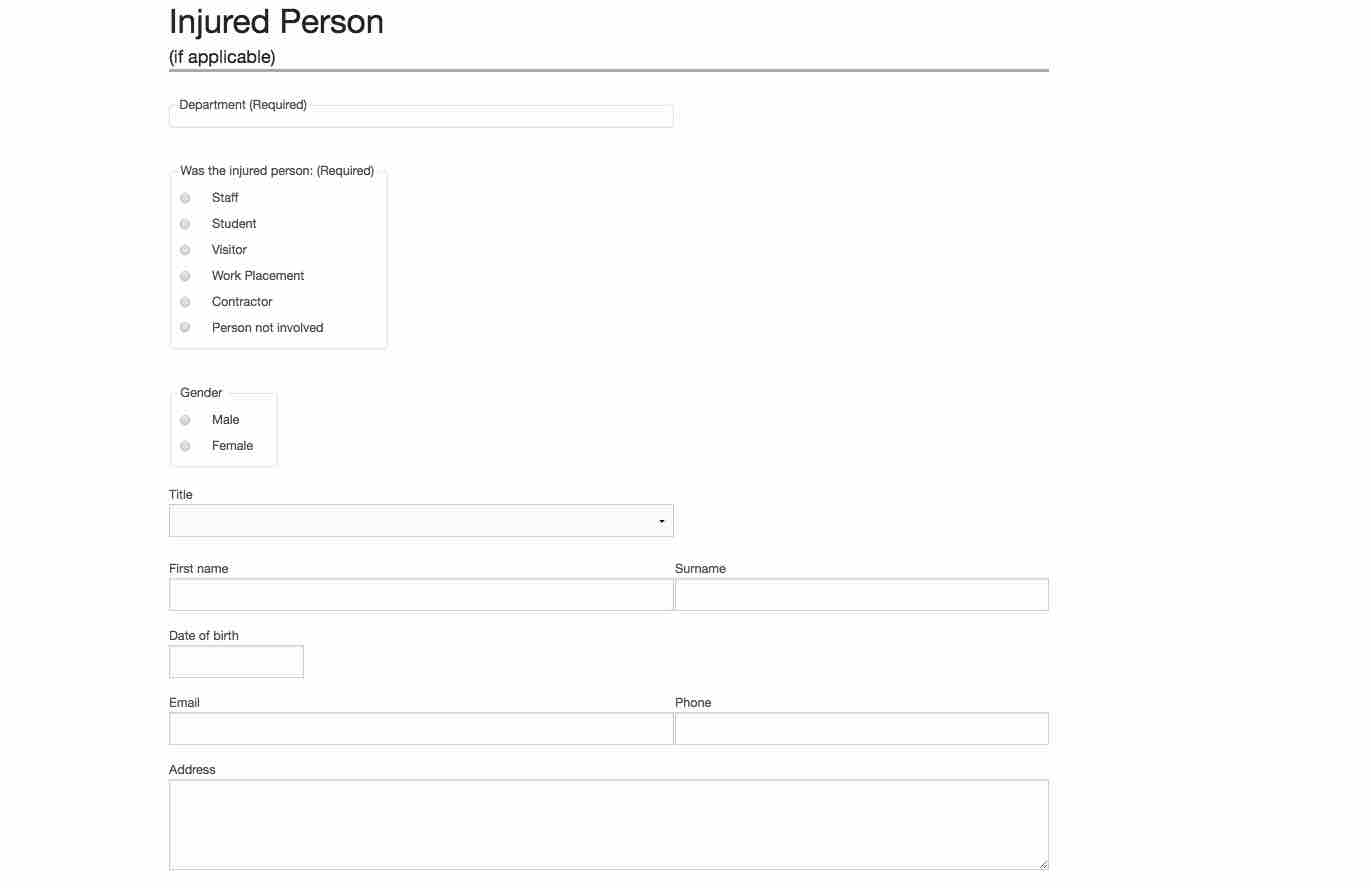
The new incident entry form showing the injured person (if applicable).
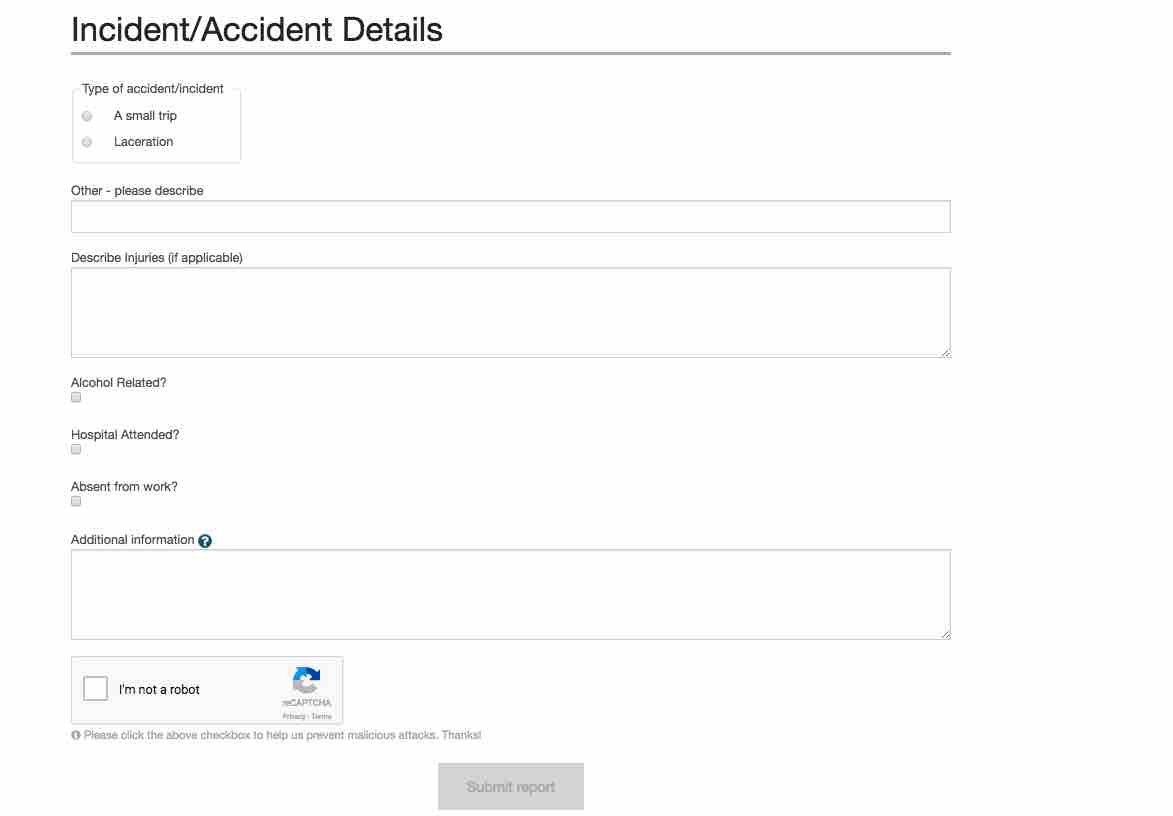
The new incident entry form showing the incident/accident details as well as the ‘Submit report’ button.
There are four required fields here, any left empty/ blank are all highlighted when submitting the incident, these are:
- Incident Type
- Date of Incident
- Details of what happened
- Location
It is also not possible to add an incident with a ‘Date of Incident’ in the future; this will also return an information message.
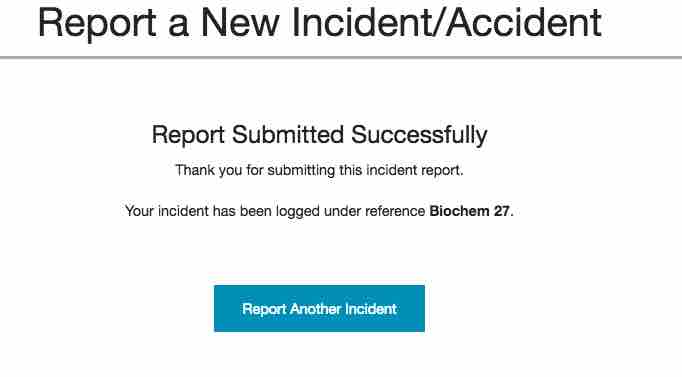
Once all of the required fields have been completed (including reCAPTCHA) click the ‘Submit report’ button and the report is entered into iPassport automatically. The user is provided with a unique on-screen reference number for the incident submission.
Adding a New Incident – Internal Input
To create a new incident using internal entry form, go to: Laboratory Records -> Incident Reports -> New Incident Report. An alternative is to click the + to the right of the Incident Reports sub-menu option. This should open a new incident report entry page.

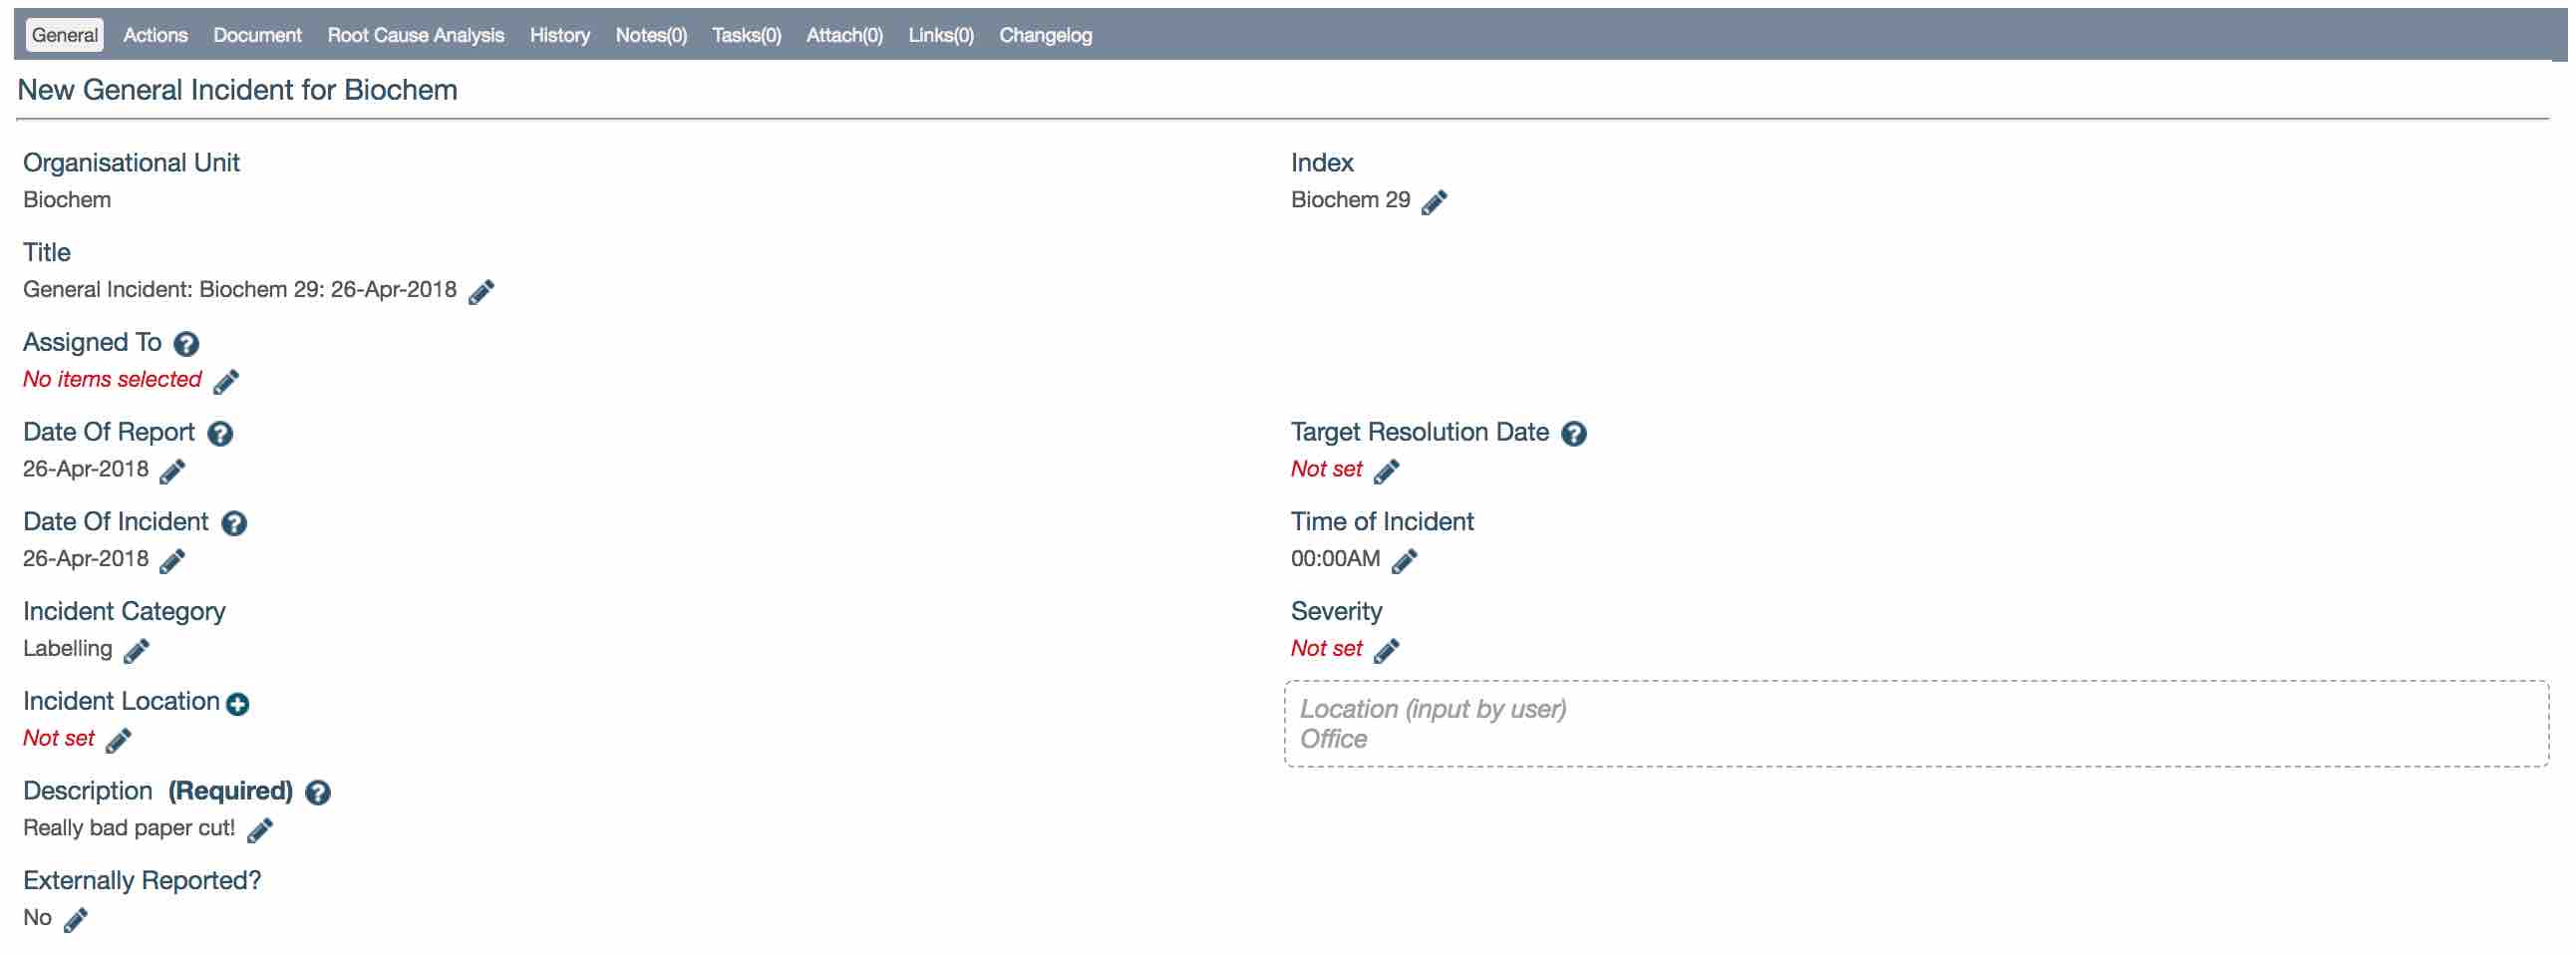
Any incident report added to iPassport needs to belong to an Organisational Unit (OU). The OUs available depend on the permissions the user has within iPassport. Once an OU has been selected then the incident type needs to be selected from the ‘Select Incident Type’ field. The example followed here shows the ‘General Incident’ type. Having selected the type the new scroll down entry form is displayed.
There are two other types of incidents available for selection; sample incident and adverse incident. Sample incidents will allow the user to record details of the incident without identifying the patient, whereas the adverse incident type can be used to records most other occurrences.
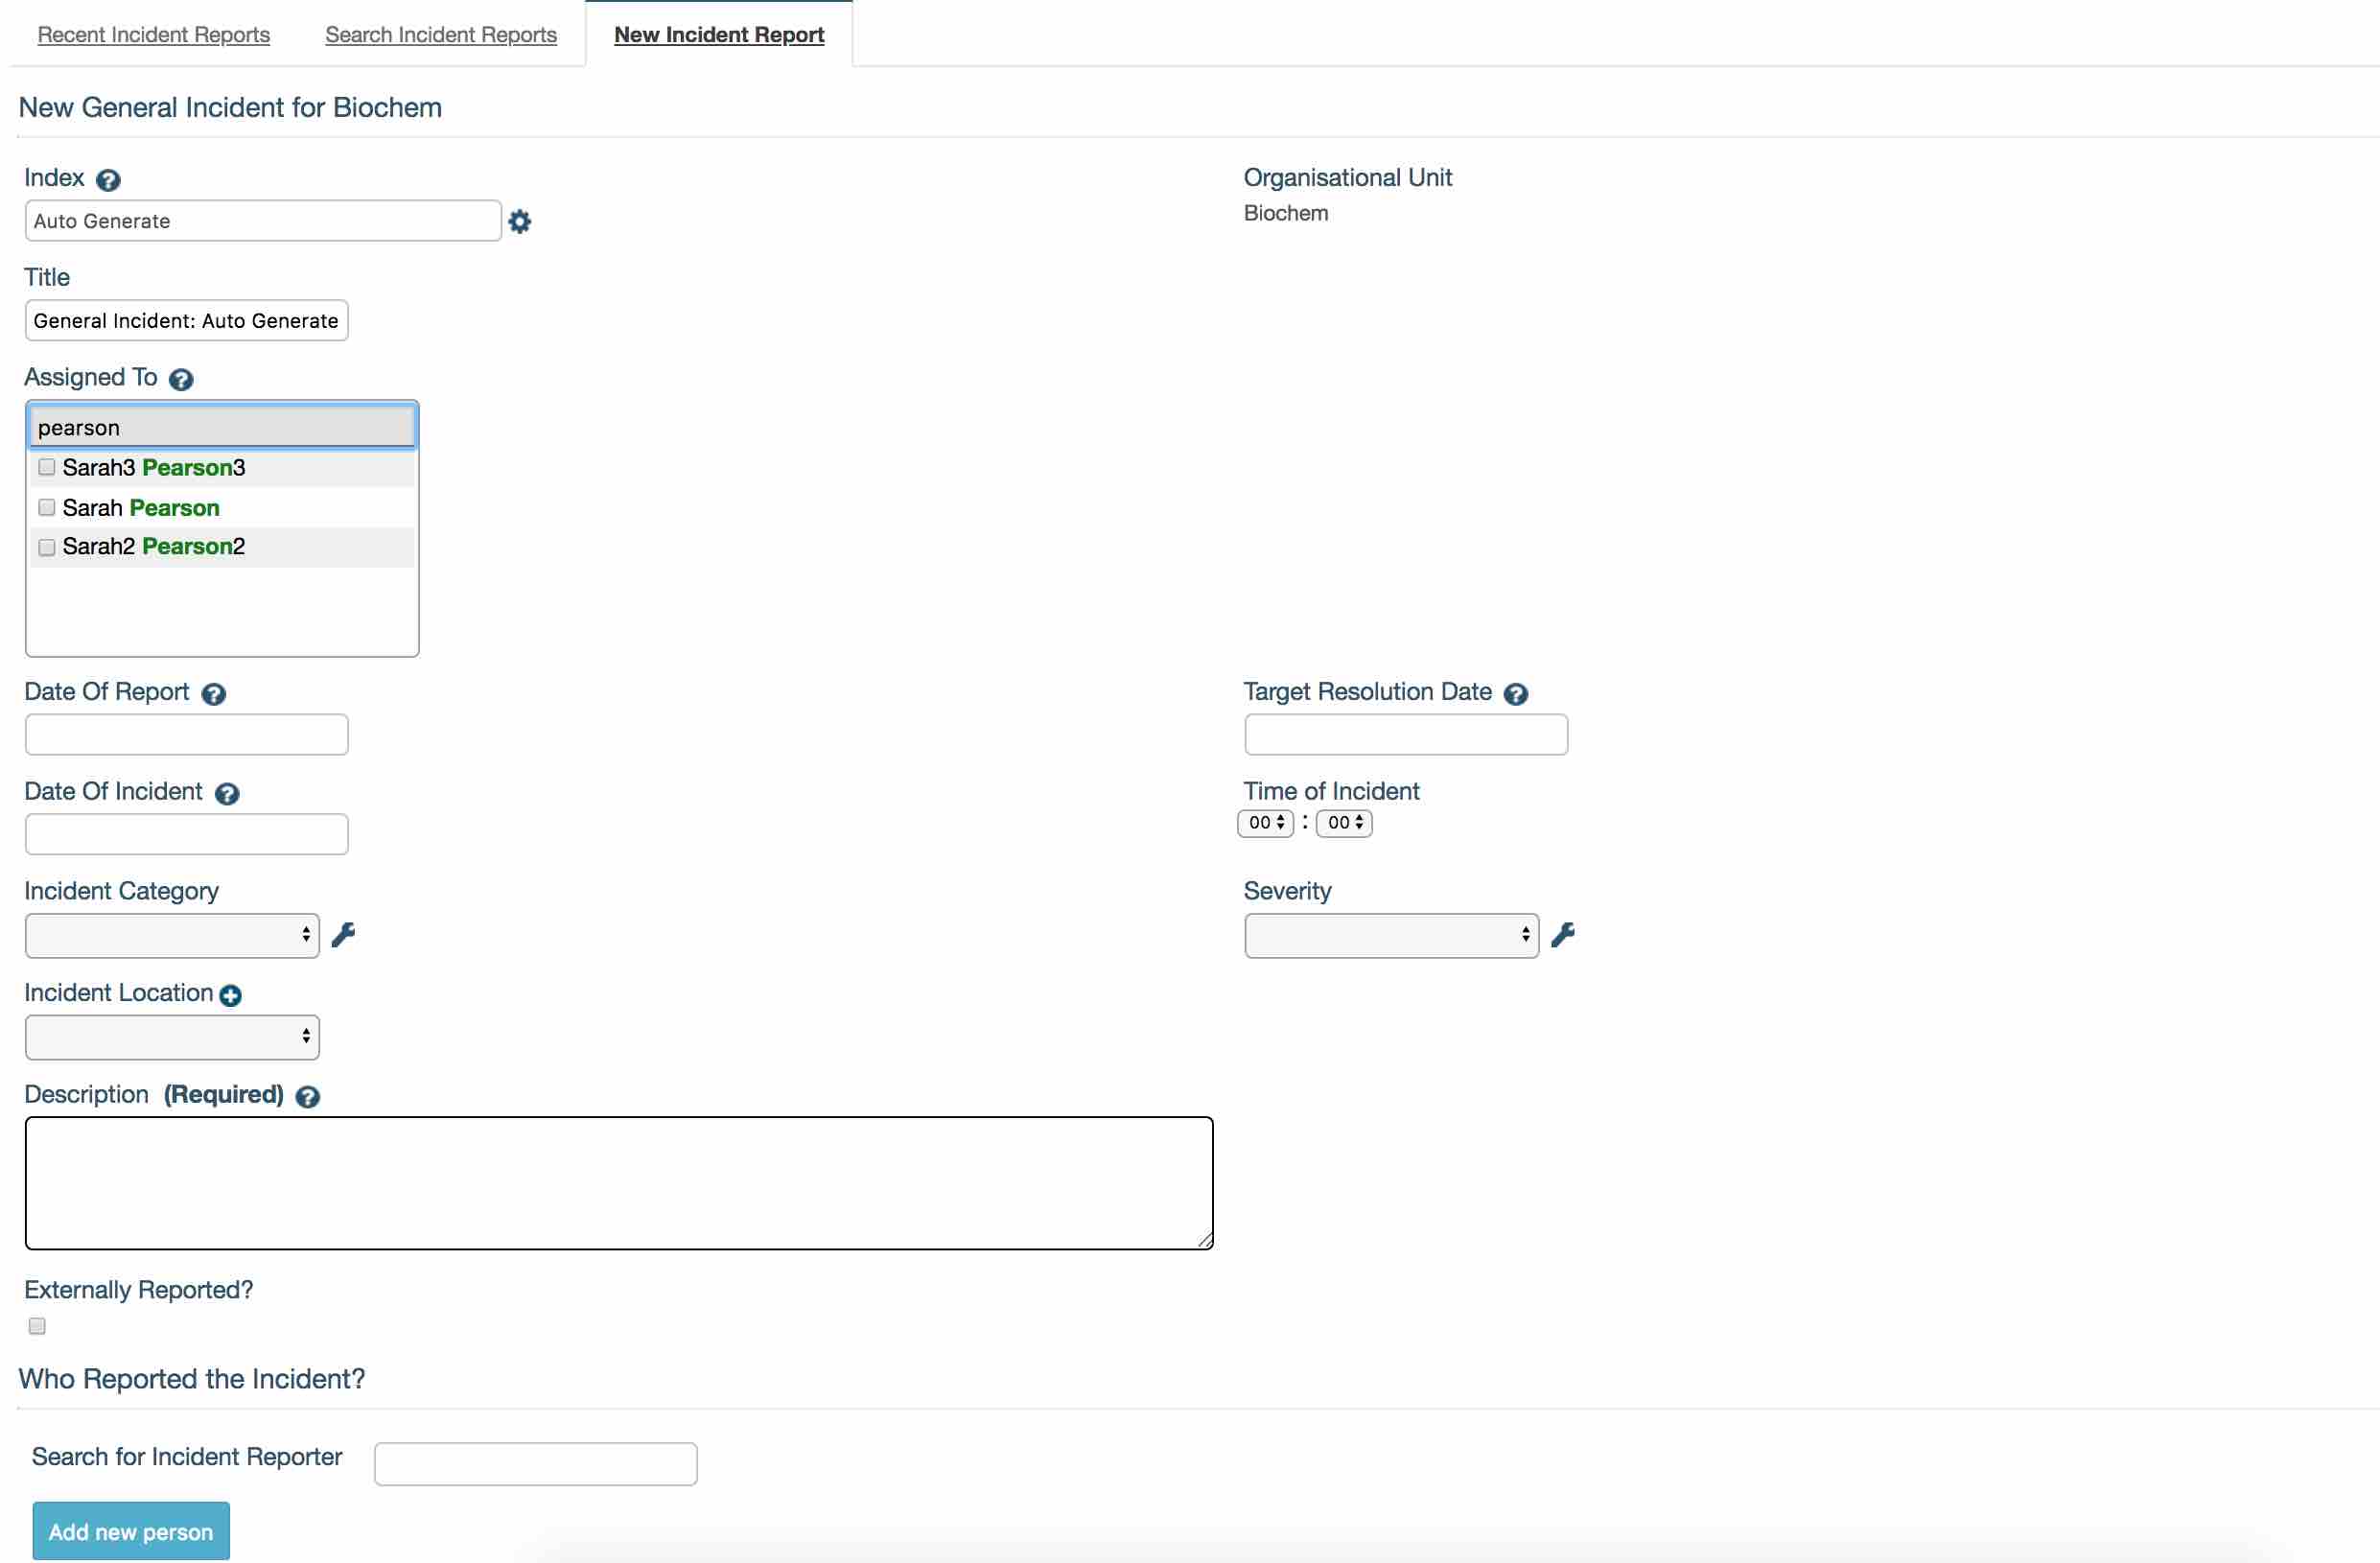
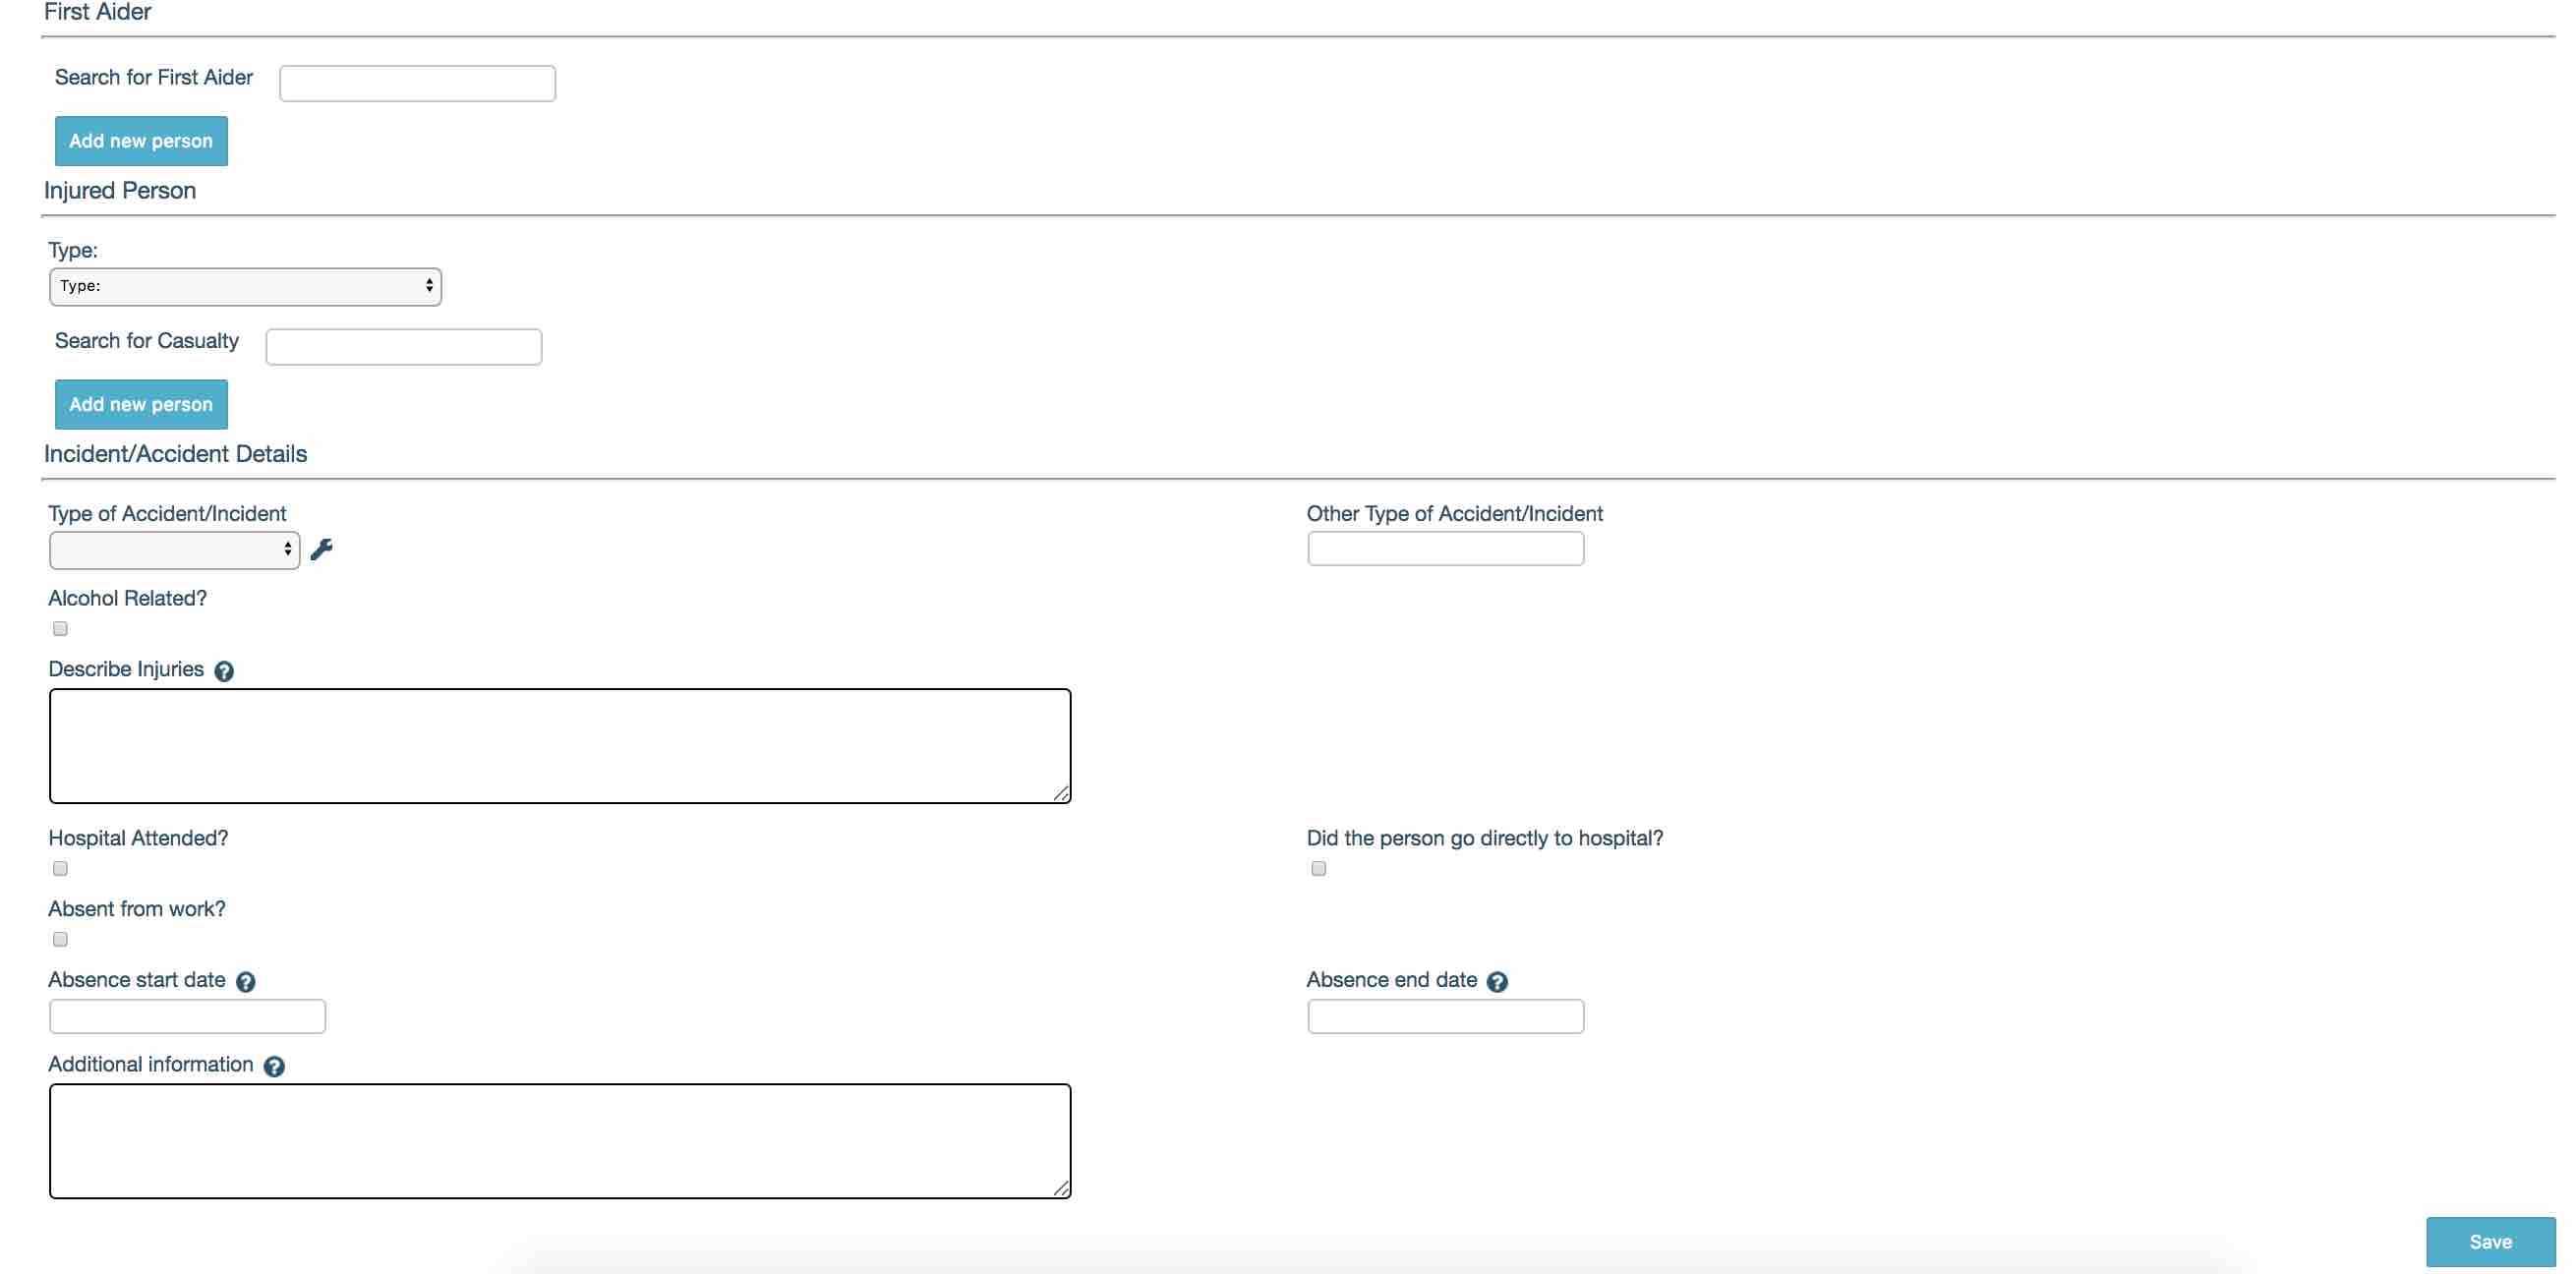
The required fields need to be complete before it is possible to ‘Save’ the incident report.
It is possible to add custom options to both the ‘Incident Category’ and ‘Type of Accident/Incident’; these can be customised using the spanner to the right of the field. Any items added here would then be populated and made available for future selection although they are not available on the web input form.
Instructions on how to manage these configurable look-up fields can be found by clicking this LINK.
Editing an Incident Report
Those with appropriate permissions can adjust or edit record.
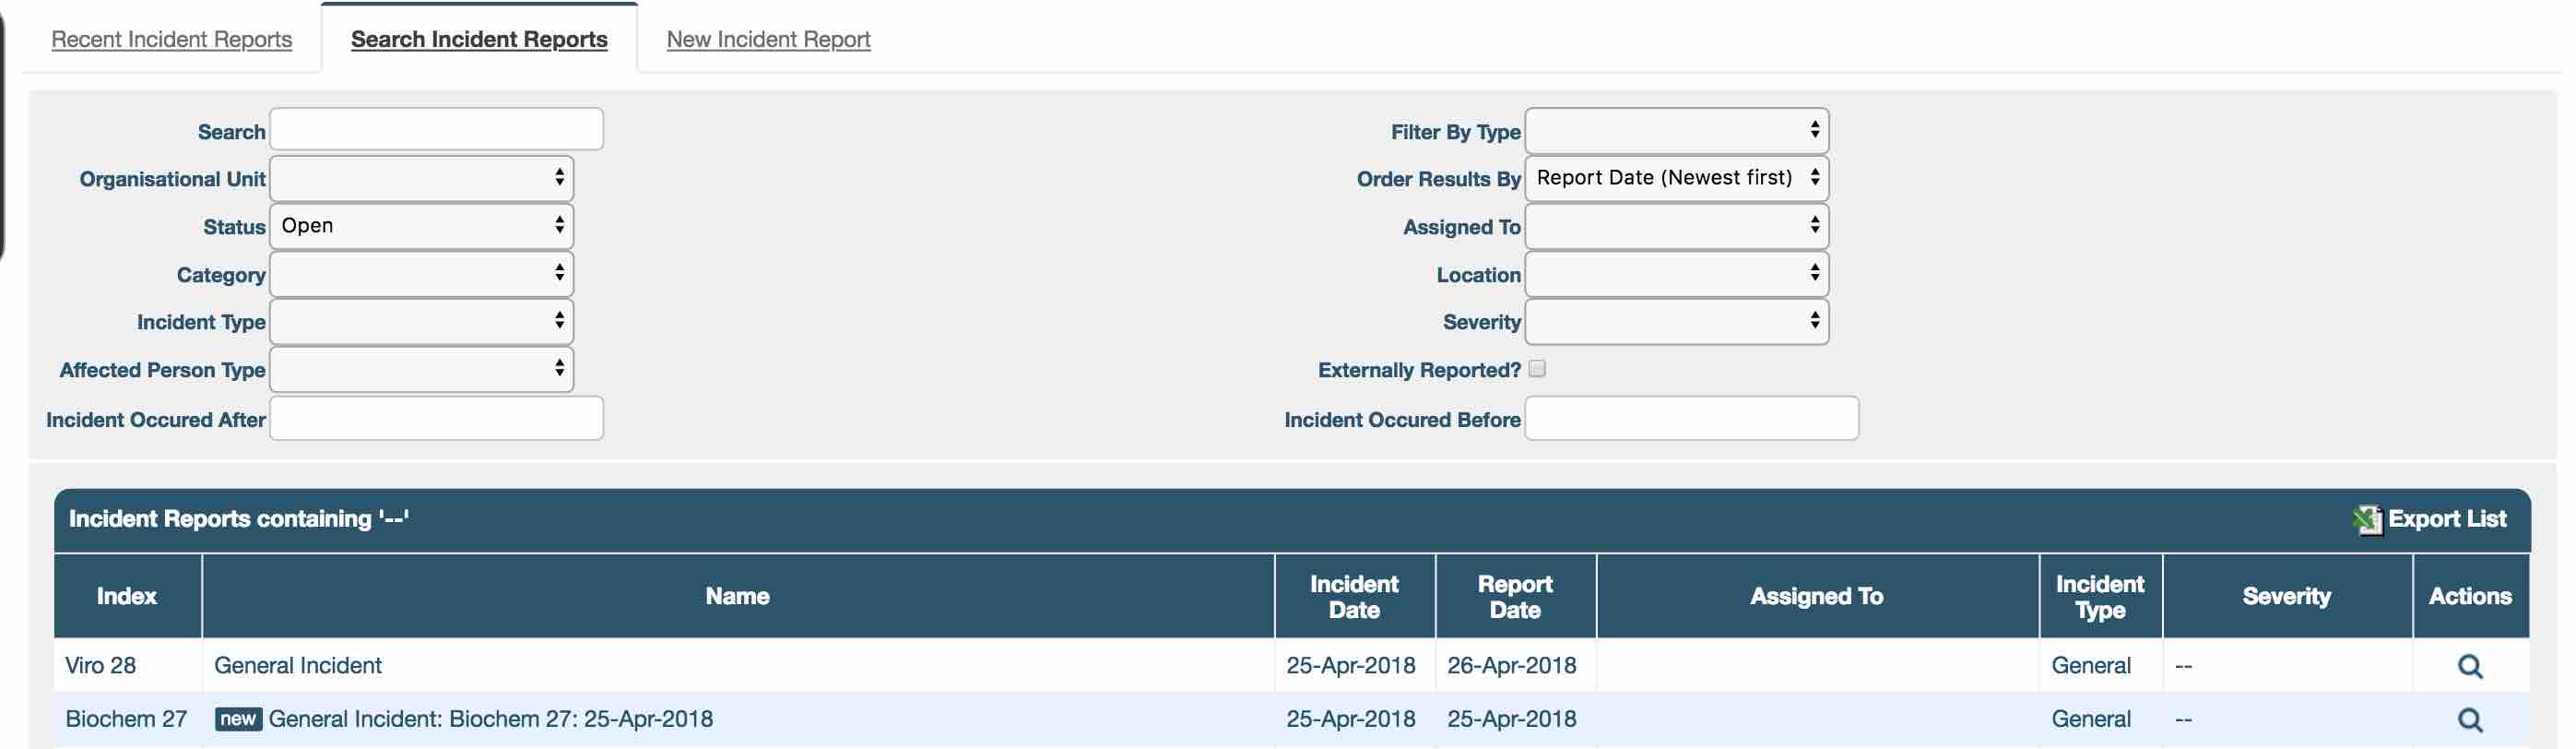
Once an incident has been created it can be found within: Laboratory Records -> Incident Reports -> Search Incident Reports. Any incident report that has been added using the external input form will be displayed with a ‘New’ flag to help ensure that it is not missed.
To access any incident records, click on the row or the magnifying glass in the ‘Actions’ column.
Editing an Externally Entered Record
The ‘New’ flag remains in place until the incident report has been viewed and the page has been refreshed.
Records from an external input need to be validated, as the contact and location details may not exist within iPassport.
So, when entering an externally entered incident report it is possible to add a new location and contact record. The system informs the user by displaying entered text for comparison.
All fields with a ‘pencil’ edit icon against them can be edited. Clicking one of these fields opens the edit option.
When a contact is added to the field in ‘Who Reported the Incident?’ or ‘First Aider’, iPassport checks its contacts database to see if this person exists on the account. If they do then it automatically selects them, if not then the system informs that it does not recognise the contact. The user can add a the new person here.
To add a new contact click the ‘Add new person’ button against the field.

The new contact details do not have to be anything more than the name but without the information being added it is not possible to pull this out of the system at a later date.
Editing an Internally Entered Record
If a particular contact record or location does not exist in the system, the user is prompted to add these using the button options available.
Other than this, the ability to edit the incident record is controlled in the same way and edited in the same manner as Externally added records/reports.
Adding a New Location
Locations are used to record where the incident occurred. The location does not have to be pre-populated within the system and it can be added when required. When entering details using the external input form, the system simply records the location the user entered and it is the manager’s responsibility to review this and select the most appropriate location from those within iPassport. Or add a new location if no suitable options are presently in the system.
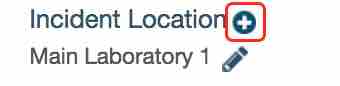
A new location is added from within an incident record via the ‘Incident Location’ + option.
Any incident entered via the external input form will be displayed on the right side and this can be used as a reference to select the location (if it exists). To select this location, use the pencil edit icon to edit the ‘Incident Location’ field.
To add a new location simply click the + sign, this opens the ‘Create New Location’ light-box and allows the user to add a ‘Short Name’ and ‘Long Name’ for the location, these can be the same if needed.
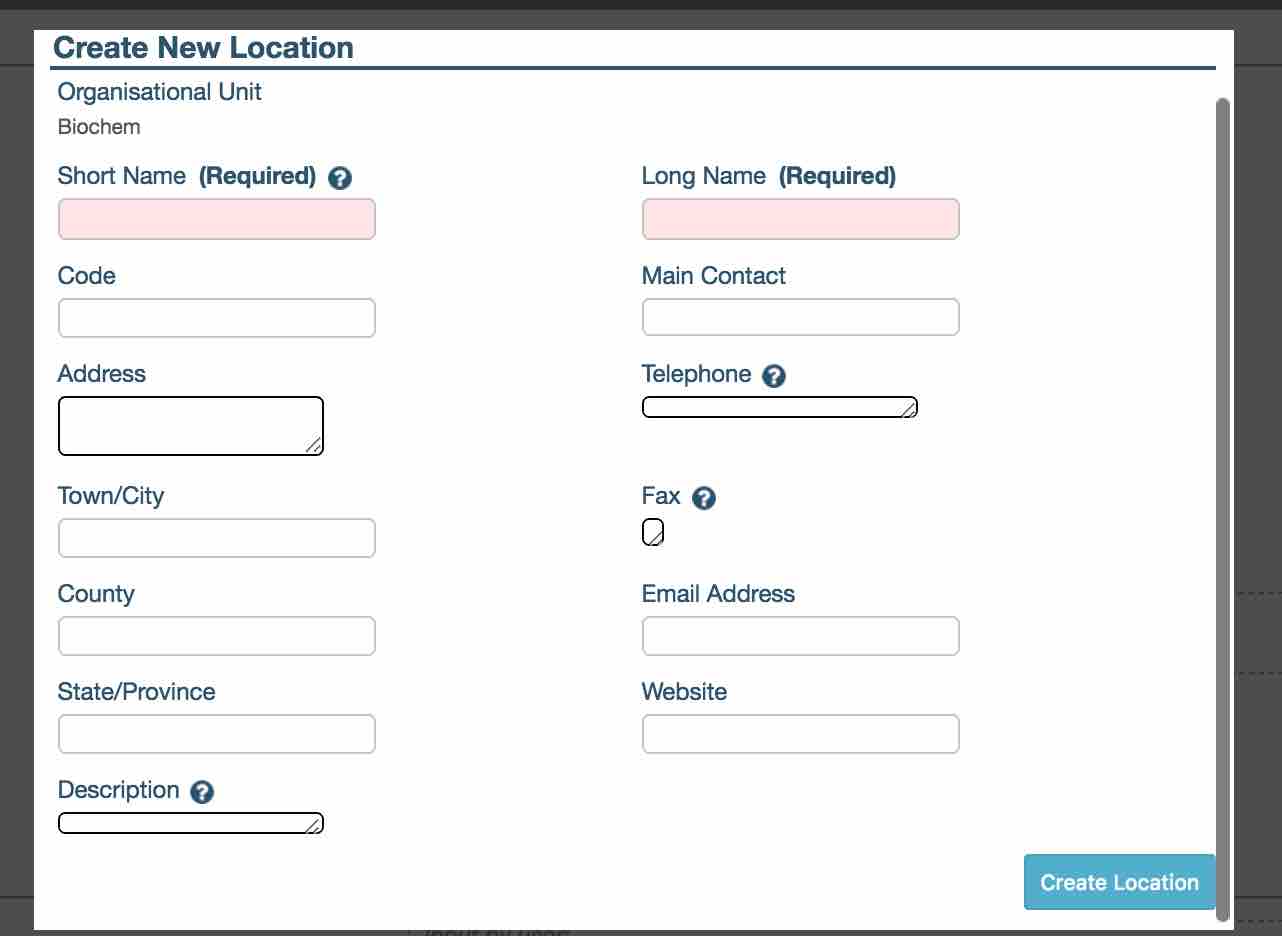
Any location added here is added to the default OU associated with new incident. Should the location details need to be edited then this would be done via the location record itself which is found in: Administration -> Locations -> Search Locations -> enter via the magnifying glass in the ‘Actions’ column.
Searching for Incidents and Report Generation
The specific incident report search can be found via: Laboratory Records -> Incident Reports -> Search Incidents Reports.
Please note it is also possible to search for an incident report via the global search tool, this is always found in the top right of iPassport. This area searches the ‘Title’ and ‘Index’ of the incident.
The incident specific search provides many opportunities to search across open and closed incidents. The incident search defaults itself to Report Date (Newest first) and Open incidents.

The user can generate a .csv report of the results. Select the search criteria then click the ‘Export List’ option found in the lower right of the search results.
This export the results to a .csv file. It can be opened in Excel™ but if the user makes adjustments to the file such as adding a column sort then the file needs to be saved via Save As.
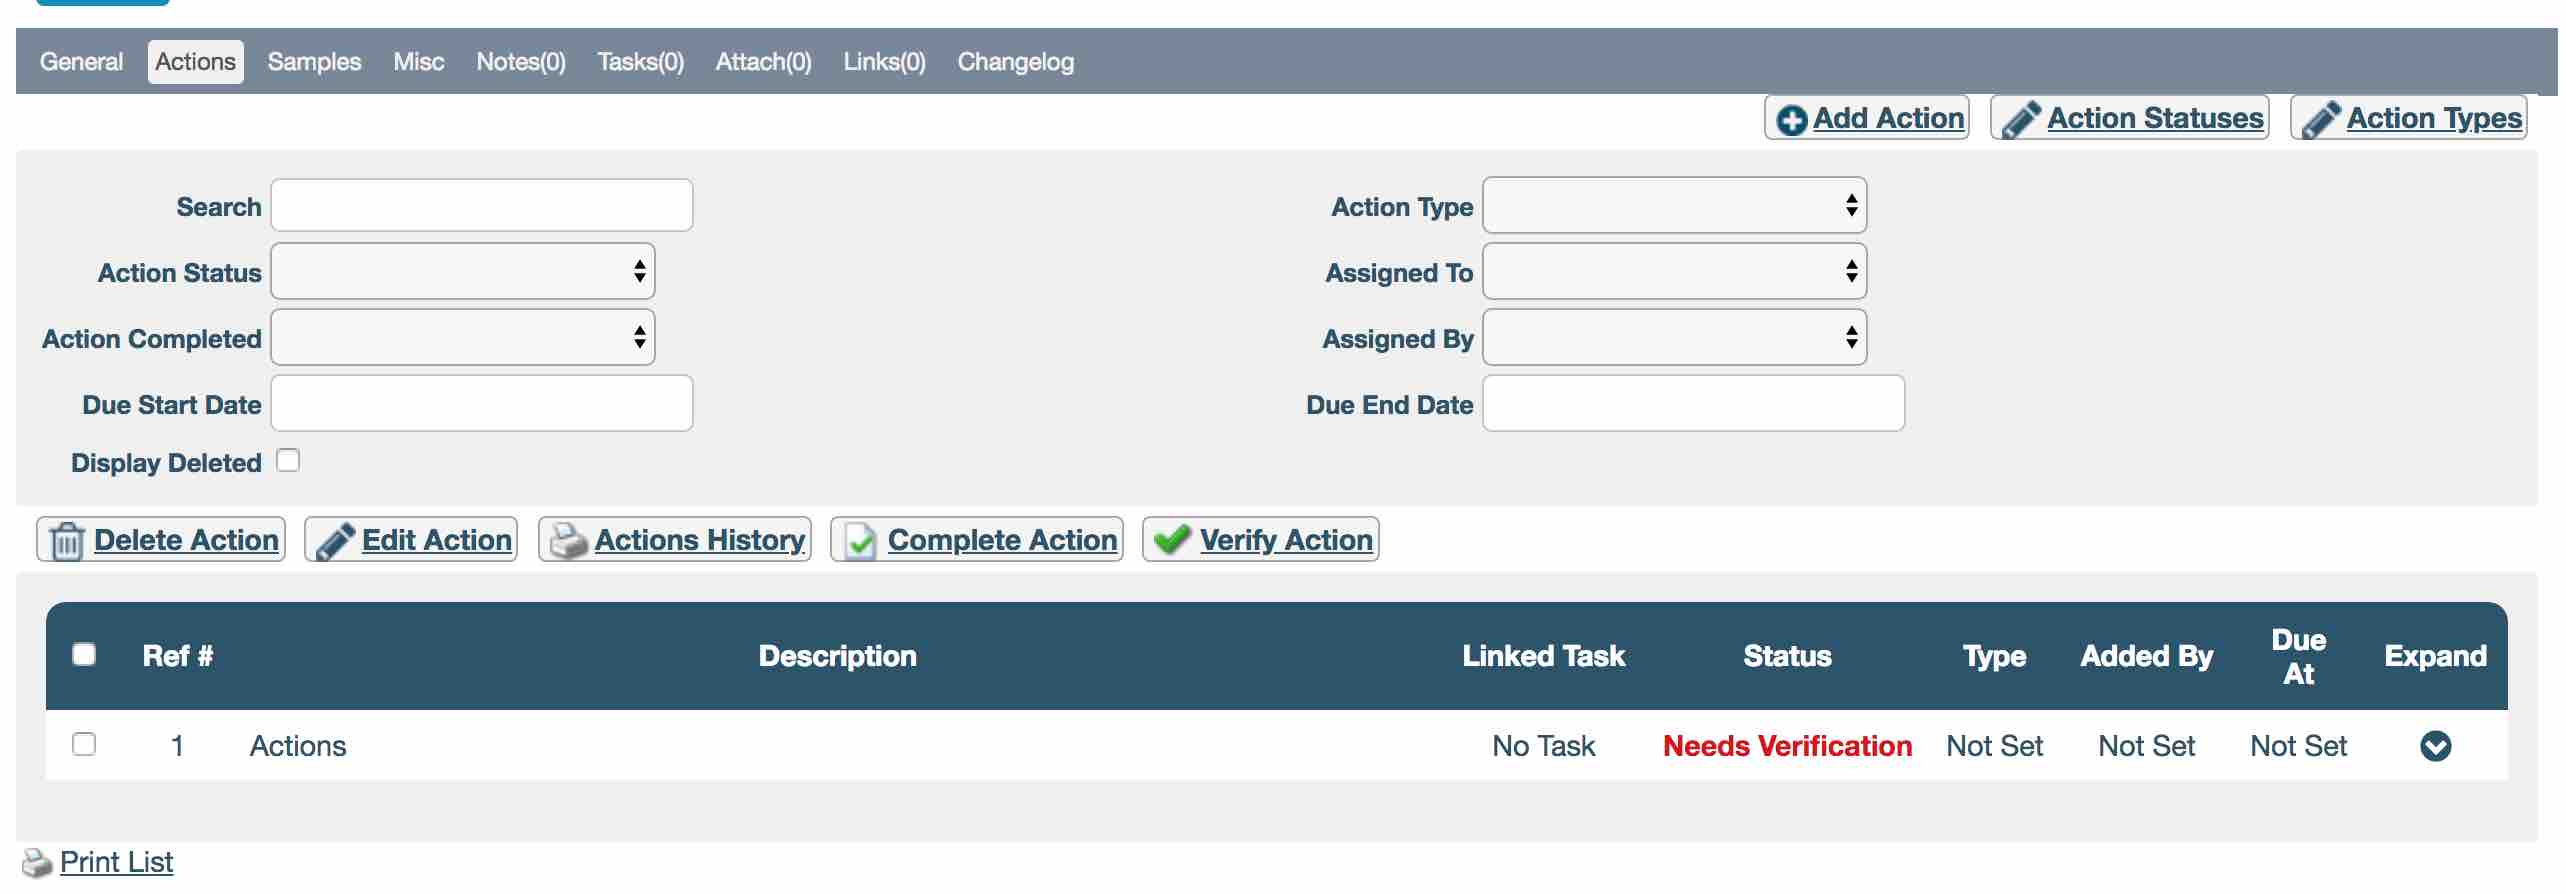
Actions
The ‘Actions’ tab allows the user to assign multiple actions to help clear the NC.

Action Types
The Actions Types are effectively the type of action record e.g. Corrective or Preventative.
To add a new type, click the ‘Action Types’ button, this will open the ‘Manage Incident Action’s Types’ light-box.
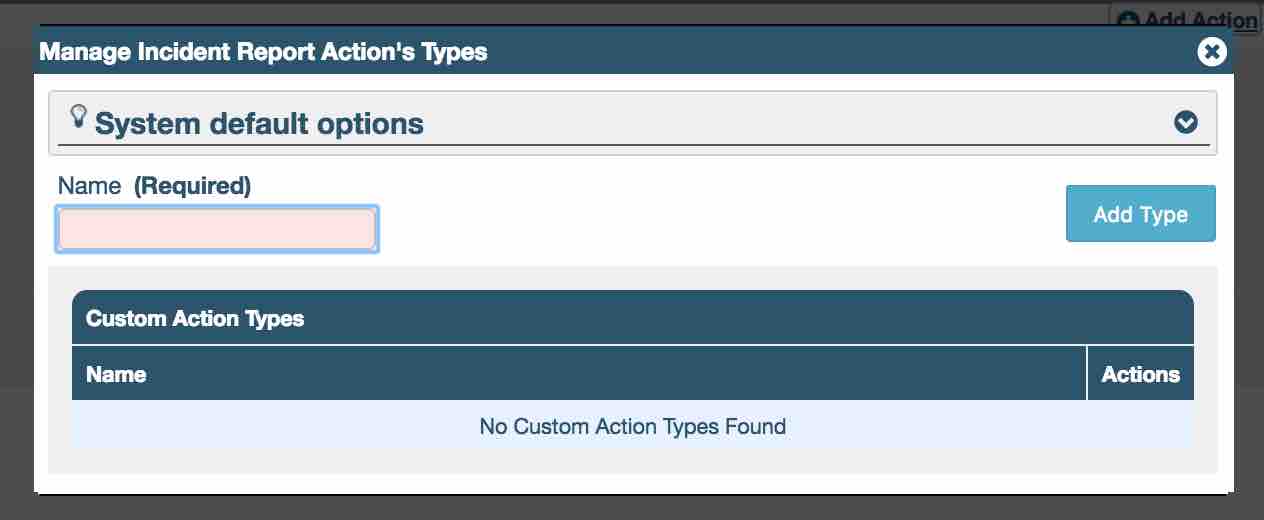
Enter the ‘Name’ of the new type e.g. Preventative and click ‘Add Type’. The visibility of incident action types can be restricted to selected OUs.
To exit, click the ‘X’ in the top right corner of the light-box.
Adding a New Action Status
An Action Status can be used to help identify the status of each action within the incident; it is not a required field when creating the Action. The status would be updated manually as each action has work undertaken on it.
To add a new status, click the ‘Action Statuses’ button, this will open the ‘Manage Incident Action’s Statuses’ light-box.
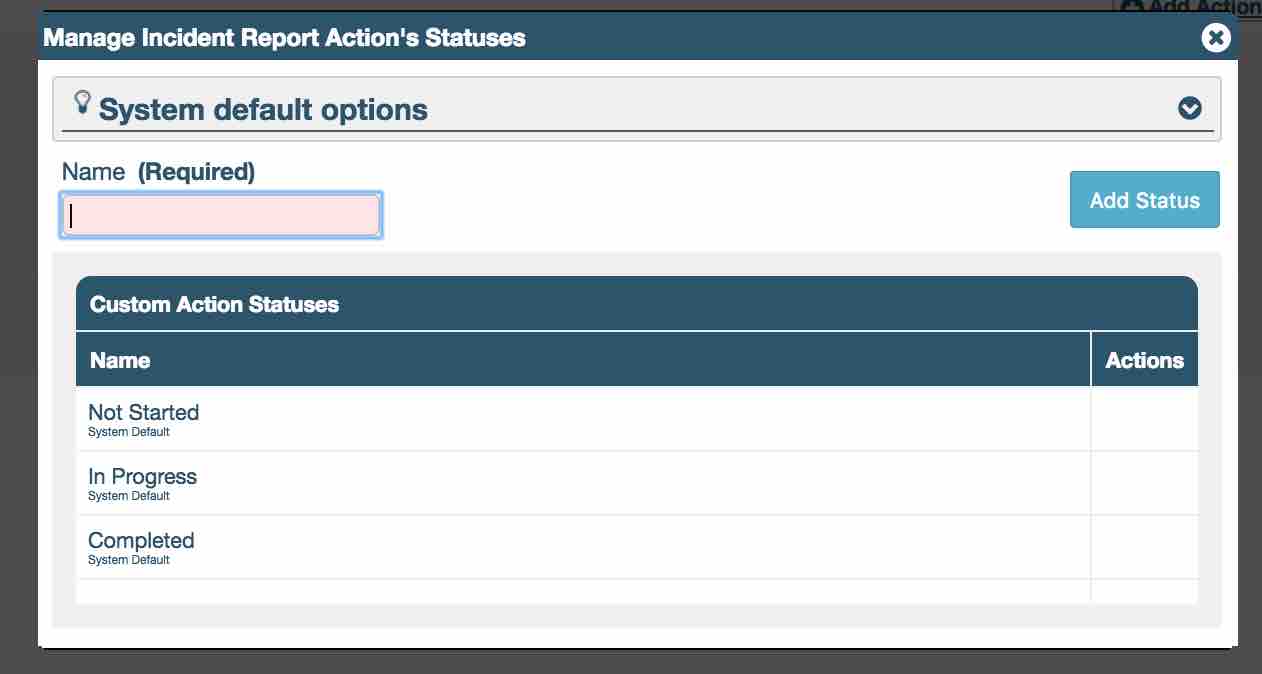
Enter the ‘Name’ of the new status e.g. Awaiting Review and click ‘Add Status’.
To exit, click the ‘X’ in the top right corner of the light-box.
Creating a New Action
Once the basics have been applied it is possible to create a new Action and assign this to a user. An Action allows the user to say what needs to be done, by which staff member and by when. This is all recorded within iPassport as part of the audit trail.
To add a new Action, click the ‘Add Action’ button, this will open the ‘Add Action’ light-box.

There are a number of fields available when adding a new action:
-
The ‘Send Action Updates to’ field allows the user to choose one, or multiple ‘Distribution Lists’ to send update on the action to. Each time the action is updated everyone that is a member of the selected group(s) would receive an email update of the change (provided their personal preference was activated). This field can be used on its own or in conjunction with the ‘Send Action Updates to’ field.
-
The ‘Send Action Updates to’ field allow the user to choose an individual user or users to send updates to.
-
‘Associate Action to’ field allows the user to say if this action is directly associated with any other actions in the incident, as this is the first action to be created there are no associated actions. This is just a reference between the two (or more) actions.
The ‘Action Details’ portion of the light-box contains all the critical information on the action itself.
-
‘Action Type’ allows the user to say what type of action this is; this is populated from the Action Type light-box list.
-
When creating an Action, it is advisable to assign this to a user using the ‘Assign Action To’ field. An action can only be assigned to one user so if there are multiple items to be completed it is advisable to create multiple actions and assign them to different users.
-
When an action is created, there is the possibility to say that it requires verification, this is done via the ‘Action Needs Verification?’ field. This means that once the action has been completed it then needs to be verified, this is not required. If used then a ‘Verification Status’ will be displayed. This is not to be confused with the Action Status- the Action Status could show as complete and the Verification Status could show as Awaiting Verification.
-
Within iPassport it is possible to add actions that are already completed, if this is the case then select the ‘Is Action Completed?’ field, by default actions are not complete when adding them.
-
The ‘Initial Status’ allows the user to set the status of the action as it is being added; this status is populated from the Action Status light-box.
-
The ‘Complete(ed) By Date’ field allows the user to say when the action needs to be completed, or when it was completed if the action is marked as ‘Is Action Completed?’.
-
Actions can act as standalone events and by default no task is created. However, a task can be associated with the Action when ‘Create Task For This Action?’ is selected. The action’s details will appear in a users personal task list. Selecting this field means a task will be created for the user with the same ‘Description’ when the ‘Create Action’ button is clicked.
-
Finally, the ‘Description’ of the action is required.
Once the ‘Create Action’ button is clicked the user will be returned to the ‘Actions’ tab and the new action will be displayed.
Now that the action has been created and the task issued the system relies on the assigned user to either complete the action or complete the task. Completing the task closes/ completes the action but completing the action means that task still needs to be closed.
Editing an Action
Once an action has been created it is possible to edit it. To do this select the action to be edited from the select box on the left and click the ‘Edit Action’ button. This will open the ‘Edit Action’ light-box.
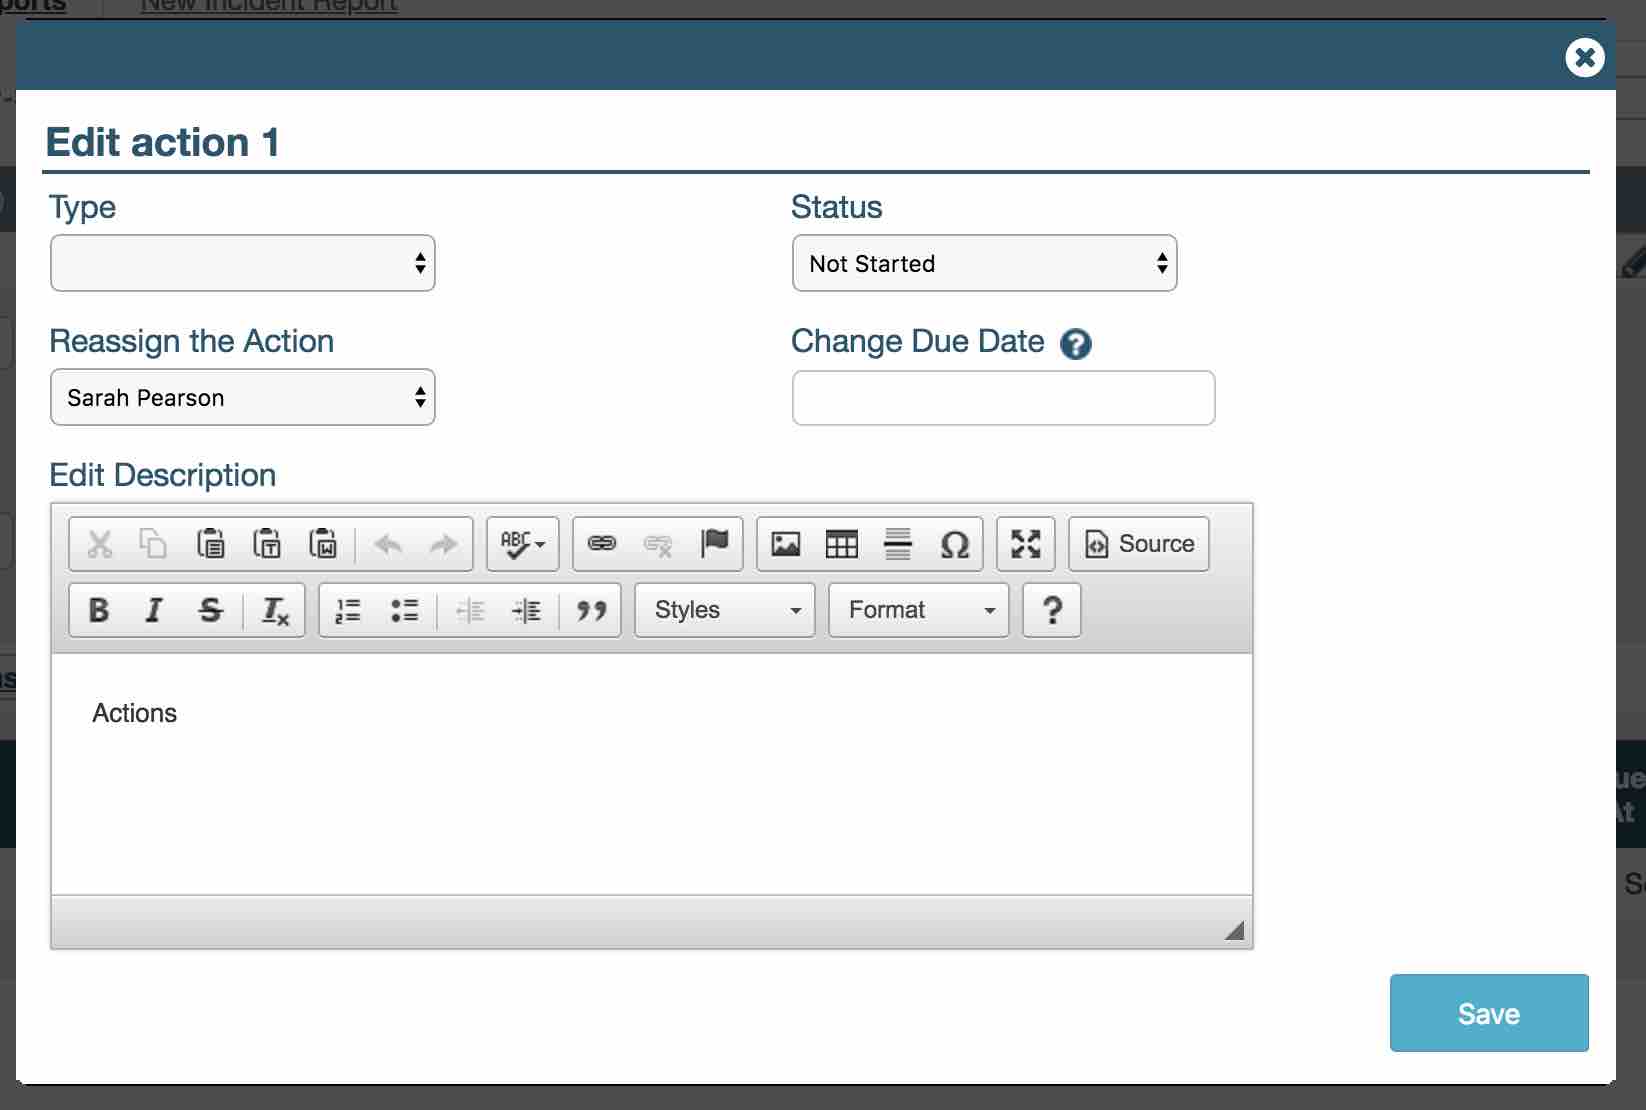
Here the user can change any of the displayed fields. When the changes have been made click the ‘Save’ button or click the ‘X’ button in the top right corner to exit the light-box without making a change.
All edit events are stored in the ‘Actions History’ area.
Deleting an Action
If the user has created an action that is no longer required then it is possible to delete the action. To do this select the action to be deleted from the select box on the left and click the ‘Delete Action’ button. This will open the ‘Delete’ light-box.
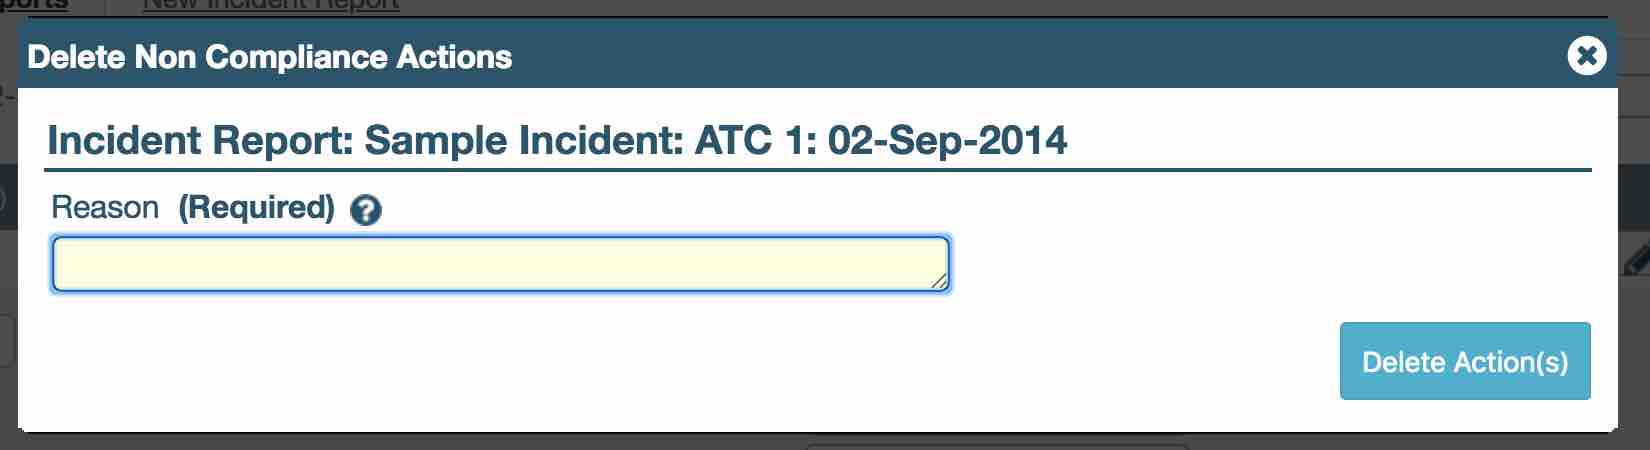
Enter a ‘Reason’ for the deletion then click the ‘Delete Action(s)’ button or click the ‘X’ button in the top right corner to exit the light-box without deleting.
All delete events are stored in the ‘Actions History’ area.
To view a deleted action(s) select ‘Display Deleted’ filter in the ‘Actions’ search area. This will list all deleted actions and can be used in conjunction with the other search items.
Completing/ Closing an Action
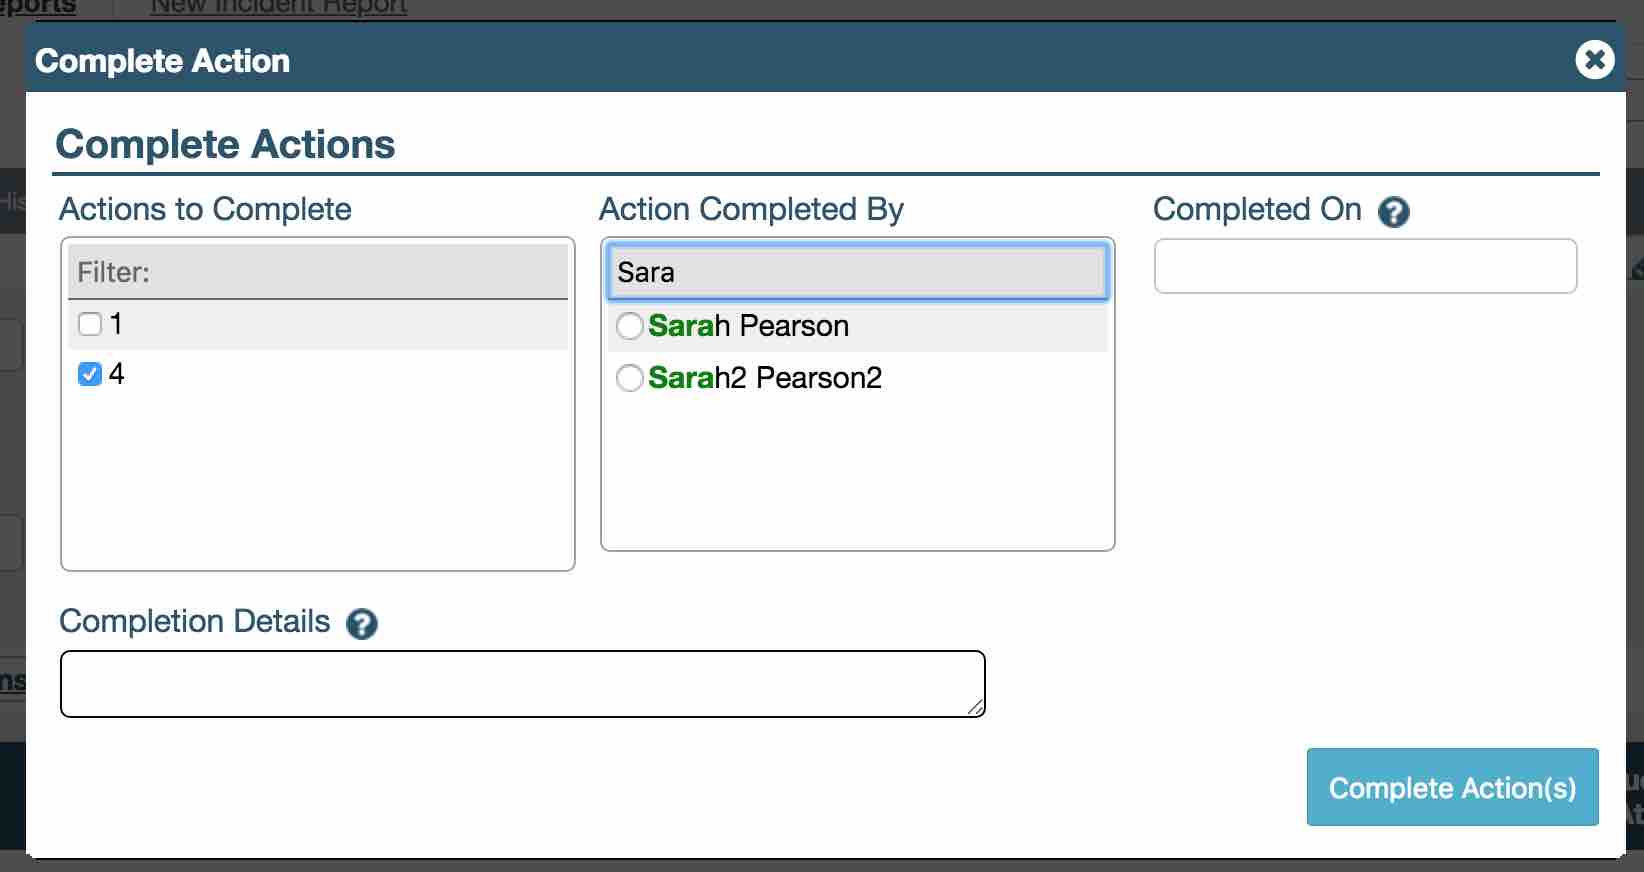
To complete an action, select the action to be completed from the select box on the left and click the ‘Complete Action’ button. This will open the ‘Complete Action’ light-box.
-
All actions will be listed here. If multiple actions were selected they should all be ticked in the ‘Actions to Complete’ field.
-
The staff member who completed the action needs to selected from the ‘Action Completed By’ field.
-
A completion date is required, this can be added via the ‘Completed On’ field.
-
‘Completion Details’ can be added as free text, the field also allows for pasting details but formatting may be lost.
When all the fields have been completed click the ‘Complete Action(s)’ button.
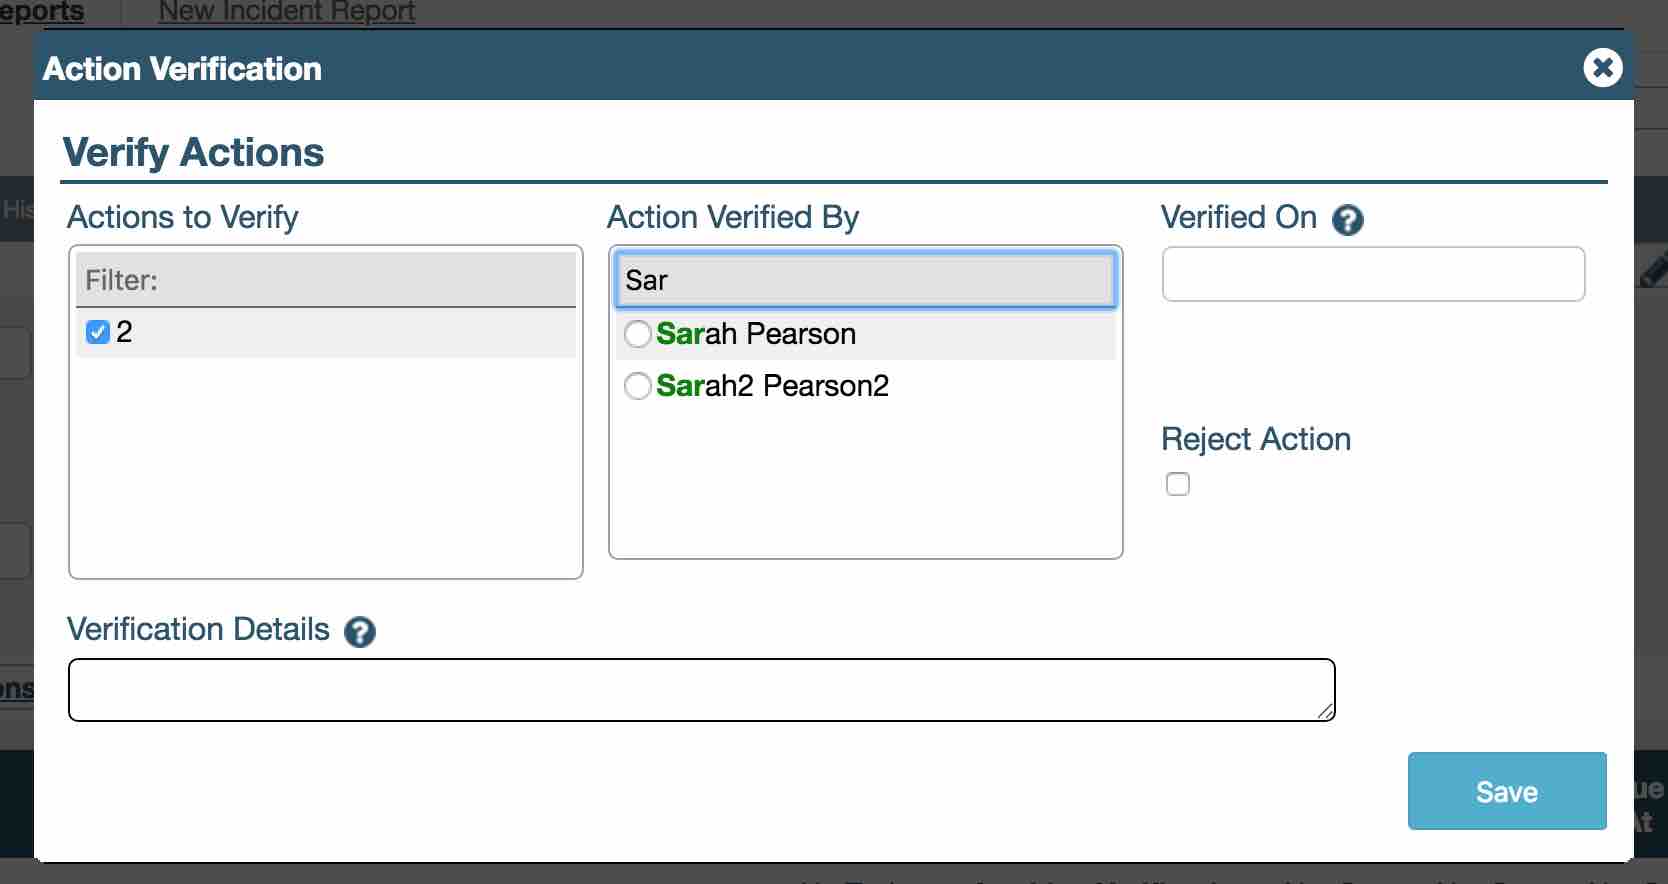
Verifying an Action
If the ‘Action Needs Verification?’ field was selected, the Action will need to be verified once it has been completed. Select the action to be verified from the select box on the left and click the ‘Verify Action’ button. This will open the ‘Verify Action’ light-box. Fill in the fields then click ‘Save’. The status should change to ‘verified’
Printing an Incident Report
Incident reports can be printed off individually from within the incident report. From the drop-down menu select ‘Print’ and click ‘Go’. Once the PDF icon appears click this and the incident report will be printed. Based on individual browser preferences this will either be downloaded or opened within a new tab.
Closing an Incident Report
Closing an incident report (e.g. when all Actions have been closed) is accomplished by expanding the drop-down menu and selecting ‘Close Incident’ and click ‘Go’. This will open a ‘Comments’ box, this is a free text box but there is no requirement to enter a comment. Click ‘Save’ to close the incident report.
Should the incident report need to reopened, expand the drop-down menu within the closed incident and select ‘Re-Open Incident’ and click ‘Go’. This will open a free text comments box, click ‘Save’ and the incident will be re-opened.