- Managing Non-Compliances
Managing Non Compliances
Noncompliances in iPassport offer tools to design corrective actions and assign them as tasks for selected users to complete. The corrective plan can be submitted for review and the designated reviewer will receive a task to complete as well (please find more information near the bottom of this article - Reviews). Noncompliance Actions are at the core of the resolution process and require a separate article (Non-Compliance Actions).
This article also covers other areas of noncompliances where:
- a root cause can be determined,
- the effectiveness of the corrective plan can be evaluated,
- any lessons learned can be logged.
The last section gives instructions on how a noncompliance can be set as compliant (Corrected).
Non-Compliance Actions tab
Please refer to the next article, Non-Compliance Actions, where the process and elements used to resolve noncompliances are described.
Root Cause
The tab, Root Cause can be viewed by users with the permission, “Non Compliance:View Root Causes”. One or more root causes can be attributed to a noncompliance by selecting them from a user created list (instructions on managing the list, below). Clicking the edit (pencil) icon under the Root Causes field, opens a multi-select tool where the root causes have a checkbox to select them.
The field, Root Cause Analysis Undertaken By also provides a multi-select tool to add the user(s) who assigned root cause(s) to the noncompliance. Information about how the root causes were determined can be added in the Comments section. The edit (pencil) icon is available to edit these fields while the noncompliance is still open.
Managing Root Causes
The list of root causes can be managed by users with the permission, “Non Compliance:Edit Root Causes”. A manage (spanner/wrench) icon is available to them by the Save/Cancel buttons. The permission, “Non Compliance:Delete Root Causes” is required to remove unused root causes.
Instructions on how to manage this configurable look-up field can be found by clicking this LINK.
Effectiveness
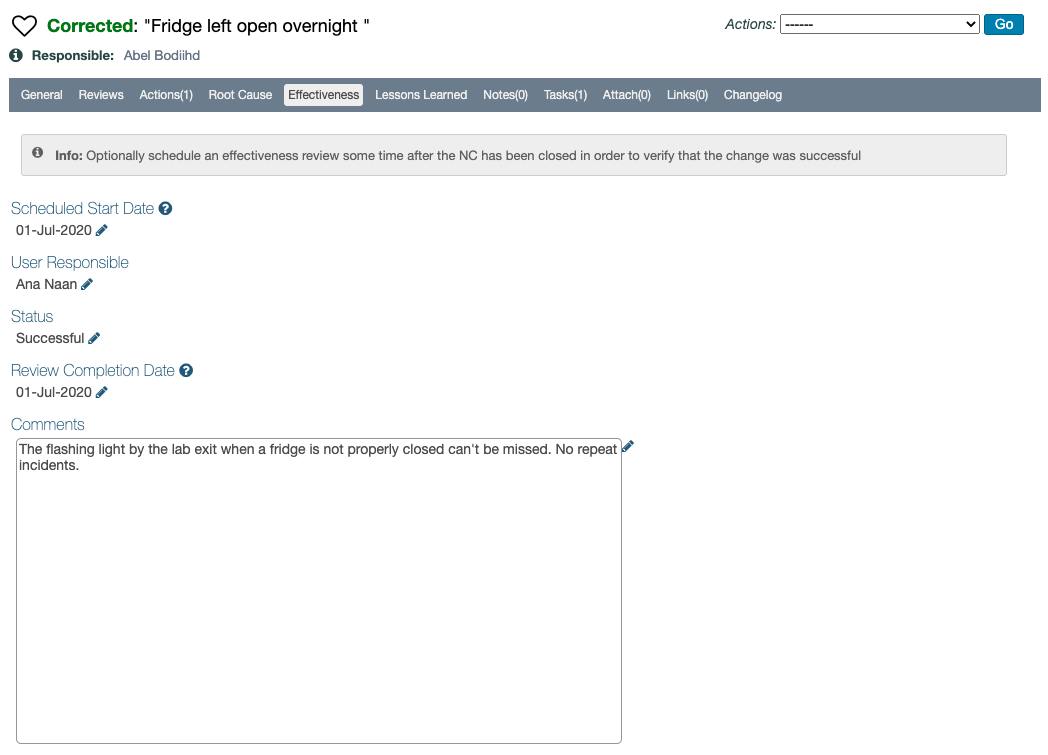
Knowing if corrective actions are enduring helps measure how effectively noncompliances are resolved. The Effectiveness tab allows scheduling a date in the future to perform this evaluation; the Scheduled Start Date provides a pop-up calendar to select the date. The User Responsible field allows selecting one user for whom a task will be issued on the ‘scheduled start date’ selected.

To complete the task, the user responsible will have to select an Effectiveness Status from a user editable list (instructions below) which is initially loaded with two options - Successful and Unsuccessful. A Comments box is available to add information.
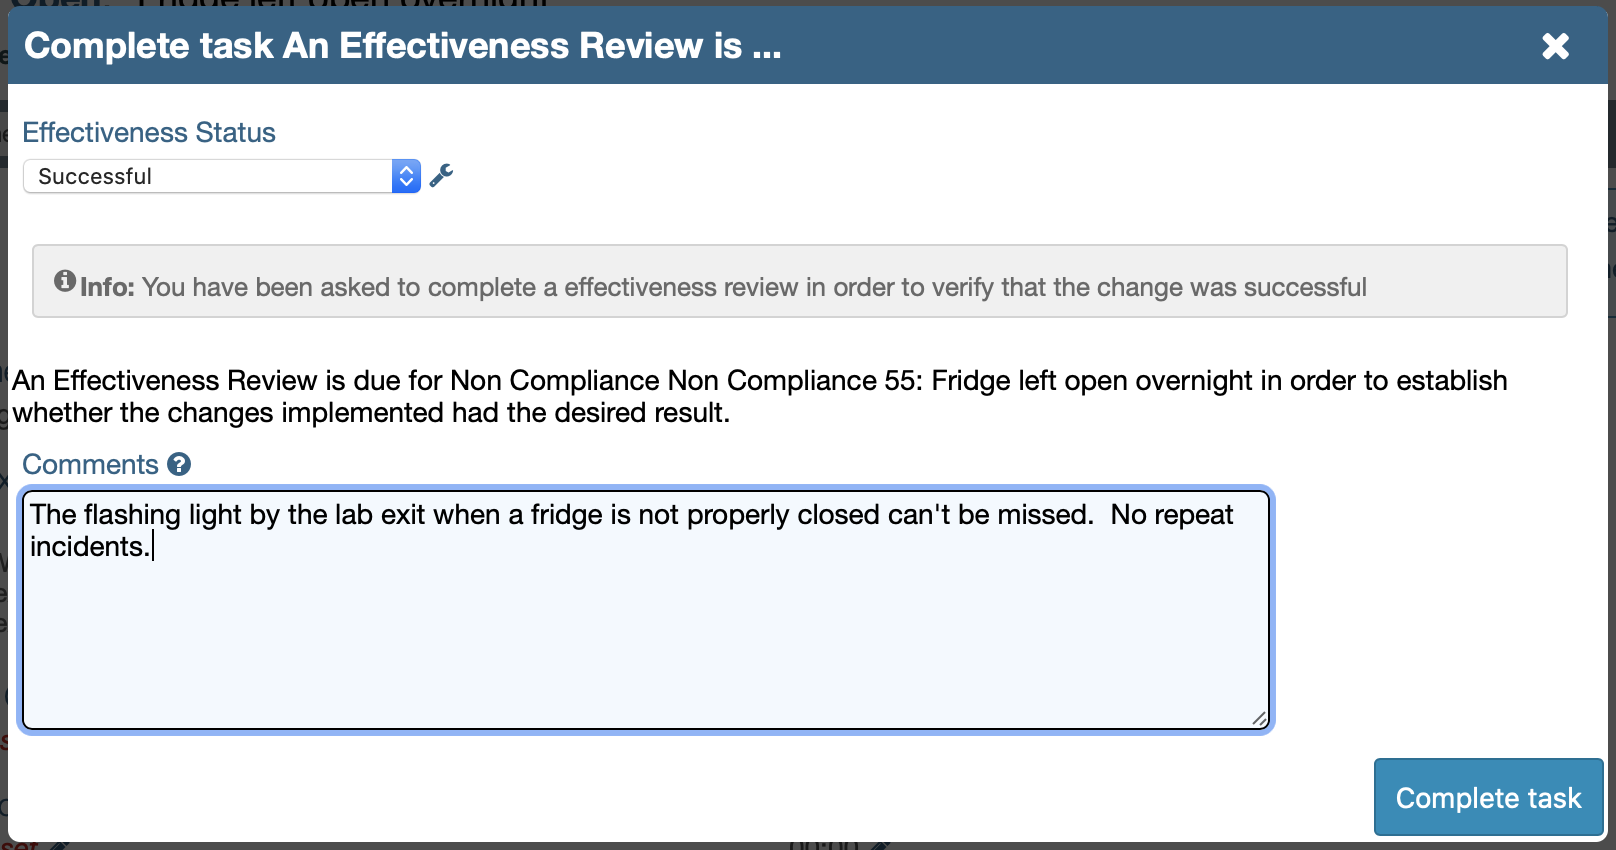
The information is then available under the Effectiveness tab and it remains editable after the noncompliance is ‘corrected’.
Managing Effectiveness Statuses
The options, Successful and Unsuccessful are initially available but they can be edited or even deleted if not in use. Users need the permission “Non Compliance:Manage Effectiveness Statuses” to be able to manage the list of options.
Instructions on how to manage this configurable look-up field can be found by clicking this LINK.
Lessons Learned
The Lessons Learned tab offers a space to record information that might help prevent future noncompliances. The permission, “Non Compliance:View Non Compliance” (in the noncompliance’s OU) is enough for any user to access and edit fields here. Every entry made is recorded in the Changelog tab for future reference.
It has three fields which remain editable after a noncompliance is ‘corrected’:
- Lessons Learned - a free text box where text can be added
- Performed By - a person can be selected from a dropdown list on each entry
- Performed On - a date can be chosen from the calendar that pops up when clicking the edit (pencil) icon
Reviews
An iPassport Non-Compliance should have a person responsible for reviewing and correcting it (assigned in the Non-Compliance Responsibility field under the General tab).
In addition, other relevant users can be tasked with reviewing the noncompliance record to provide feedback on the plan of action and other information, like the root causes. The permission, “Non Compliance:Schedule Reviews“ is needed to be able to request these reviews.
In the Reviews tab, clicking the (+) Schedule Review button opens a lightbox to create the review feedback task.
The reviewer receives the task immediately and it can be found in the My Tasks (left sidebar) area. Clicking it opens the noncompliance record. Review feedback, similar to document review feedback tasks, can return an approval (No Changes Required) or a request to make changes (Request Changes).

The users responsible for the noncompliance will see the feedback under the Reviews tab, where the review tasks are also created.
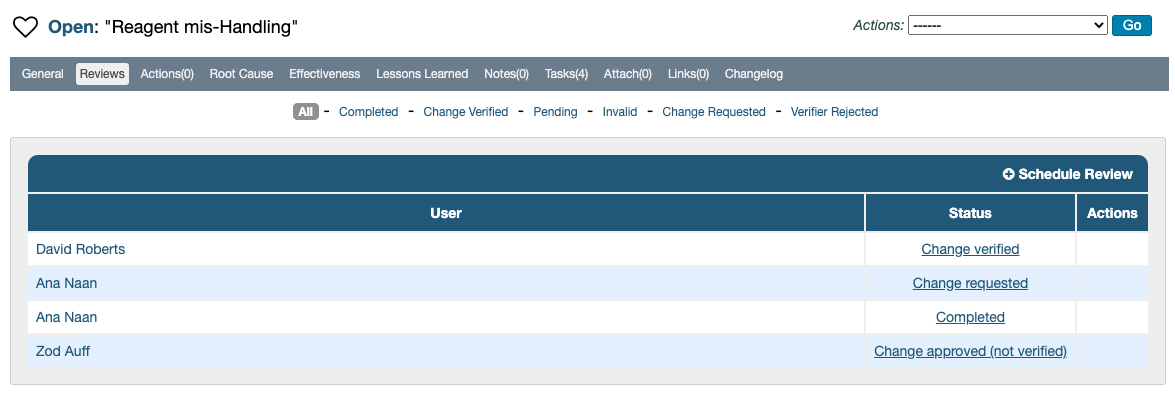
Change requests can also be approved or rejected and if approved, there is an additional verification step to confirm the approved change request was implemented. Users with the permission, “Non Compliance:Manage Review Tasks” can approve or reject change requests and also verify them afterwards.
Reviews can be scheduled in the future but other forms of verification are more appropriate for certain purposes:
- a validation step is available to seek approval when closing a noncompliance and also,
- the ‘Effectiveness’ of corrective actions can be evaluated after a given period of time (under the Effectiveness tab).
Closing a Non-Compliance
Once all actions and assigned tasks have been completed, users with the permission, “Non Compliance:Change Compliance“ can close (set as compliant) a noncompliance. It is also possible to close one with outstanding tasks but all actions must be completed or deleted before being allowed to set a noncompliance as compliant (Non-Compliance Actions are discussed in the next article). Outstanding tasks will be deleted once the noncompliance is set as corrected.
Validation can be requested from another user if approval is required by more than one person.
To close a noncompliance (set it as ‘Corrected’):
- Select ‘Set As Compliant’ from the Actions dropdown menu and click Go to open the Confirm Action lightbox
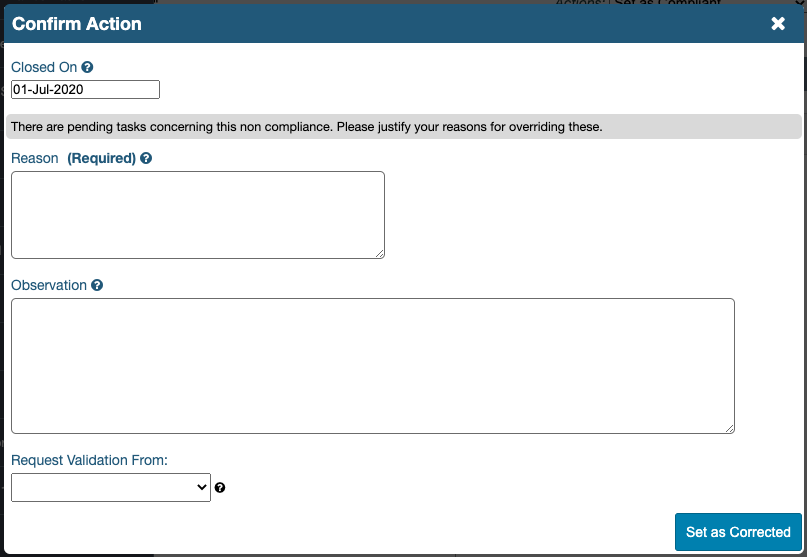
- The Closed On field defaults to the current date but any date in the past can be selected from the pop-up calendar
- If the NC is closed before all tasks have been completed, iPassport will ask the user to justify this in the Reason field; this is required as the task(s) will be deleted
- The Observation field allows adding text to support the action
- The Request Validation From field allows selecting one user from a dropdown list
- Click the Set as Corrected button to finish
Verifying a NC has been Corrected
If the Request Validation From field has been populated with a user’s name, that user will automatically receive a task of the type, ‘Verify NC Now Compliant’. The verifier will need the permission, “Non Compliance:Change Compliance“ in the noncompliance’s OU to complete the task.

Clicking the task from the My Tasks area in the left sidebar, opens the noncompliance and provides two immediate choices for the verifier: “Close NC” or “Re-Open NC”. If rejecting the closure, the NC will return to be marked as ‘Open’. If approving, a Confirm Action lightbox (like the one above) will allow setting a date, observations and if required, an additional verifier can be tasked to re-confirm the NC closure. Once closed, the NC will be marked as ‘Corrected’.
Reopening a Non-Compliance
If a noncompliance is found to not have been properly resolved after it has been ‘corrected’, it can be reopened. To do this, select the option, ‘Set as Non Compliant’ from the Actions dropdown menu in the NC record and click Go. This reopens the NC record and allows additional actions to be added.
NEXT STEP: Non-Compliance Actions
PREVIOUS STEP: Searching And Editing Non Compliances