- Search & Edit Non-Compliances
Searching and Editing Non Compliances
Searching for a Non-Compliance Record
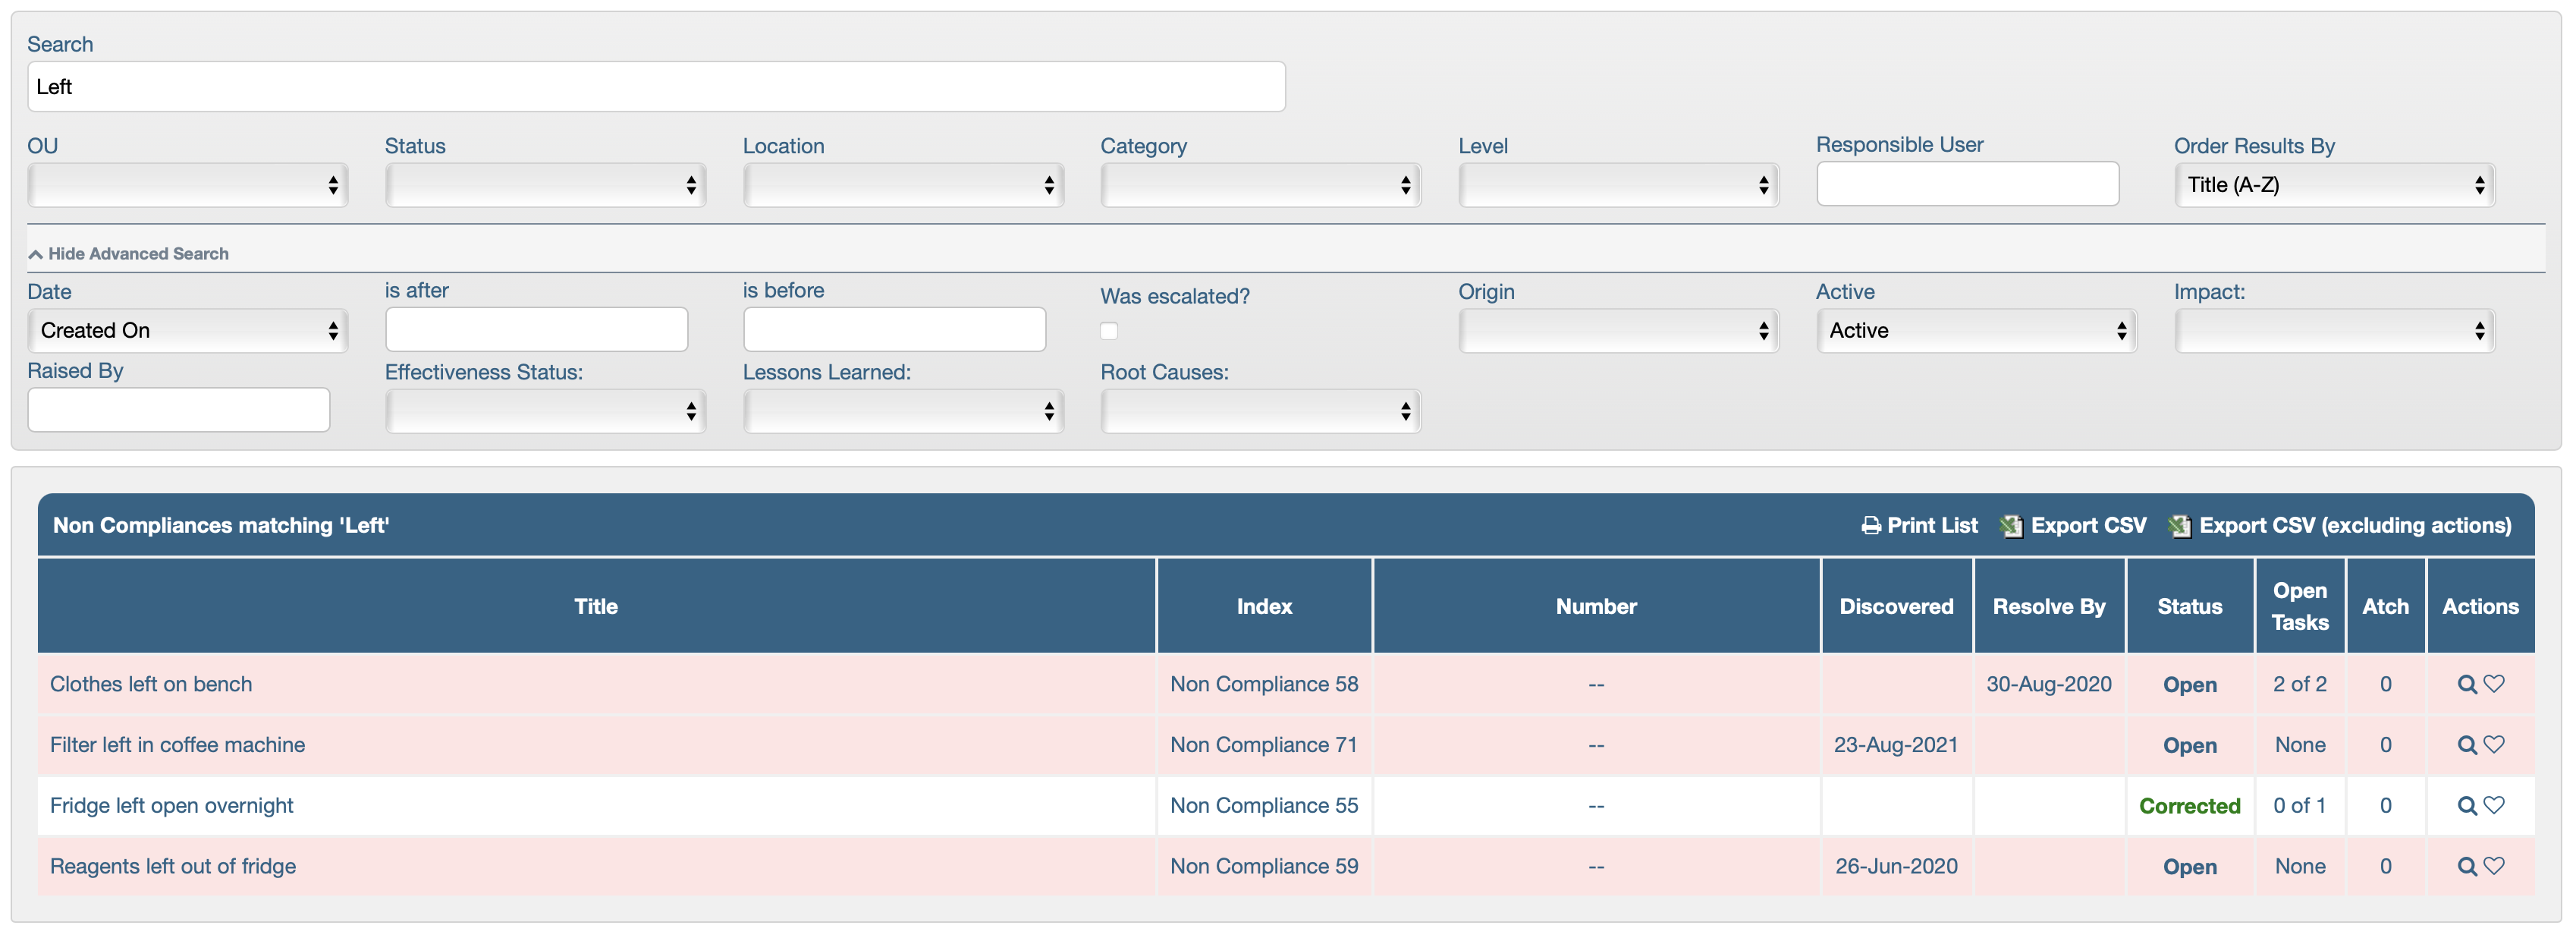
When navigating to Quality Management > Non-Compliances, the Search Non-Compliances tab opens by default. A comprehensive set of search tools is available to locate any noncompliance in this tab. Additionally, the Recent Non_Compliances tab to the left, lists noncompliances recently viewed by the user.
The permission, “Non Compliance:Search Non Compliances” gives access to the search area and the permission, “Non Compliance:View Non Compliance” allows viewing and opening the noncompliance records.

The filters are grouped in two sections; the first section is always on display while the second is hidden to save screen space and it can be expanded/collapsed by clicking the Advanced Search bar.
Main search filters:
- Search - this field accepts free text; it searches for details in the ‘Title’, ‘Index’ and ‘Number’ fields of noncompliances
- OU - all NCs live in one OU; however, the dropdown menu will only display the OUs which the user has permission to access
- Status - the options are, ‘blank’(which selects all statuses), “Open”, “Pending Verification” and “Corrected”
- Location - displays user configurable list (please see information about managing it in the previous article section, Managing Non Compliance Customisable Fields)
- Category - displays user configurable list (please see information about managing it in the previous article section, Managing Non Compliance Customisable Fields)
- Level - displays user configurable list (please see information about managing it in the previous article section, Managing Non Compliance Customisable Fields)
- Responsible User - search-as-you-type field brings up matching names in a dropdown menu; the desired name must be clicked in the dropdown to select it
- Order Results By - the results can be ordered in the following ways:
- Title (A-Z) (default)
- Title (Z-A)
- Action (A-Z)
- Action (Z-A)
- Discovered Date (Oldest first)
- Discovered Date (Newest first)
- Resolve By Date (Oldest first)
- Resolve By Date (Newest first)
- Index (A-Z)
- Index (Z-A)
- Created At (ASC)
- Created At (DESC)
- Outstanding Tasks Count (ASC)
- Outstanding Tasks Count (DESC)
Advanced Search filters:
- Date - is after - is before - the ‘Date’ field choices are Created On, Discovery date and Resolve By; the other two fields allow selecting a start and end date from pop-up calendars
- Was Escalated? - checkbox which when ticked opens the Escalated To dropdown menu; it displays a user configurable list (please see information about managing it in the previous article section, Managing Non Compliance Customisable Fields)
- Origin - displays user configurable list (please see information about managing it in the previous article section, Managing Non Compliance Customisable Fields)
- Active - toggle between Active and Inactive NCs
- Impact - displays user configurable list (please see information about managing it in the previous article section, Managing Non Compliance Customisable Fields)
- Raised By - search-as-you-type field brings up matching names in a dropdown menu; the desired name must be clicked in the dropdown to select it
- Effectiveness Status - this is also a user configurable list; the choices, ‘Successful’ and ‘Unsuccessful’ are provided by default but they can be edited
- Lessons Learned - dropdown choices are - ‘blank’ to select every noncompliance, Has Lessons Learned and Does Not Have Lessons Learned
- Root Causes - dropdown choices are - ‘blank’ to select every noncompliance, Has Root Causes and Does Not Have Root Causes
Any combination of the criteria above will yield a list of results which can then be exported in PDF form by clicking, Print List, in spreadsheet form (CSV) by clicking the link with the Excel icon, Export CSV or in a more compact CSV version - Export CSV (excluding actions).
Viewing, Editing and Sharing Noncompliances
Once a noncompliance is located in the results area, it can be opened by clicking its row or the magnifying glass in the Actions column.
Any new, unprocessed noncompliance reports will have the mark, “NEW” before their title to help make them more visible. All the fields of a noncompliance can be edited while it’s still Open; the edit (pencil) icon will be visible next to editable fields. The permission, “Non Compliance:View Non Compliance” is all that’s required to edit them. There is one exception: to change the OU of a noncompliance a different procedure must be followed.
Change OU
The noncompliance’s OU field doesn’t have an edit (pencil) icon; it requires a different procedure if it needs to be changed. The permission, “Non Compliance:Change OU” is required in the source OU.
To change a noncompliance’s OU:
- Select the option, Change OU from the Actions dropdown menu and click Go
- In the lightbox that opens, find and select a new OU in the search tool provided.
The original OU will appear selected; the search-and-select tool will only list the OUs available to the user. - Click Save.
Inactivate a Noncompliance
A noncompliance can be made inactive by selecting the option, ‘Set as Inactive’ from the Actions dropdown menu and clicking Go. The permission, “Non Compliance:Change Status” is needed to make this option visible.
If there are any outstanding tasks, they will be invalidated when the NC is inactivated. The record will still be searchable and it is possible to reactivate it if necessary.
Delete a Noncompliance
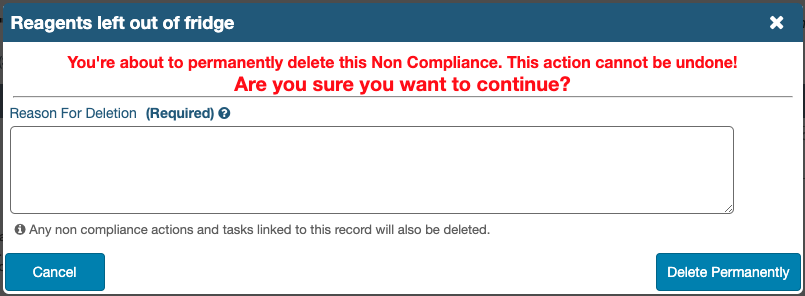
A noncompliance record can also be deleted at any time and in this case, access is lost to any work done on it. However, a Reason For Deletion must be entered before the button, Delete Permanently can be pressed. This information is only accessible by the Genial support team and it can be requested if necessary ([email protected]).
To delete a noncompliance:
- Select the option, Delete this Non Compliance from the Actions dropdown menu and click Go
This option is only available if the user has the permission, “Records:Delete Records” in the noncompliance’s OU. - Enter a Reason For Deletion
- Click Delete Permanently
Email and Print Noncompliances
Noncompliance records can be emailed to an existing contact and they can also be printed (exported as a PDF file). These options are available to users with the permission, “Non Compliance:Create Non Compliances”.
To email a noncompliance:
- Select the option, Email Non Compliance from the Actions dropdown menu and click Go
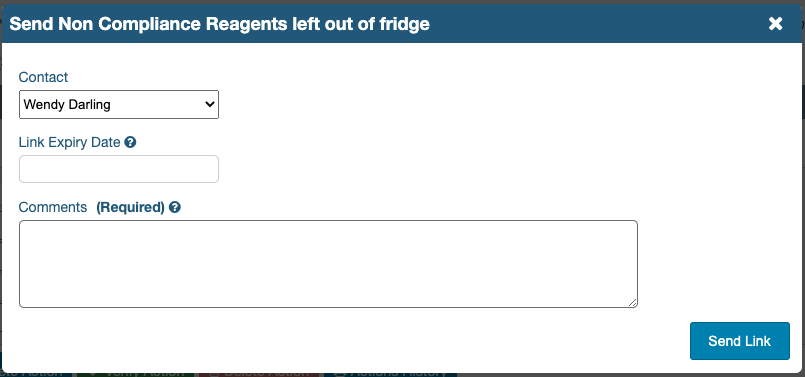
- The Contact must be selected from a dropdown list of registered contacts in the account
Contacts can be managed in the Laboratory Management > Contacts area - A Link Expiry Date can be selected from the pop-up calendar so that the emailed link stops working after a certain date
- Comments must be added
The recipient will get a URL link which when clicked will open a new tab and the NC will be automatically downloaded as a PDF. The file is the same as when it is ‘printed’.
To produce an uncontrolled print of a noncompliance:
- Select the option, Print Non Compliance from the Actions dropdown menu and click Go
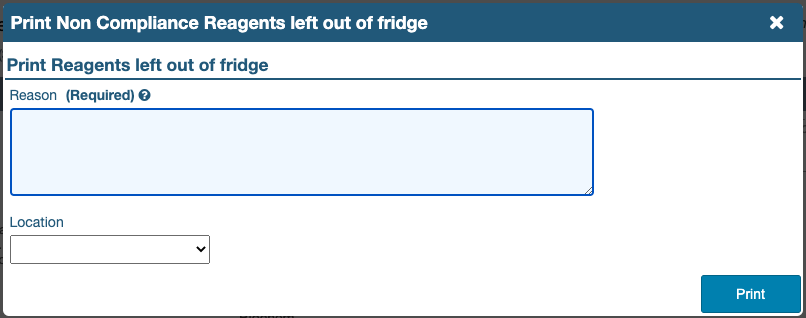
- A Reason is Required to add to the Print History log
- A Location where the print will be used can be selected from the available locations in the dropdown menu
- Click Print to produce a PDF copy that can be downloaded, printed or saved
The Action option, Print History provides details of any prints generated from a Print Non Compliance action.
The following two articles cover the process of resolving noncompliances, learning from them and evaluating the effectiveness of corrective measures taken.
NEXT STEP: Managing Non Compliances
PREVIOUS STEP: Raising a New Non Compliance