- Overview Tab Configuration
Assessment Fields Configuration
Overview Tab Configuration
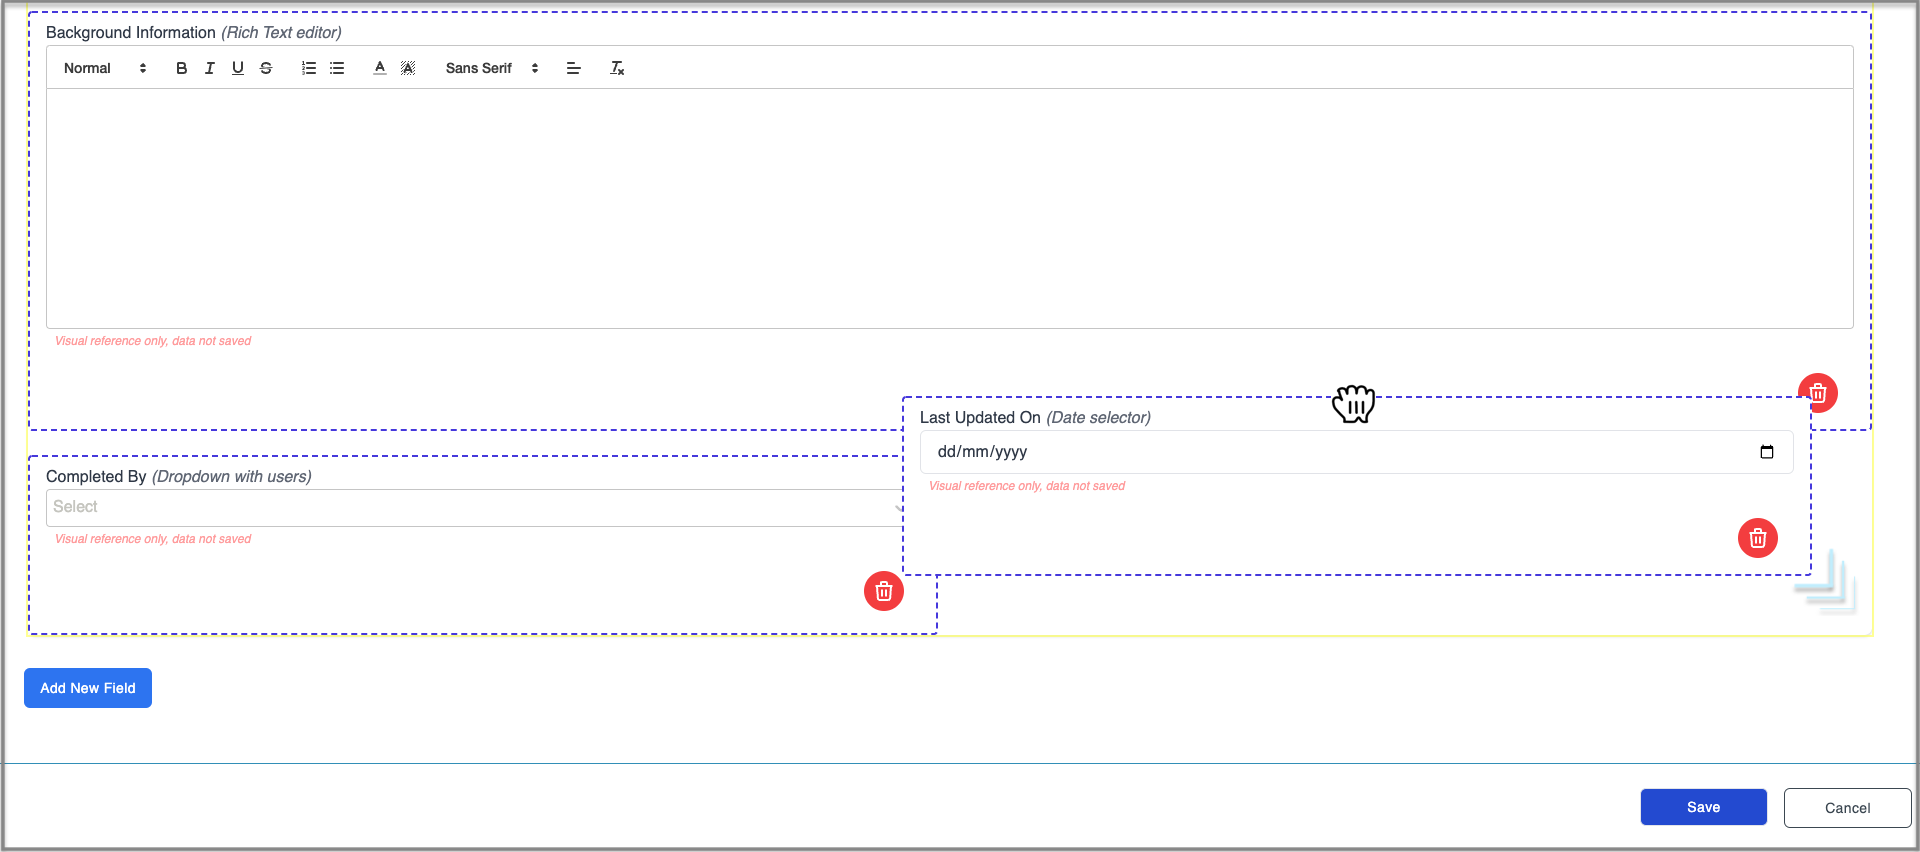
The Overview Tab is a fully customisable area where different types of fields can be included to produce a form with all the information required to describe and document a given risk assessment.
Information can be entered/selected within the fields to test the form but it won’t be saved.
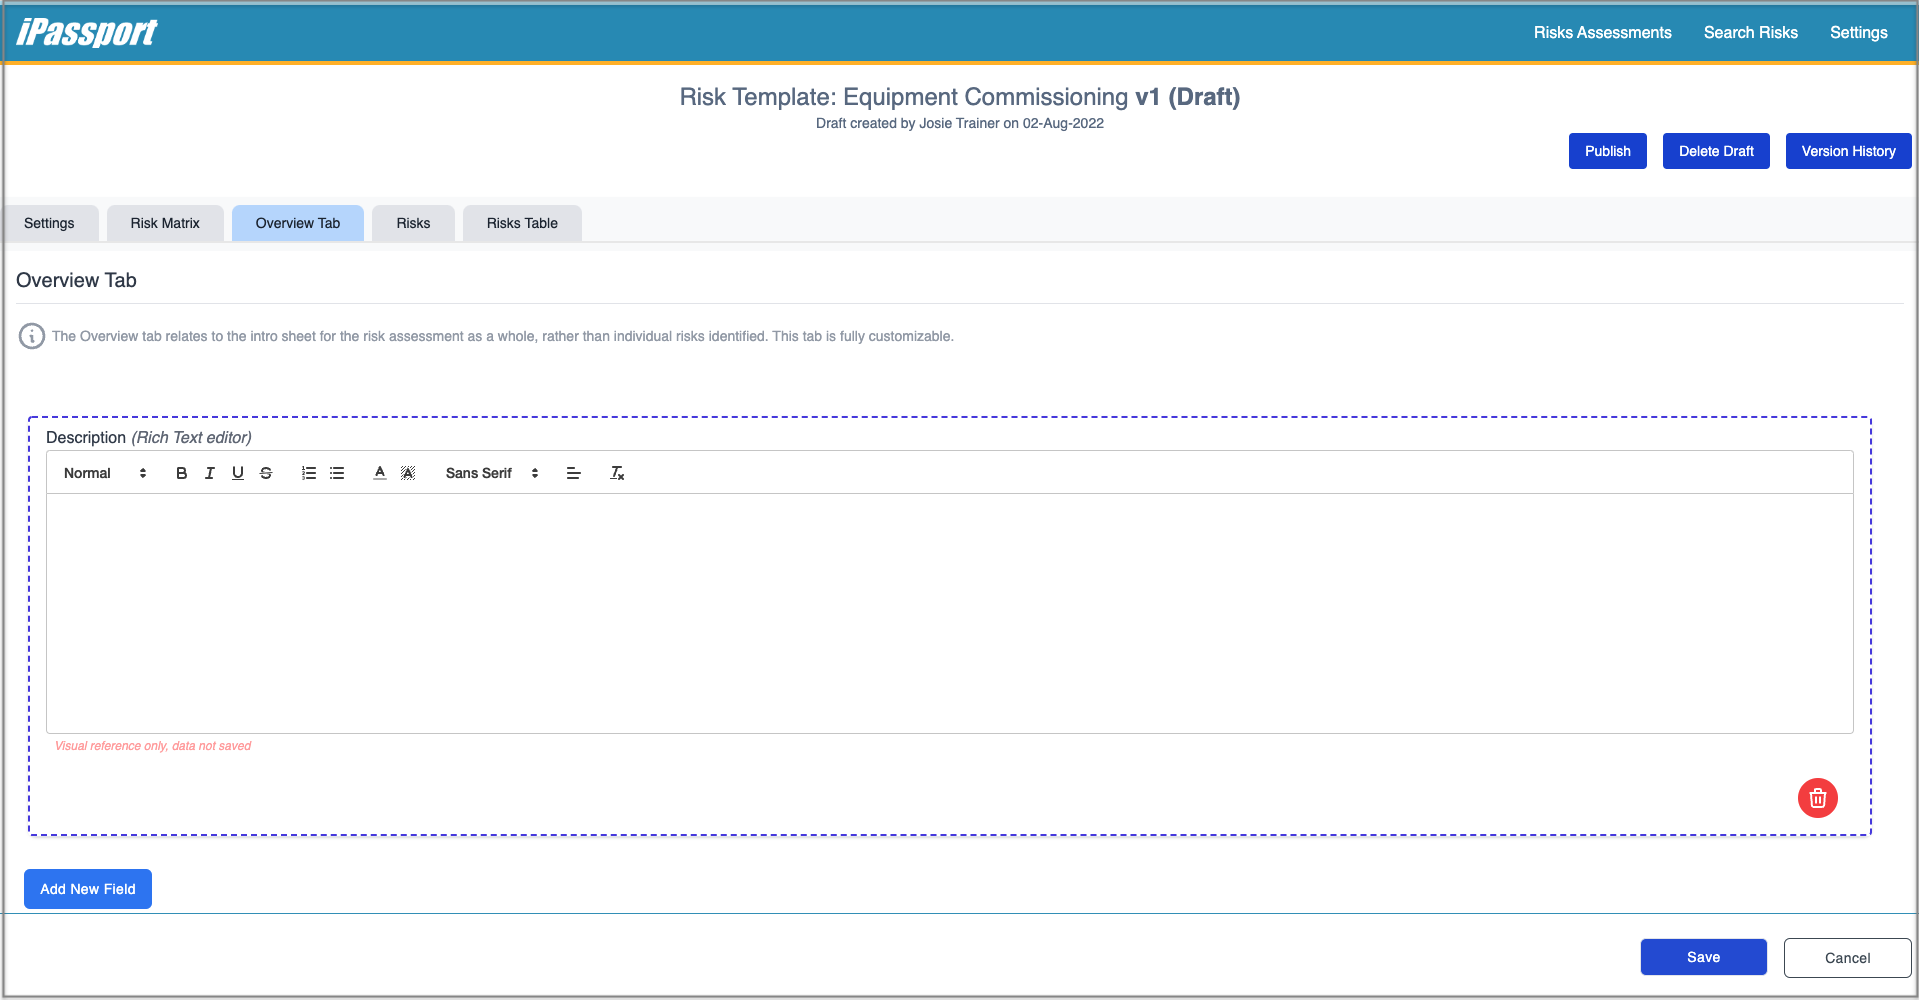
A rich text Description field is added by default. Like all fields, it can be deleted by clicking the trash/bin icon in its bottom right corner.
Other fields can be added by clicking, the Add New Field button. A collection of pre-formatted fields is provided and it is also possible to create custom ones of different types.
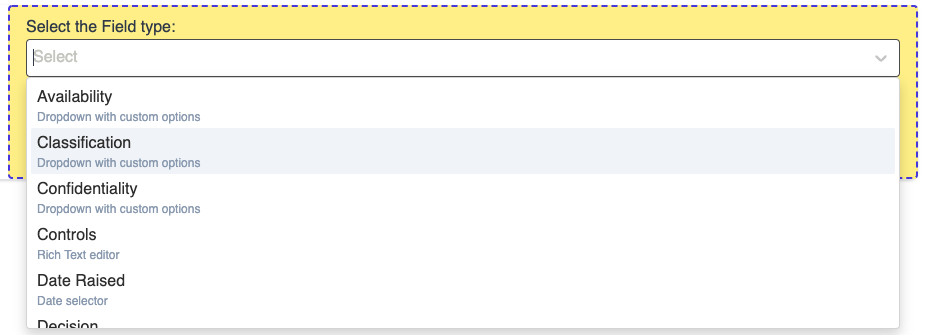
There are four kinds of fields (widgets) amongst the list and all of them are available to create custom fields:
- Text fields where free text can be entered, such as titles and other short texts
- Rich Text Editor fields where extended formatted text can be entered
- Dropdown fields which can be configured with custom options, or which retrieve data from iPassport records
- Date selector fields with a pop-up calendar
Adding Fields
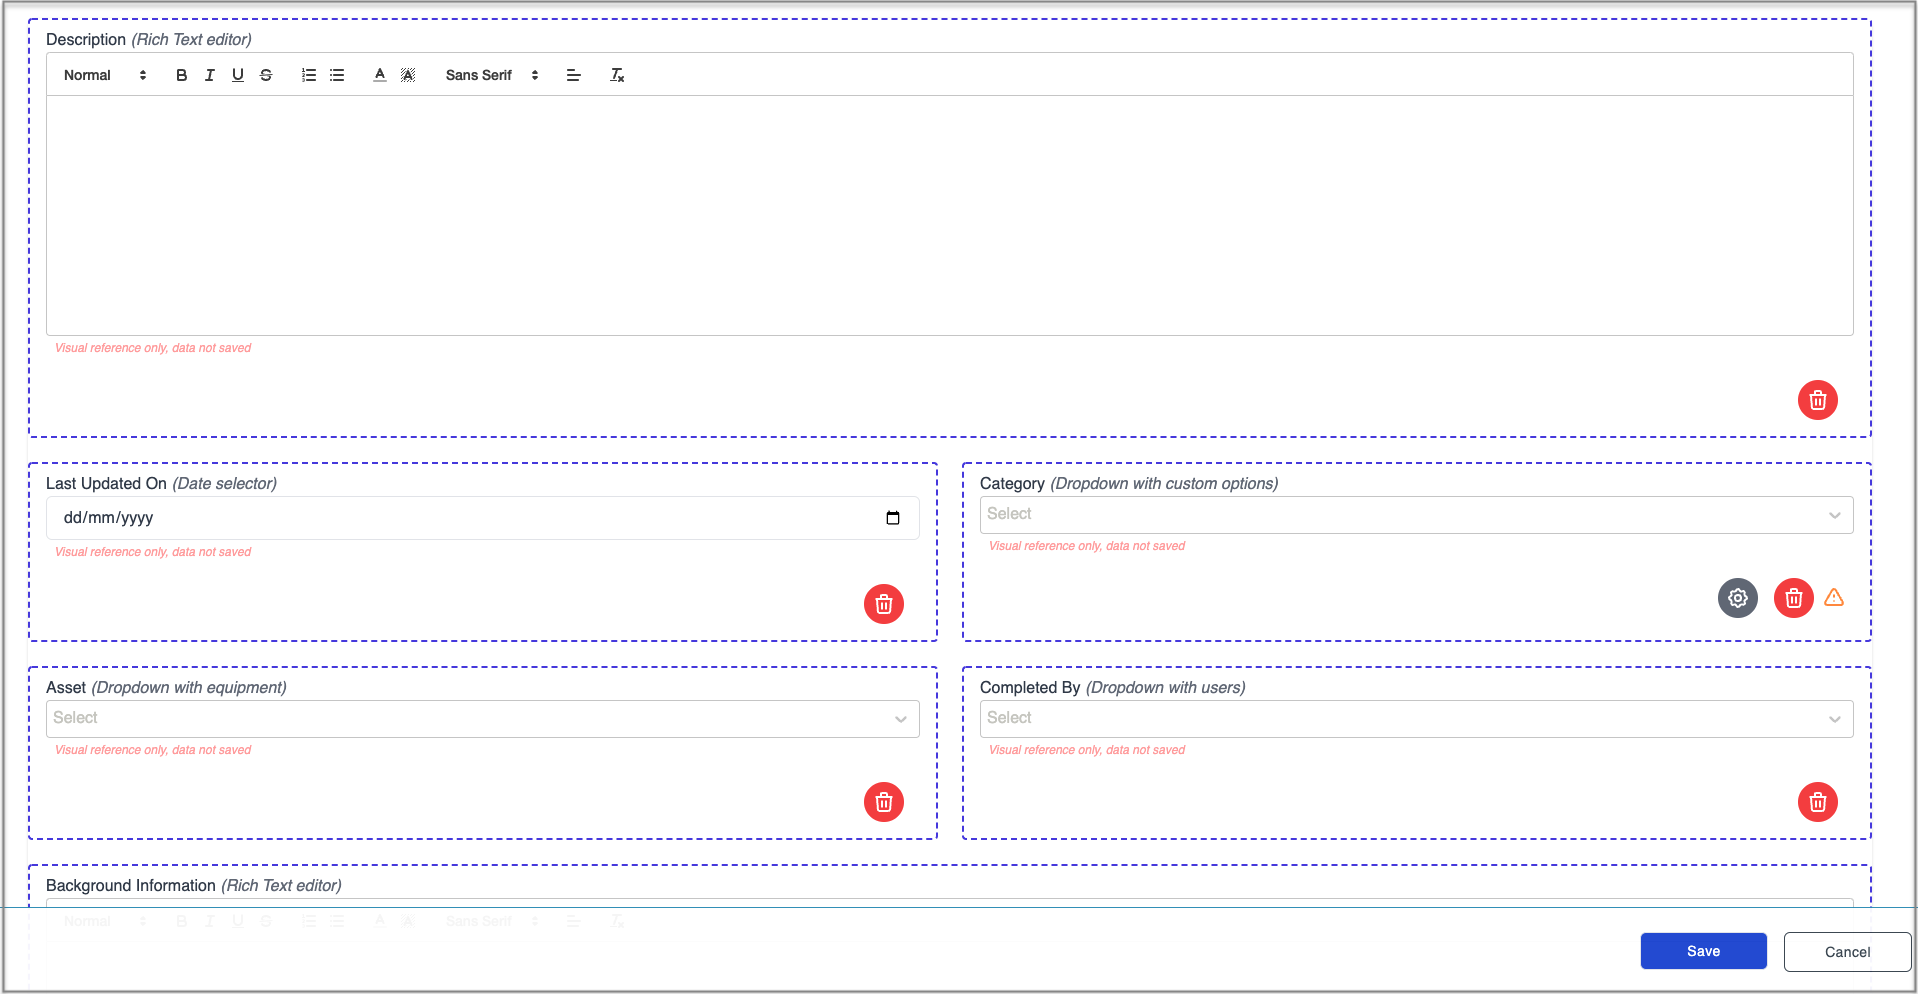
Once fields are added, they can be re-arranged so the required fields can be quickly selected and then the layout can be sorted.
To add fields in the form for the overview sheet of risk assessments:
- Click the Add New Field button - a widget appears
- Either,
- Click the Select the Field type dropdown to choose one of the pre-populated fields, or
- Click the icon with the ‘plus’ (+) sign to create a custom field (please see details below)

- Click the Select the Field type dropdown to choose one of the pre-populated fields, or
- Click Save at any time to save progress
Custom fields
When the ‘plus’ (+) sign icon is clicked to create a custom field, a sidebar opens on the right-hand side of the screen. There is an area at the top to configure new custom fields.
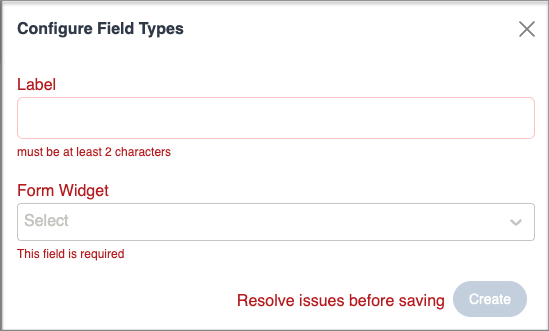
To configure a custom field:
- Enter a Label in the field provided
- Select one of the following Form Widget types -
- ‘Text Box’
- ‘Text Area’
- ‘Date’
- ‘Dropdown’
- If ‘Dropdown’ is selected, a new field will appear - ‘Options Source’ which in turn has four items to choose from -
- ‘Custom’ - which allows creating custom options to display and pick from
- ‘Equipment’ - the list of equipment records in the iPassport account will be displayed
- ‘Standards’ - the list of standards in the iPassport account will be displayed
- ‘Users’ - the list of users in the iPassport account will be displayed
- Click Create to finish and automatically add the field to the Overview page
To add custom options in dropdown fields:
- Click the ‘cog’/‘gear’ icon to open the ‘Add New Option’ pop-up window
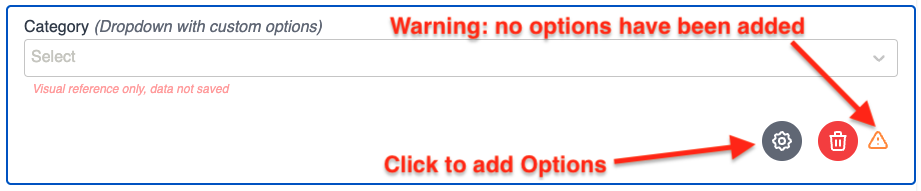
- Enter a Name in the provided field
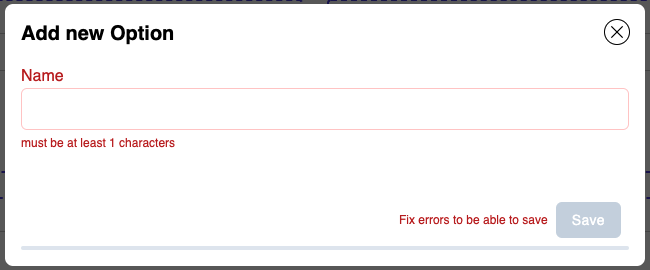
- Click Save to add it to the list at the bottom of the pop-up window
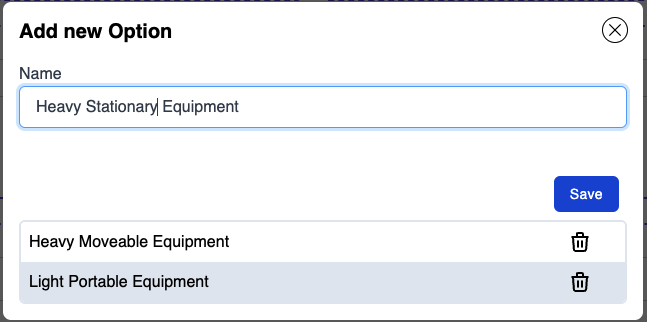
- Already added items can be edited by clicking them or deleted by clicking the trash icon on the right
- Click the ‘close’ (ⓧ) icon to return to the Overview page
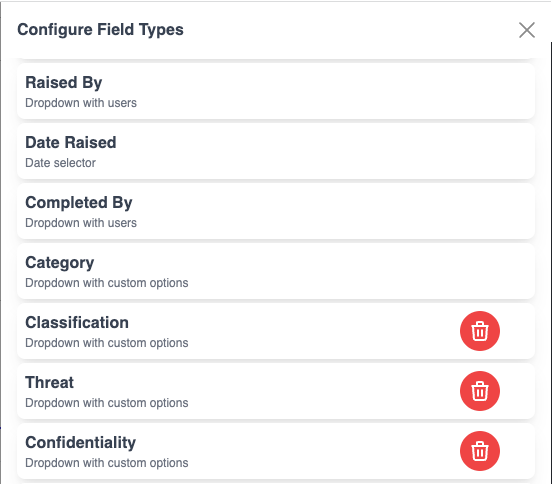
The Configure Field Types sidebar also lists all existing fields available both in the Overview Tab and in the Risks tab. Those which display a trash icon can be deleted because they are not in use in any configuration. Once deleted, they would have to be created again as a new custom field.
Sorting the Layout of the Overview page
The size of the fields is not adjustable but all fields can be moved around to arrange them in the desired order. When hovering inside fields, the pointer will turn into a hand icon, to grab and drag the field as desired.
The Cancel button returns to the Configurations page.
There is a Save button always present in the bottom right corner of the screen to save progress at any time.
NEXT STEP: Risks Items Configuration
PREVIOUS STEP: Risk Matrix Configuration