- Task Escalation
Task Escalation
Introduction
Task escalation provides a tool to help prevent tasks from being left unattended. Selected users can be nominated to receive emails that summarise overdue tasks assigned to people under their supervision. A time frame can be set between the time when the task becomes overdue and the supervisor gets informed. Different types of tasks can be escalated to different users. Escalated tasks can be searched for in the Users’ Tasks area.
OU Preferences
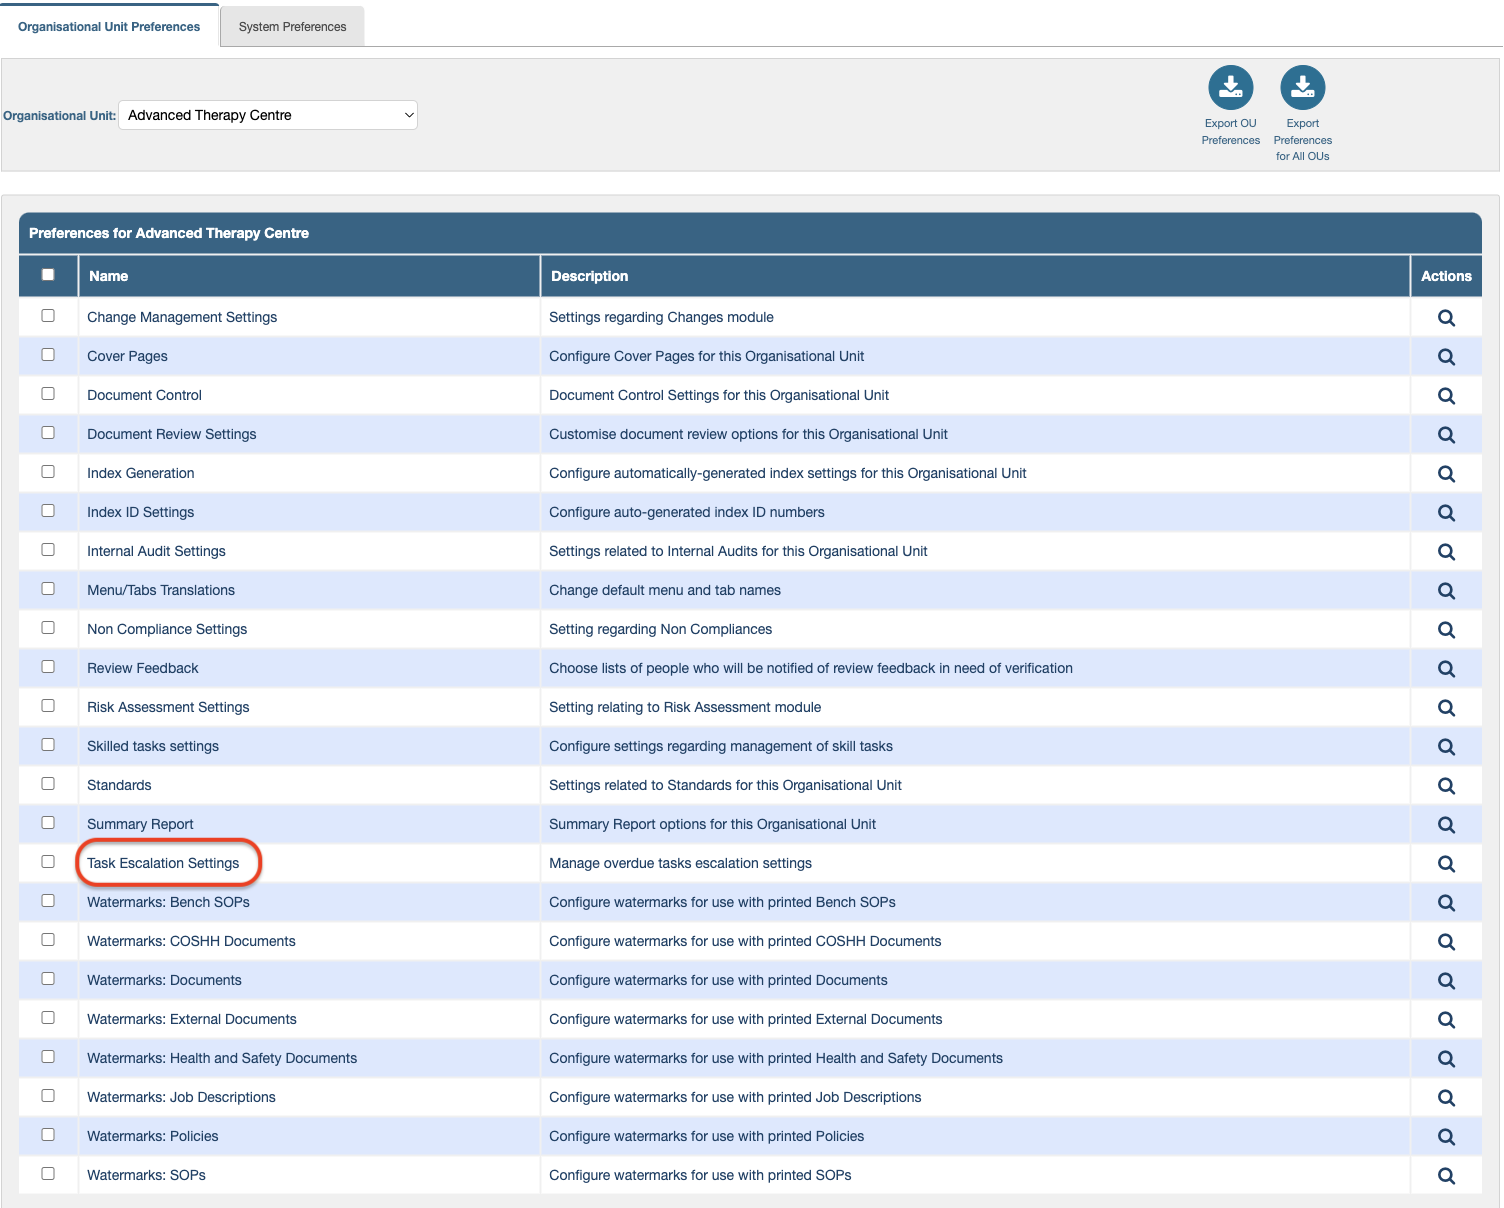
Task Escalation Settings are available for each OU independently. They are found midway down the Organisational Unit Preferences tab and users will only be able to adjust the settings in OUs they have access to, as reflected in the dropdown menu, Organisational Unit.
Permissions
To access the Task Escalation Settings under a given OU, a user must have the permission, Manage Settings at least once (in any OU) and the permission, Organizational Units:Manage Settings in the OU of interest. These permissions are included in the system role, Administration Editor.
Managing Task Escalation
Assigning escalated tasks to a user doesn’t automatically grant access to the areas where the tasks originate. If a user doesn’t have access, they will be notified of the overdue tasks in email summaries but they won’t be able to access them under Users’ Tasks.
To adjust task escalation settings:
-
Go to Administration > Settings > Organisational Unit Preferences
-
Select the OU to adjust from the Organisational Unit dropdown menu
This OU should be the ‘Home OU’ of the task recipients, not the OU where the tasks originate -
Click the row, Task Escalation Settings to open the settings page
-
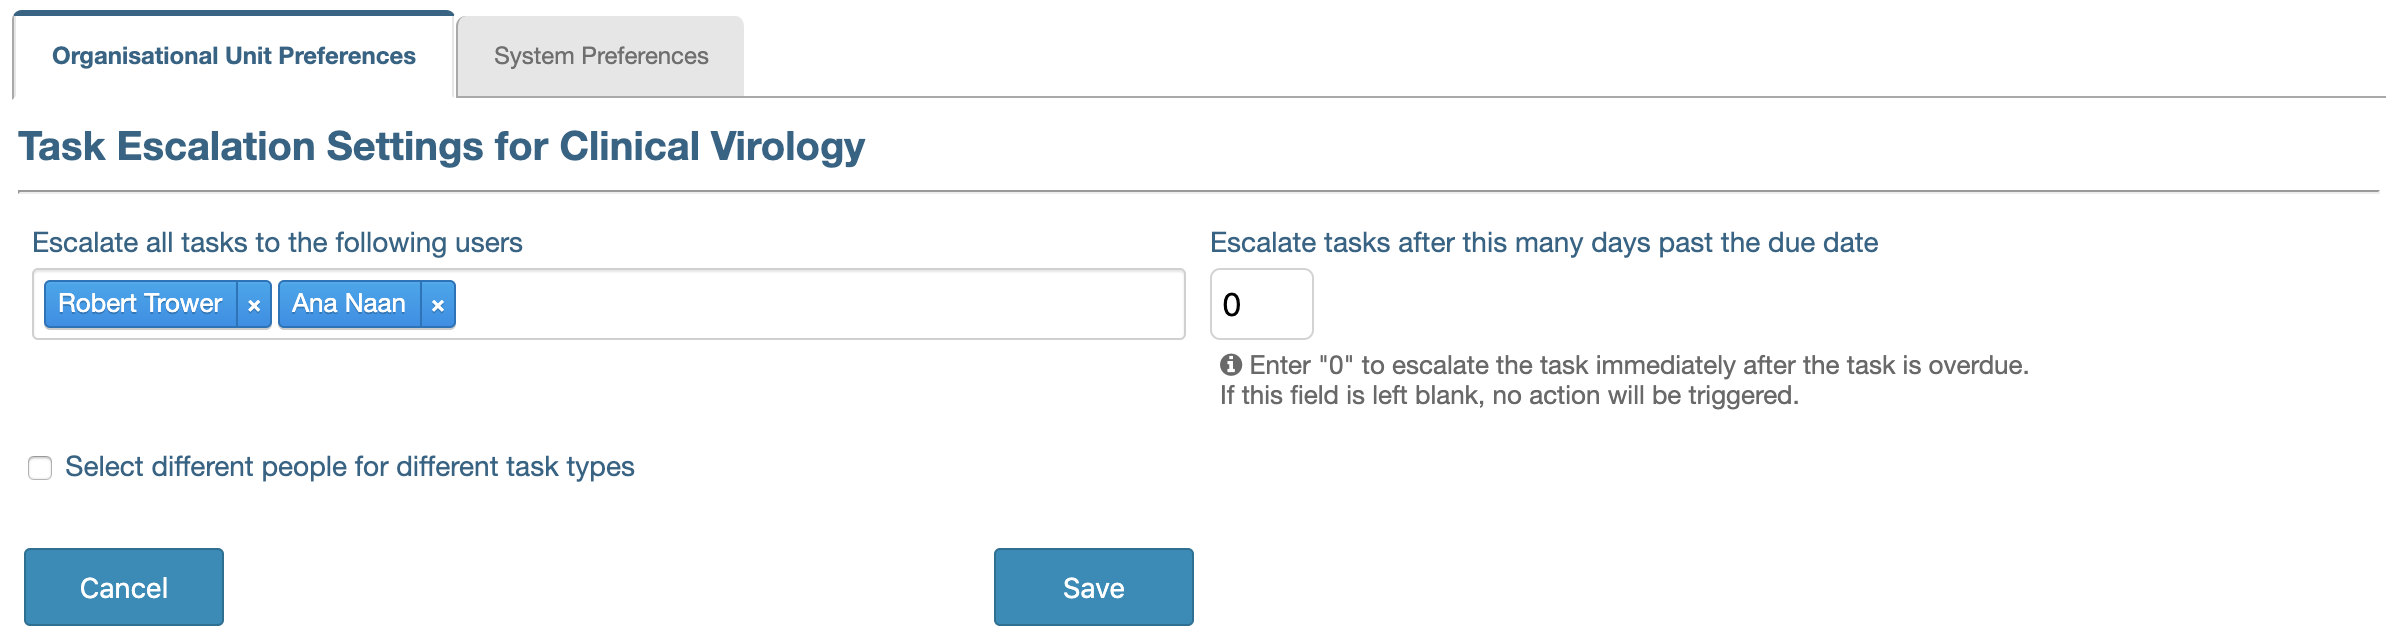
If all tasks are to be escalated to the same user(s),
- Click in the field under, Escalate all tasks to the following users
- Select users by clicking their name in the dropdown list that appears (the list can be narrowed by entering names, even partially, in the field)
- Enter a value for the number of days before the task is escalated (once it becomes overdue) in the field, Escalate tasks after this many days past the due date
A "0" is required if tasks are to be escalated immediately; if the field is left blank, the setting will be ignored by the system. -
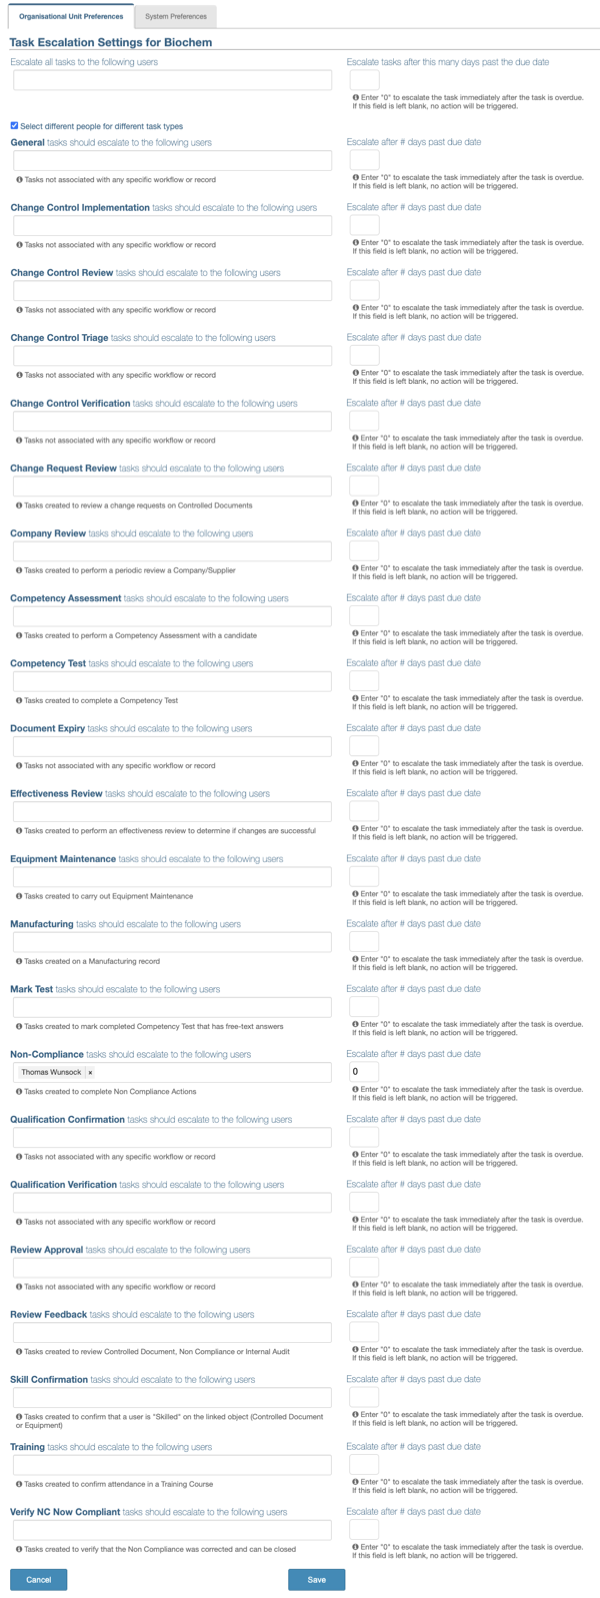
If different people are to be notified for different types of tasks, tick the checkbox next to, Select different people for different task types
- Repeat the instructions above to add people and a number of days in each appropriate section for the different types of tasks.
-
Scroll down and click Save
Managing Notifications
The people nominated in Task Escalation Settings can adjust their personal preferences to receive summaries daily, weekly, monthly or not at all. Please refer to the user guide, Personal Preference Management for details.
Viewing Escalated Tasks
The Users Tasks area offers a filter to search for tasks escalated to given individuals. For details about this, please refer to the user guide, Users’ Tasks.