- Enterprise Accounts
Enterprise Accounts
Introduction
Though an iPassport account has the ability to hold large amounts of data, records, documents and users, large organisations can benefit from a top layer classification of their data. By subscribing to an Enterprise account, they can be divide the account into Facilities. Facilities can reflect separate branches of an organisation and allow for better segregation of information and independent administration. At the same time, all facilities are under one account to benefit from iPassport’s controlled sharing of information and quality management.
As an example, each facility can have an independent set of categories for their controlled documents, its own set of OUs, User Groups, settings and in general, behave as an independent account. However, when required, documents from that facility can be shared with other facilities and users that need to be involved in more than one facility can be granted membership to user groups from different facilities.
There are both, global System Preferences, that govern the whole account and Facility Preferences, for more localised settings, such as the facility’s timezone.
Permissions
Enterprise accounts introduce the status, Facility Admin. This status is similar to the status, Site Admin which grants access to all areas and functions of the account but in this case, the scope of Facility Admins is restricted to their facility.
This status is independent from any permissions gained through membership to user groups. The same as with Site Admins, the first Facility Admin has to be appointed from above - either by a Site Admin or by the Genial support team ([email protected]). Facility Admins can then add other Facility Admins in their own and in other facilities.

To appoint a new Facility Admin:
- Go to Administration > Site Admins and select the Facility Admins tab
- Click the row of the Facility for the new administrator
- In the lightbox that opens, click in the field, Select a user
- Start typing the name of the new Facility Admin until it appears in the dropdown menu below
- Click the name in the dropdown menu so that it appears in full in the field
- Click the Add Admin button
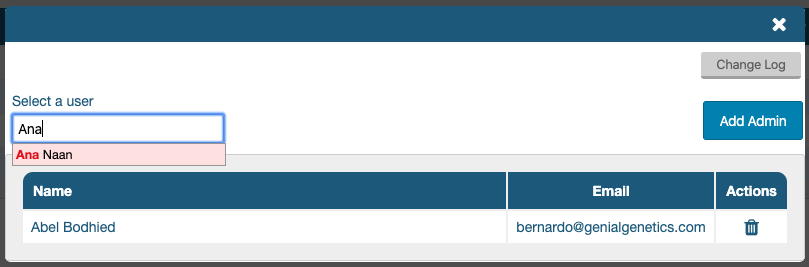
Facility Admins can be removed by clicking the trash/bin icon under Actions. There is a Change Log in this pop-up window to inspect the history of the facility’s administrators.
Settings
Settings are divided into three tiers:
- System Preferences - that are global and govern the whole account,
- Facility Preferences - that govern an entire facility and
- Organisational Unit Preferences that govern departments (OUs) within a facility

Users must have appropriate permissions to access the different settings sections. To access the Administration > Settings menu, the permission, “Desktop:Show Settings Menu Item” is required. System Preferences and Facility Preferences can be accessed in each facility where the user has the permission, “Manage Settings”. Organisational Unit Preferences require the permission, “Organizational Units:Manage Settings” in each OU where they want to be viewed and adjusted.
Site Admins and Facility Admins can access all settings.
For information about System Preferences and Organisational Unit Preferences, please refer to the user guide, System Settings Management.
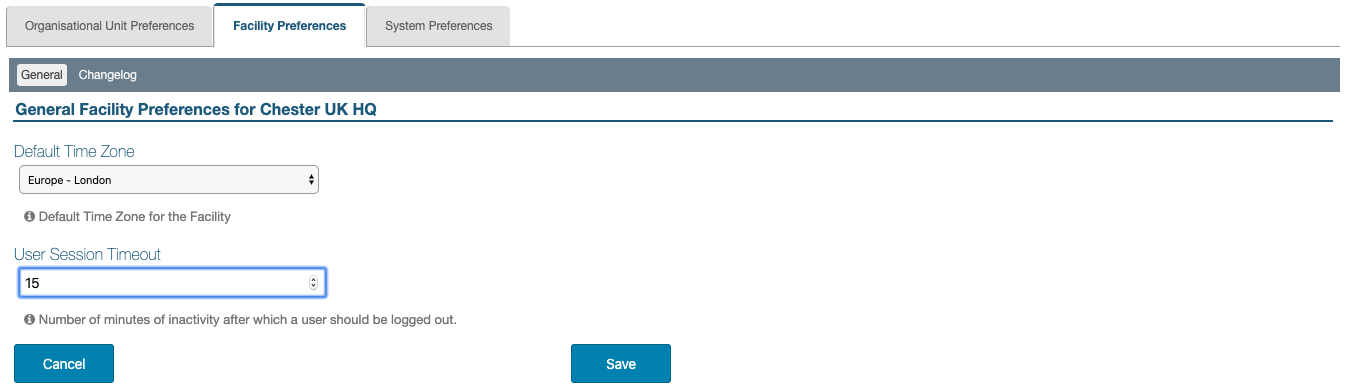
General Facility preferences
The Default Time Zone and User Session Timeout settings can be adjusted at facility level in this area. They will override the global settings which appear under Administration > Settings > System Preferences > Miscellaneous Settings.
The ‘Default Time Zone’ setting provides a comprehensive dropdown list of standard time zones. The zone selected will be used to calculate the local time of every transaction logged by the system.
The ‘User Session Timeout’ setting defines the period of inactivity (in minutes) that a user has before the system logs them off automatically.
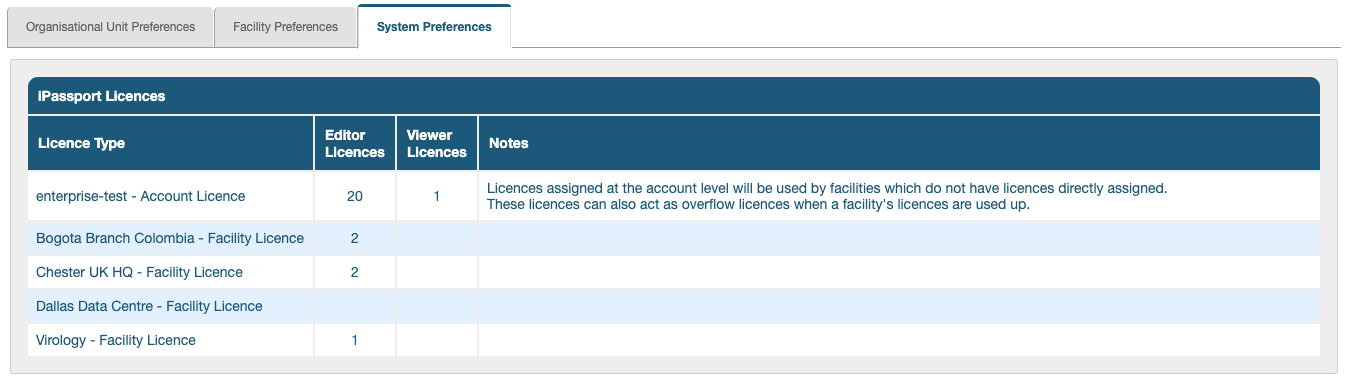
Facility Licences
This page provides a summary of the number of licences currently assigned to the facility. This is a read-only page and additional editor and viewer licences can be ordered from the Genial Compliance sales team, if required (please contact, [email protected]). The number of licences refers to the number of users that can be concurrently logged into the system; an account can have many more users than licences. Viewer licences can be useful as a lower cost option to provide access to basic users. Also, when all the editor licences are in use, the viewer licences are automatically made available to at least provide reading access to additional editors who log in.
The licences of a facility are only available to users of that facility. In addition, there are account licences that can be used by any facility when they are available. To find out how many are available, please navigate to the System Preferences > iPassport Licences tab. A facility may not have any licences and rely on the Account Licences available.
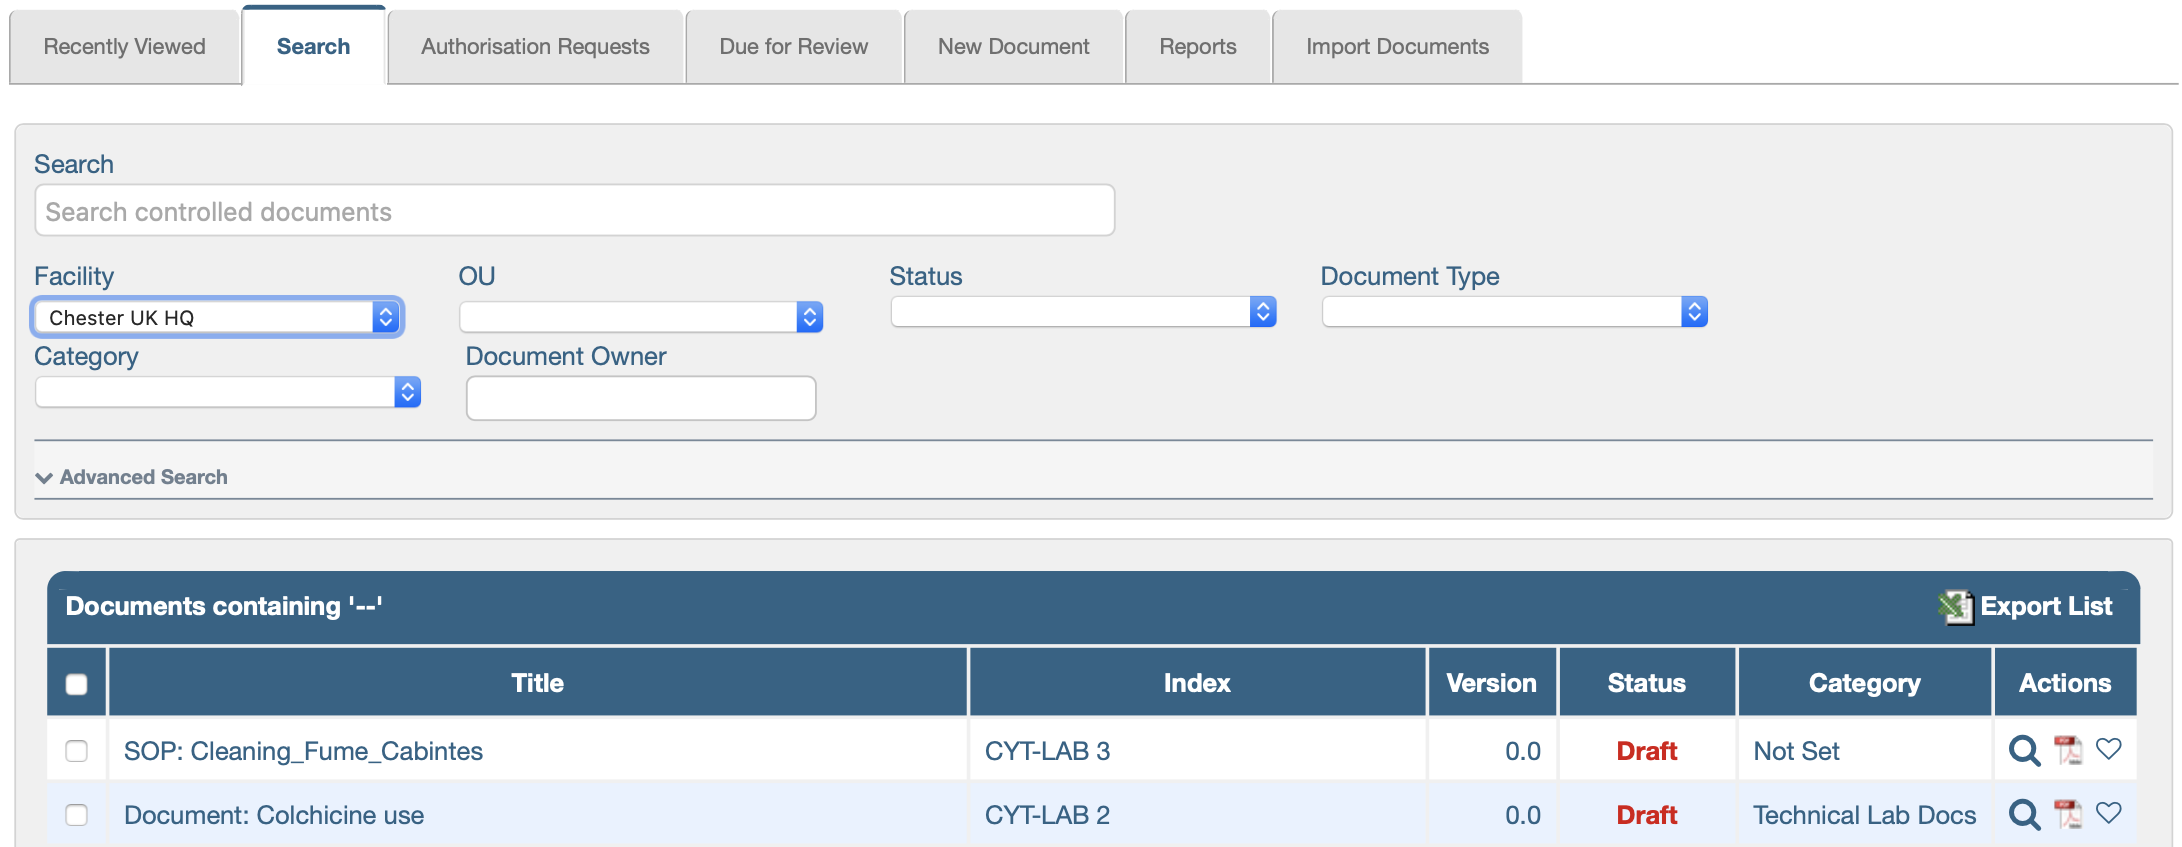
Searching and Creating Records
Enterprise accounts have an extra filter in their record search pages and an additional field in record creation pages. These allow selecting the facility where the search wants to focus or the new record wants to be placed. Users will only see the facilities where they have been granted access and furthermore, only the OUs within those facilities that they have been given permission to access.
Facility wide features
Features that are account wide in regular iPassport accounts become facility wide in enterprise accounts. When records are created in the areas listed below, they become accessible across the whole facility unless, where applicable, they are purposely restricted to specific OUs.
- Checklists - are not restricted to any OUs within a facility
- Skilled Groups - allow adding users (according to their Home OU) and documents from any OU the creator can access
- Competency Test/Assessment Templates - can be restricted to specific OUs within a facility, becoming accessible only to those who have permissions within that OU
- Competency Tests/Assessments - access restricted by facility and by the candidates’ Home OU and also governed by the OU Scope of the corresponding template
- Training Courses - are not restricted to any OUs within a facility
- Meetings - are not restricted to any OUs within a facility
- Distribution Lists -
- Users & Staff Members - access is controlled by Home OU
- User Groups - are intended to be contained within a facility but can span facilities when required (e.g. a travelling QM auditor within the organisation)
- Organisational Units - every OU resides in one facility only
Restricting Visibility of User Created Look-up Fields
Different records in iPassport provide fields which can be customised by the users to create lists from which a category, type or classification tag can be picked. For example, controlled documents have a field where a list of ‘categories’ can be created and each document can be assigned one to further classify it. Examples of categories of documents can be, ‘Instructions’, ‘Patient Forms’, ‘Administrative Procedures’, etc.
These look-up options don’t always apply in every department and can vary between facilities of an enterprise account. The lists can also get very long if they include all of the options for all of the departments of an organisation. To make them more manageable, every item in a look-up list can be assigned a scope of visibility. This functionality is available in all accounts but can be especially useful in enterprise accounts to provide the required level of autonomy to each facility.
Configurable Look-up fields with Visibility settings
Specific permissions are generally required to manage each kind of look-up list. These are the look-up fields which have configurable visibility:
General
- Attachment Types
Quality Management > Checklists
- Checklist Types
Quality Management > External Audits
- External Audit Types
Quality Management > Complaints
- Complaint Types
- Complaint Statuses
- Complaint Contact Methods
- Complaint Subjects
Quality Management > Complaints
- Change Control Categories
- Change Control Rejection Reasons
Quality Management > Non-Compliances
-
Non-compliance Action Types
-
Non-compliance Action Statuses
-
Non-compliance Action Categories
-
Non-compliance Categories
-
Non-compliance Level
-
Non-compliance Origin
-
Non-compliance Escalated To
-
Non-compliance Impact
-
Non-compliance Root Causes
-
Non-compliance Effectiveness Status
Laboratory Records > Controlled Documents
- Document Categories
Job Descriptions - Job Title Position
- Job Title Grades
SOPs - SOP Grades
- SOP Personal Protection Equipment
Laboratory Records > Equipment
- Equipment Type
- Equipment Received Condition
- Equipment Maintenance Type
Laboratory Records > Materials
- Material Types
- Material Categories
- Material Stock Units
- Material Storage Conditions
- Material Lot Statuses
Laboratory Records > Reagents
- Reagent Types
- Reagent Categories
- Reagent Stock Units
- Reagent Storage Conditions
- Reagent Lot Statuses
Laboratory Records > Incident Reports
- Incident Categories
- Incident Severities
- Type of Accident/Incident
- Sample Error Types
- Injury Types
- Injury Severities
Competency > Tests & Test Designer
- Competency Test Categories
Competency > Assessmnets & Assessment Designer
- Competency Assessment Categories
Competency > Training Courses
- Training Objective Types
Laboratory Management > Meetings
- Meeting Types
- Meeting Statuses
Laboratory Management > Contacts
- Contact Departments
Laboratory Management > Companies
- Company Categories
Managing Configurable Look-up Lists
Configurable fields where lists can be created follow general rules across the system. The instructions below apply to them all.
To Manage configurable look-up lists in iPassport:
Click the spanner/wrench icon by the relevant field to open the lightbox where they can be managed.
- To add an item,
- Click the [+]Add (field name) link on the right to expand the area
- Enter a name for the item in the field provided
- Click, Create (field name)
- Click the arrow to the left of 'Account' to expand the tree structure of OUs in the account
- Un-select 'Account' and select specific OUs or leave 'Account' selected to make the category visible in all OUs
- To edit an item,
- Click the pencil icon in the Actions column
- Adjust the name and/or visibility
- Click, Save (field name)
- If a trash/bin icon is available in the Actions column, clicking it will delete the item; if an item is in use, it can't be deleted
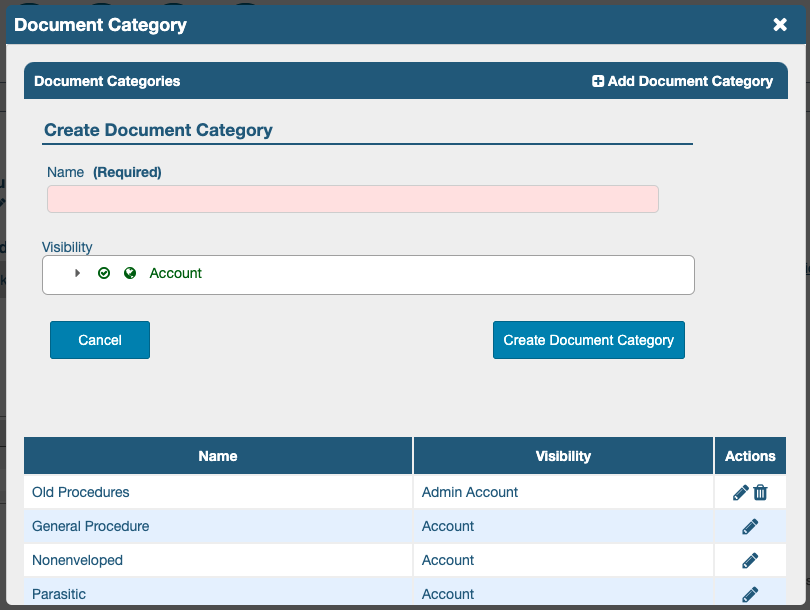 Adjusting its visibility:

Click the “X” in the top right corner to close the lightbox.