- Basic Navigation
Basic Navigation within iPassport
Introduction
iPassport has two main modes of operation, Detailed View and Simple View. The detailed view offers full functionality, while the simple view has a streamlined interface, intended for occasional users who only need to complete a task or search for content with minimal training. This article treats both modes separately but under the skin, the processes and structure are the same.
Detailed View
Menu Structure
The navigation employed within iPassport QMS is designed to provide users with the greatest degree of flexibility possible. As it is a large system, there are many menu items that are only relevant in certain conditions and are therefore nested and not visible until they might be required. The main items always remain visible along the top and left side of the screen. The system is separated out into the following menu groups (described in more detail below):
Global Menu Items
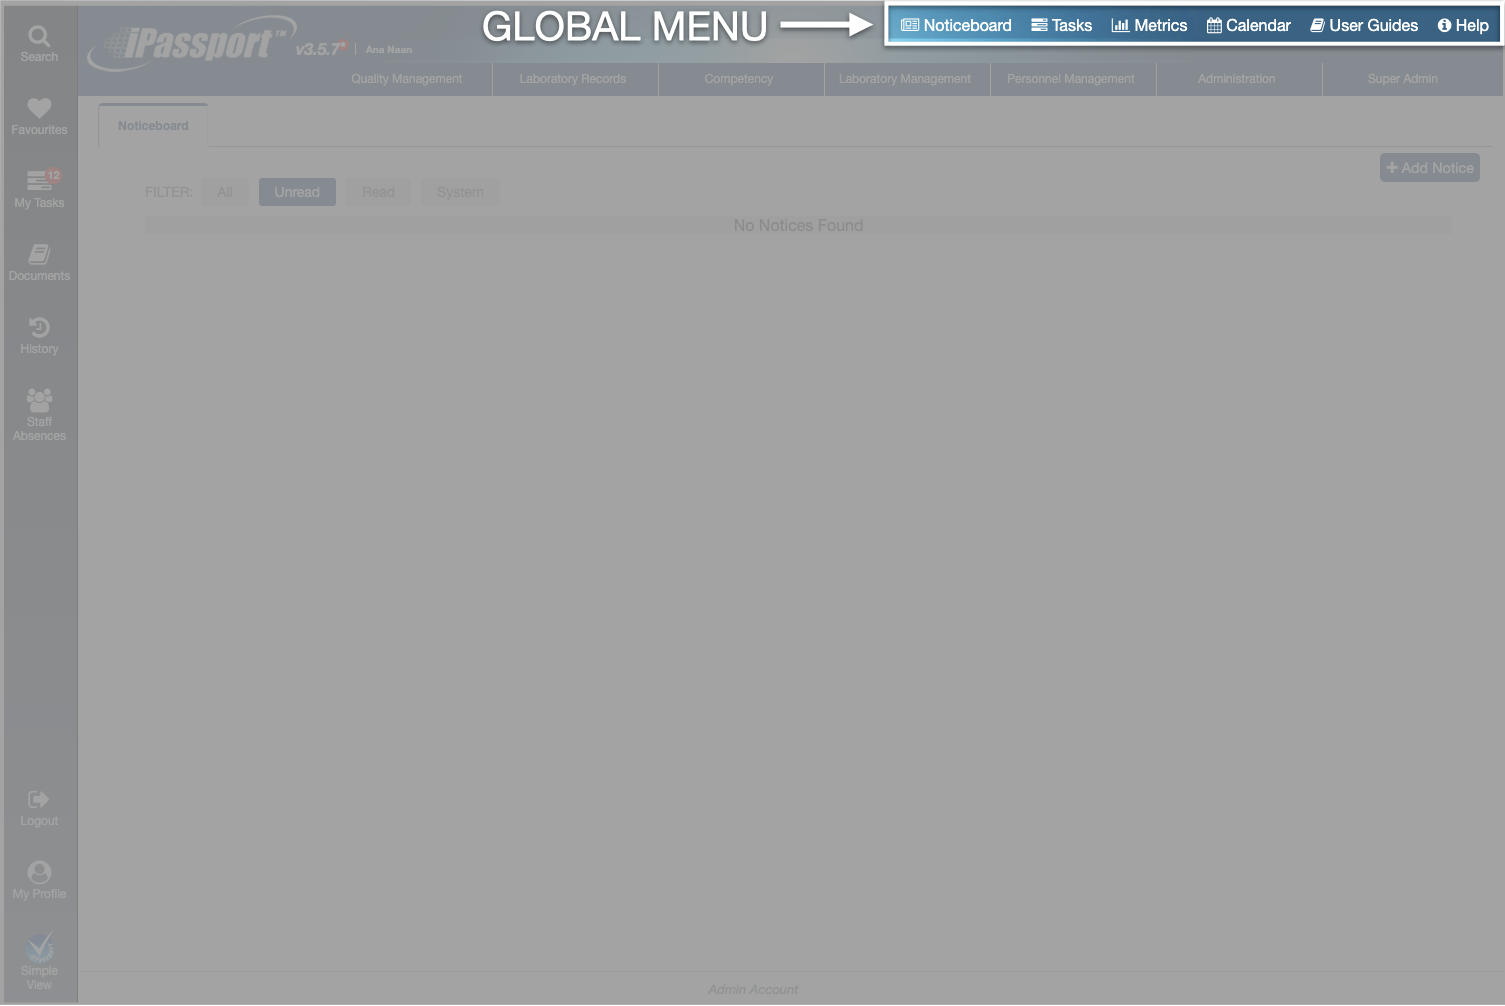
The global menu items, as the name indicates, include features that are not limited to a specific area or module – Noticeboard, Tasks, Metrics, Calendar, User Guides and Help. When you hover over them, the cursor changes into a ‘pointing hand’ icon, indicating they are selectable. None of these have sub-menus but some do offer more than one tab in the main area of the screen.
When there are unread notices or tasks to complete, the number of them will appear in a small red circle by the buttons, Noticeboard and Tasks.
Sidebar Menu Items
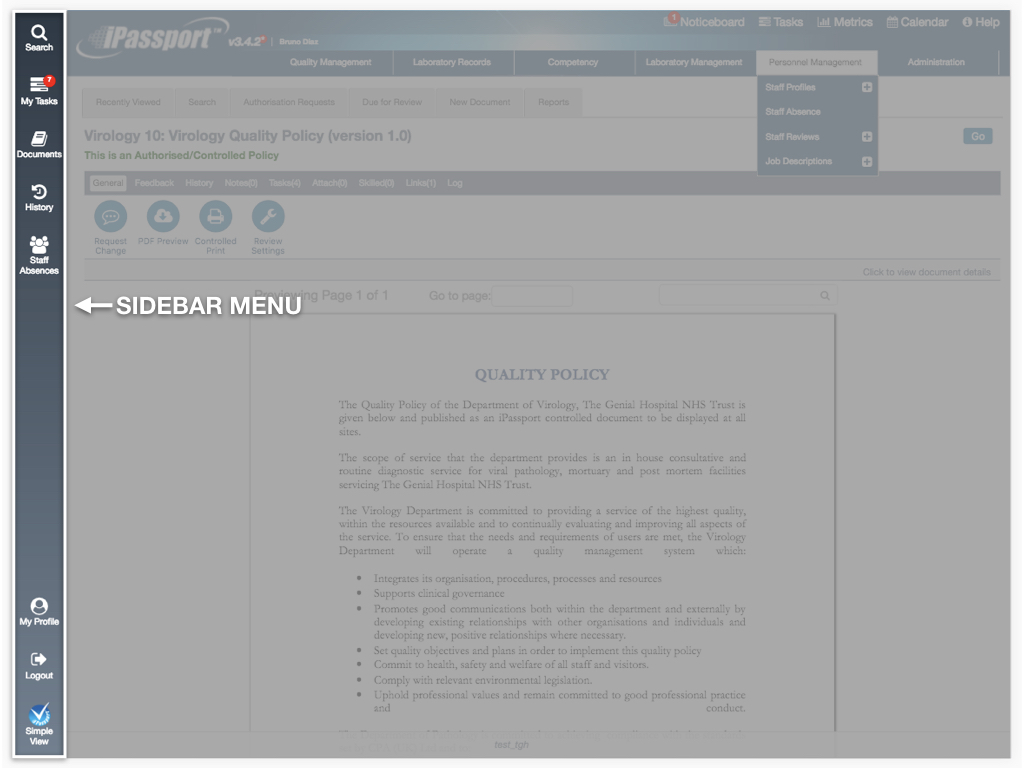
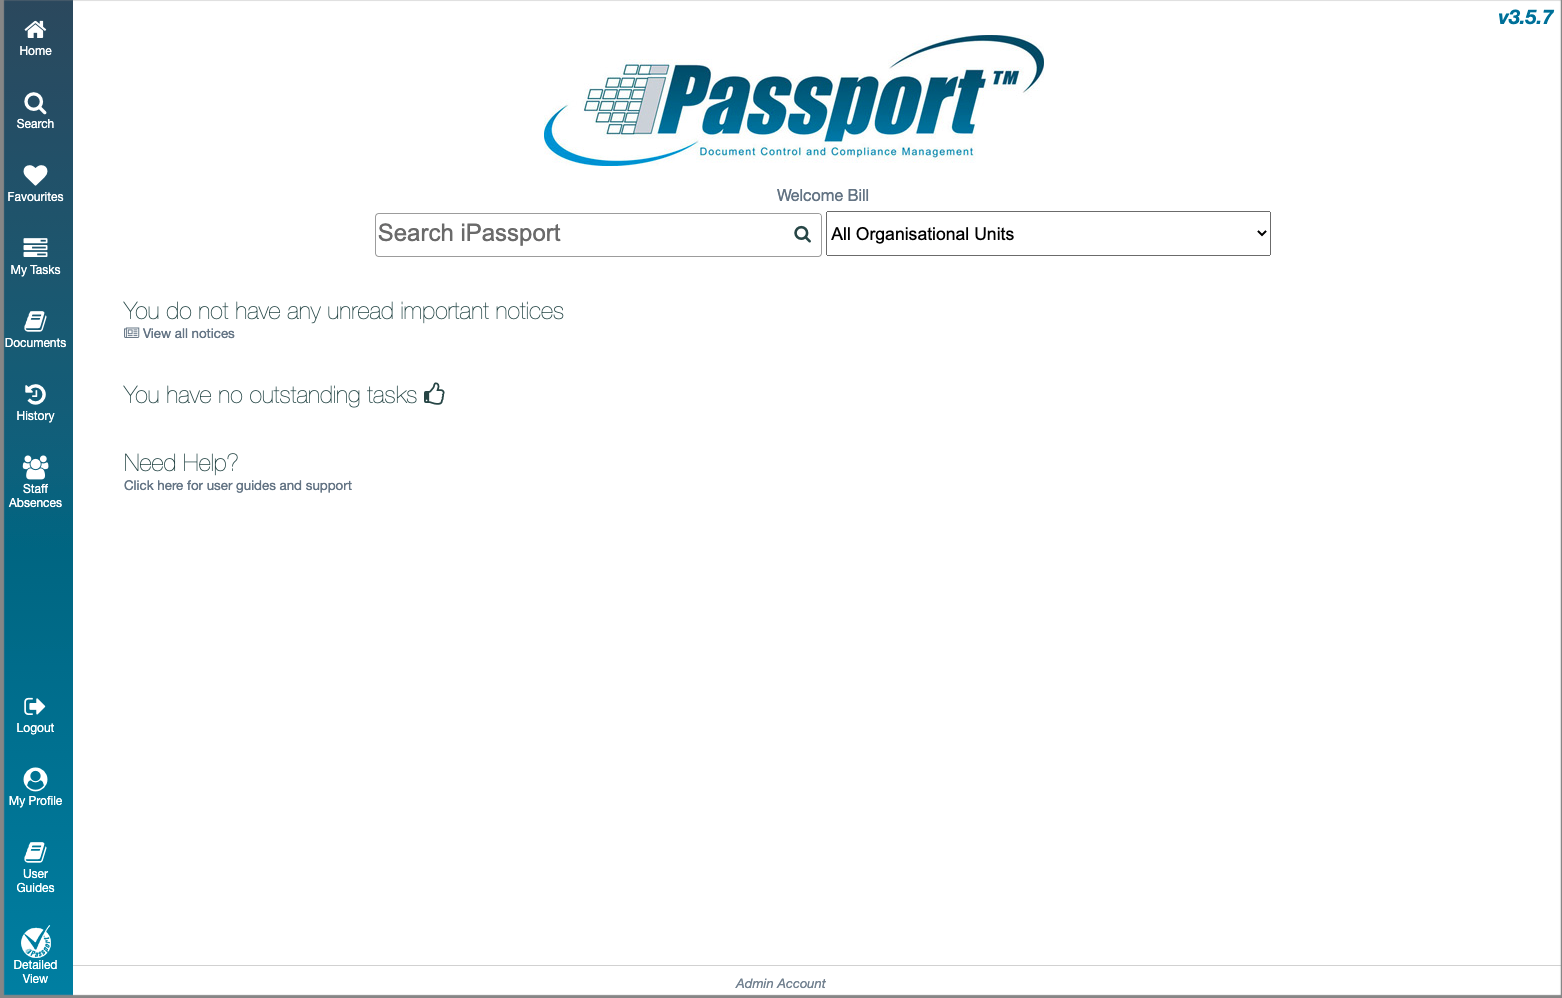
The Sidebar menu contains items that provide quick links like, My Tasks, Documents, History or basic actions like, Logout and Simple View. It also includes a comprehensive Search tool. Some items expand the sidebar to provide information and in general, this menu group is intended to expedite navigation within iPassport, always available from anywhere within the system. This is the only menu group that remains visible when in Simple View.
Main Menu Items
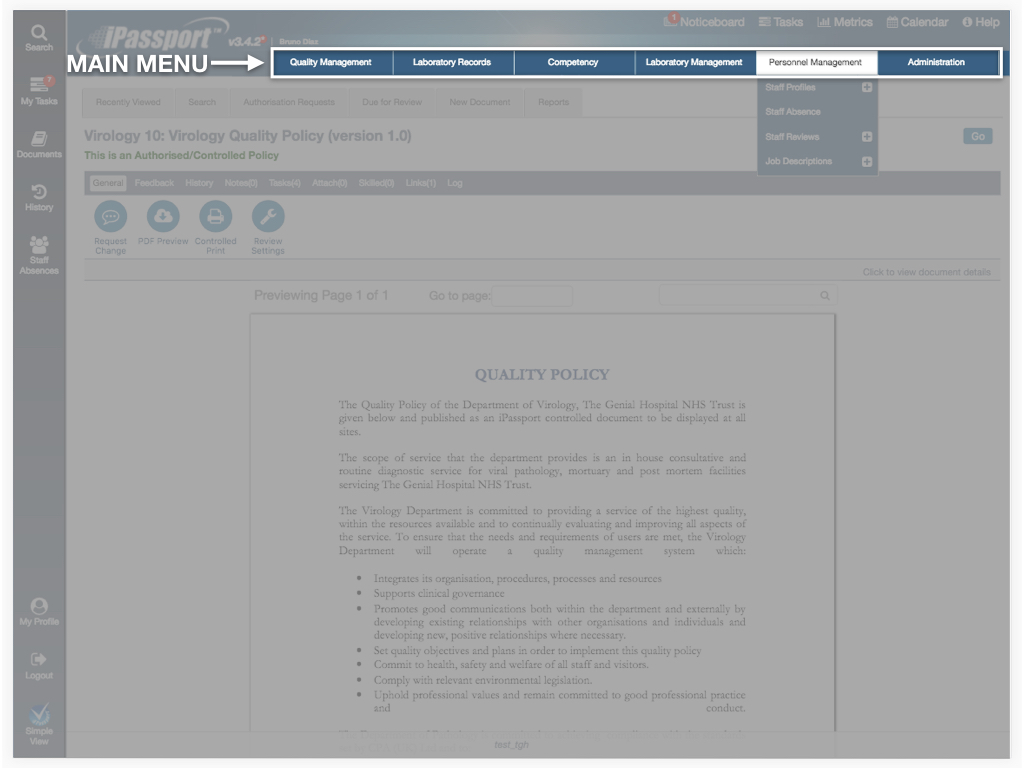
The main menu items are located along the bottom of the header area (blue in live accounts, red in training accounts). If all permissions are available to you then it will contain six items. Each item comprises a different module within the system.
Main Menu Categories
Access to the main menu, and indeed all menu items is controlled by the users’ permissions so that each user may see different menu items within their iPassport account. The main menu categories/modules are: Quality Management, Laboratory Records, Competency, Laboratory Management, Personnel Management and Administration. It is possible to change the language used, according to local conventions or requirements; these are the default terms used. For example, in some organisations, Laboratory Records are renamed simply as Records.
Sub-Menu Items
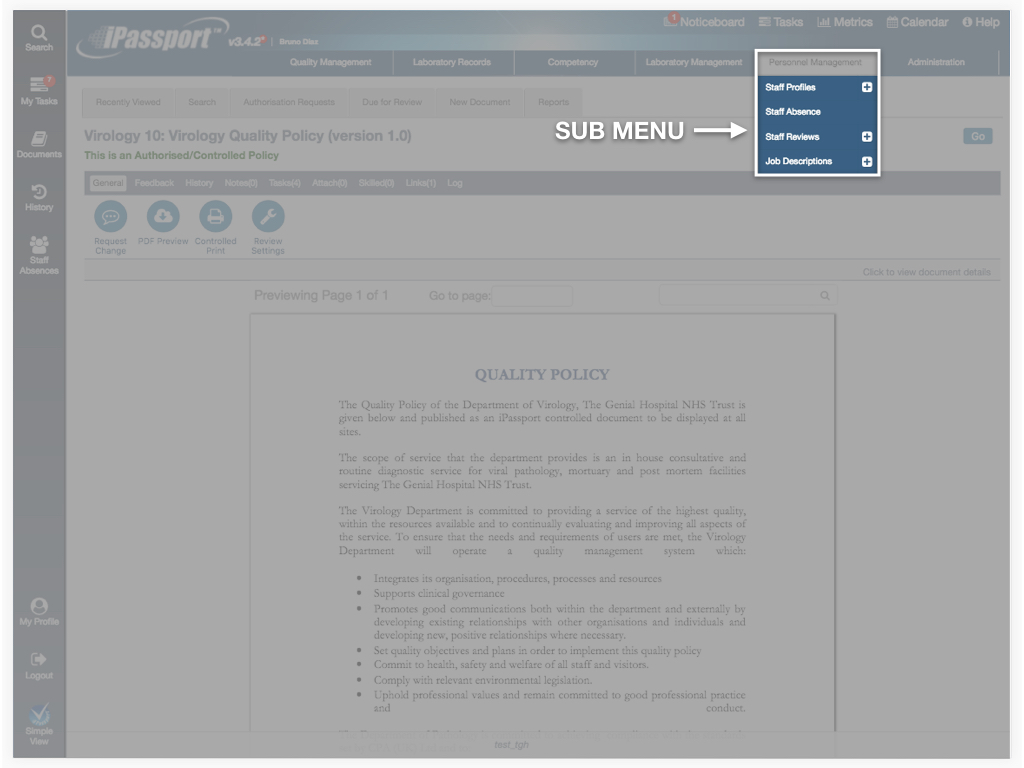
To enter the modules, hover the cursor over any of the main menu items and this will reveal the sub-menu items for that module. When a sub-menu option is selected, the program will open that section in the main area of the screen. Each section contains a collection of tabs and options related to that sub-menu. It will open to the default tab, which will be visibly highlighted.
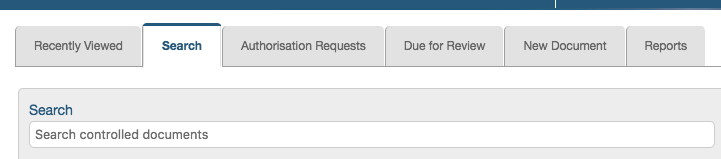
For example, if you hover over the Laboratory Records menu item, you will be able to locate the Controlled Documents sub-menu option. All selection within iPassport QMS is done through a single click. Therefore, to select the Controlled Documents sub-menu you would: Hover over the Laboratory Records menu, scroll down to the Controlled Documents sub-menu and then click it. iPassport QMS will load the Controlled Documents area and by default, it will open its Search tab. The main menu’s sub-items will remain visible until you move your cursor away.
Many sub-menu items have a plus sign [+] next to them. This is a shortcut to create a new record in that specific section.
Tab Items
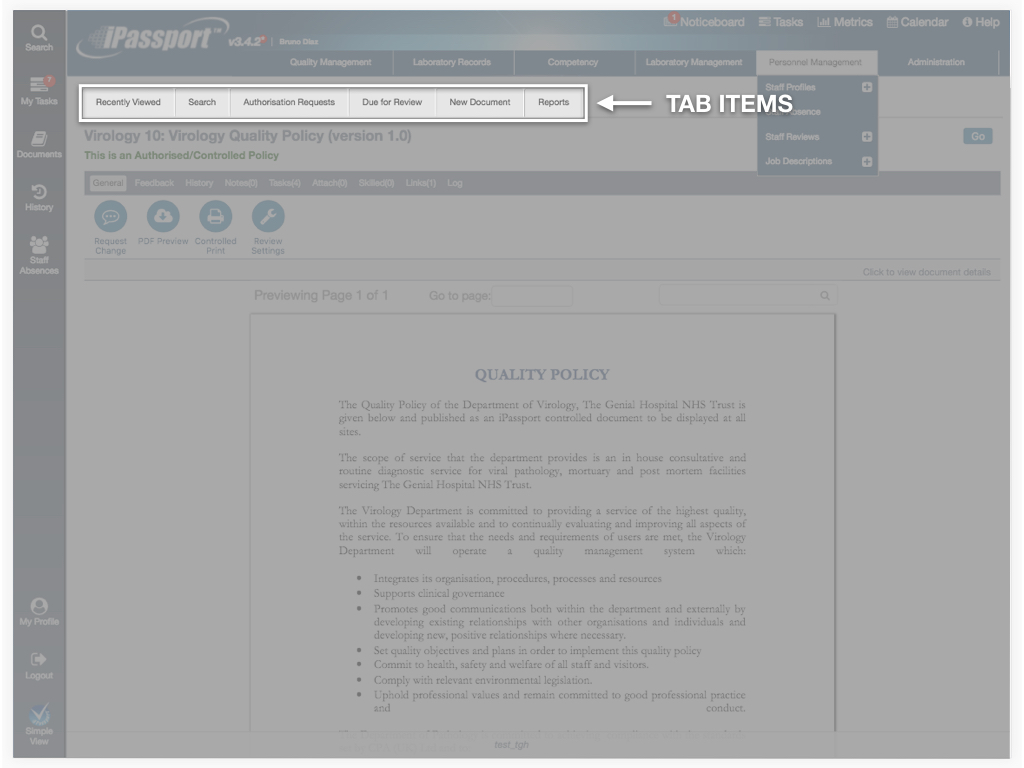
Tabs allow different screens that are within the same sub-menu to be accessed, tab items are stored from left to right on the page and can be found below the main menu bar, just above the actual screen.
The currently selected tab will stand out from the rest, with blue lettering over a white background, while the rest will have dark grey lettering over a light grey background. To select any of these tab items, simply click it and the page will load. It is possible to access any of the other tabs once the first has been loaded by simply clicking them.
Record Tab Items
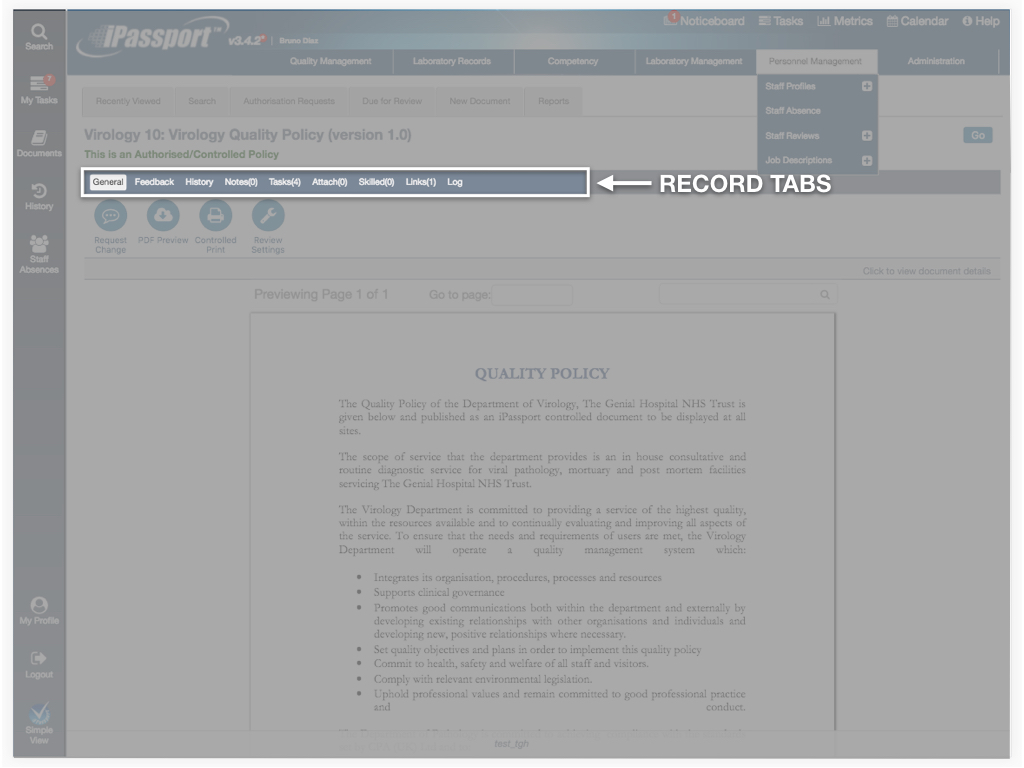
When tab items are used to navigate to a record (e.g., a controlled document, a non-compliance or a staff record), another set of tabs will be available in a grey bar below the record title. These tabs navigate to areas that are specific to that record.
Returning to the Home Page (Default Screen)
Returning to the Home Page (Default Screen) at any point is simple, click the “iPassport TM” logo in the upper left section of the screen. This will return the system to the default screen, set in user preferences (My Profile > Preferences > Left Menu Bar and Home Page).
Software Update Information (iPassport Change Log)
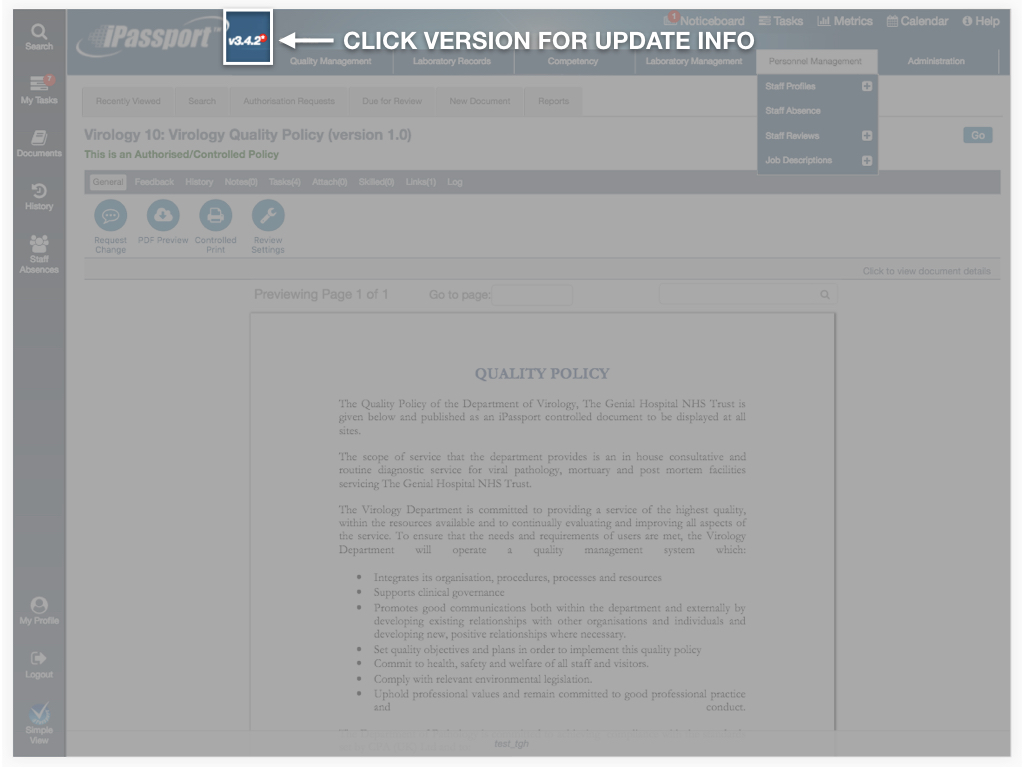
Whenever an update is released, a star in a red circle next to the version number, will alert you of any changes made to the system. The star disappears once the change log has been visited. To view the iPassport Change Log, simply click the version number by the iPassport logo.
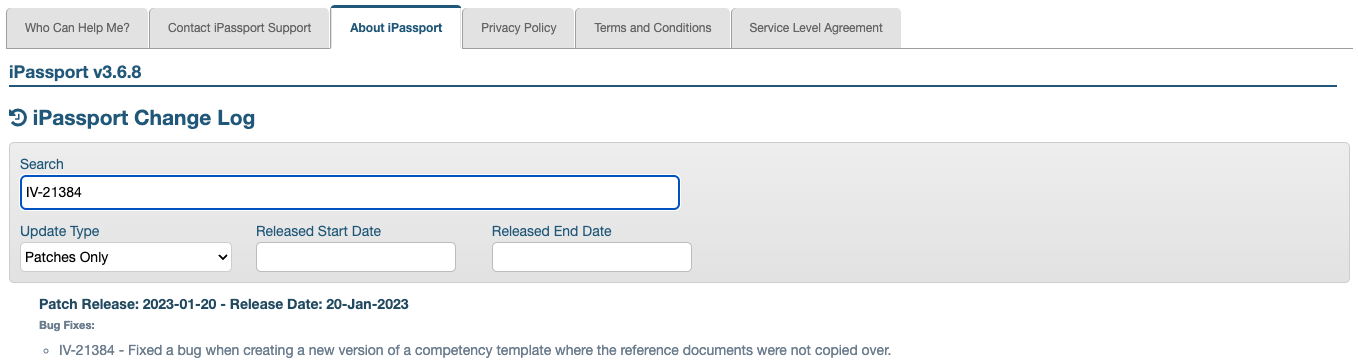
A Search field is available to locate information about software updates. There are two update types - ‘releases’ and ‘patches’ (which refer to bug fixes). The ‘Update Type’ filter allows choosing either or both from its dropdown and the ‘Date’ filters allow setting a date range for the search.
When anyone raises an iPassport bug, it gets assigned a ticket number, it's scored and prioritised, and then it's added to the queue. The developers pick them from the top of the list to promptly resolve them. We therefore can't predict when a bug fix will be released and using the iPassport Change Log is the best way to find out if a patch has been applied.
My History
Given the flow of information and processes within iPassport, the system doesn’t support the ‘back’ button on web browsers. We strongly recommend avoiding use of it and instead, we provide a History button (located on the Sidebar menu) which logs the 30 previous screens or records that have been accessed. Each user has their own history to navigate back to any of these hyperlinked items by simply clicking them. Once they are clicked, the application will open the screen or record that was previously viewed or worked upon. This list is updated each time a new screen or record is accessed and it persists between sessions, remaining available the next time the user logs in.
Simple View
Users can be limited to only access Simple View to reduce the amount of training required to complete their tasks. It’s also a practical interface when using mobile devices to view reference material or complete a task. Switching between views is instantaneous, with no need to log out, so experienced users can quickly move between views as required.
The only menu available in Simple View is the Sidebar menu, in addition to the items on the Home page. This welcome screen includes key menu items from the Global Menu in Detailed View. It contains a global Search field, which will cover all the areas and records that the user has permission to access, an Important Notices area, which can also access all notices, a Tasks area, which lists the user’s pending tasks and a Help area.