- Standards Editor
Standards Editor
Introduction
This guide shows how standards can be created within iPassport. iPassport provides a tool to import whole standard sets when they are prepared in CSV format. However, they can also be entered individually to build them manually if required and there might be times when internal standards want to be created.
A subscription or licence may be required from the standards issuing authority before they can be imported.
iPassport Permissions Required
The permissions relevant to standards are the following:
Standards:Archive Standards
Standards:Authorise Standards
Standards:Change Status
Standards:Create
Standards:Create New Version
Standards:Delete Standard Sets
Standards:Edit Standards
Standards:Import Standards
Standards:Link To Records
Standards:Remove Links
Standards:Search Standards
Standards:View Archived Standards
Standards:View Draft Standards
Standards:View History
Standards:View Standards
They are all included in the system roles, Global Editor (excluding admin and personnel records), Global Editor (excluding admin) and Standards Editor.
Creating a New Standard Set
The standards module is found under Quality Management > Standards.
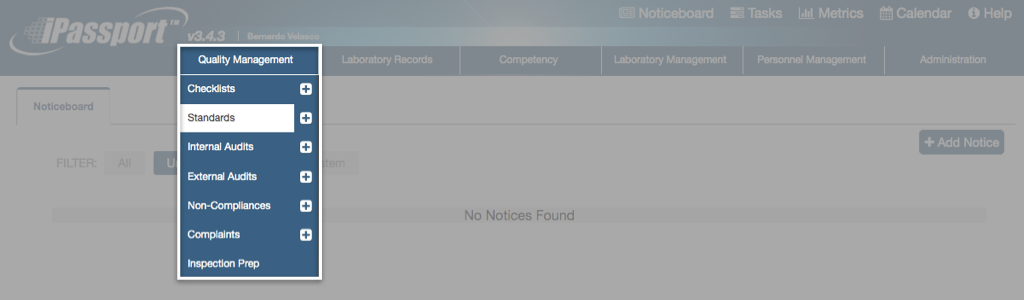
5 tabs are available and the standards editor is found under the tab, Create Standards.
Standards must be placed in a specific OU but the same standard set can be added to different OUs.
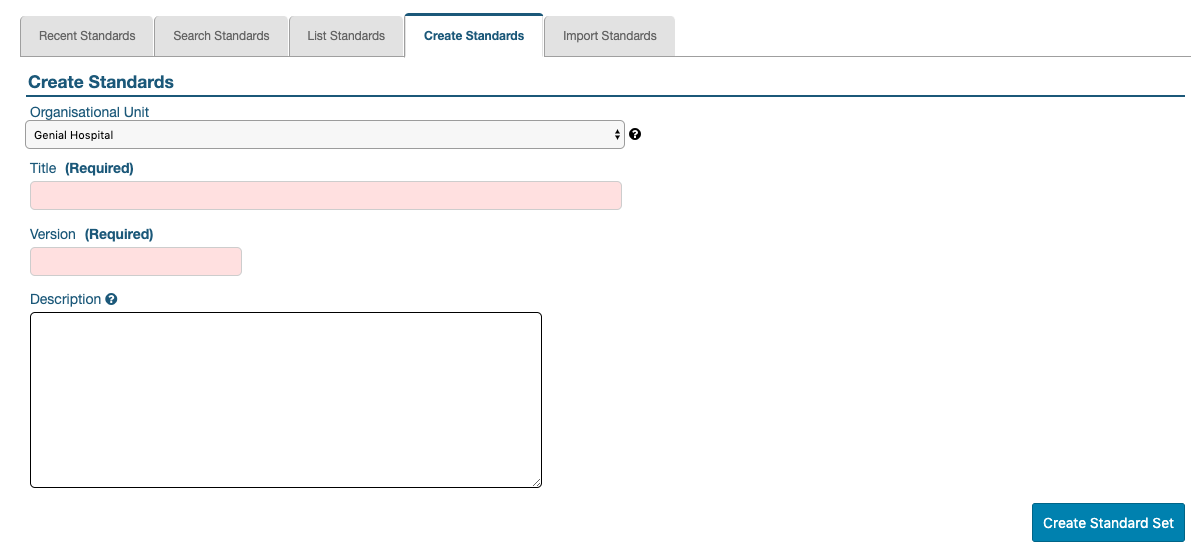
To create a new standard:
- Click the Create Standards tab to open it
- Click in the Organisational Unit field and select an OU from the dropdown menu
- Enter a title in the Title field; this is required and it should be an accurate description of the standard set
- A version must be entered in the Version field; the year of the standard set edition is commonly used here
- Adding free text in the Description field is optional
- Click Create Standard Set to complete the step
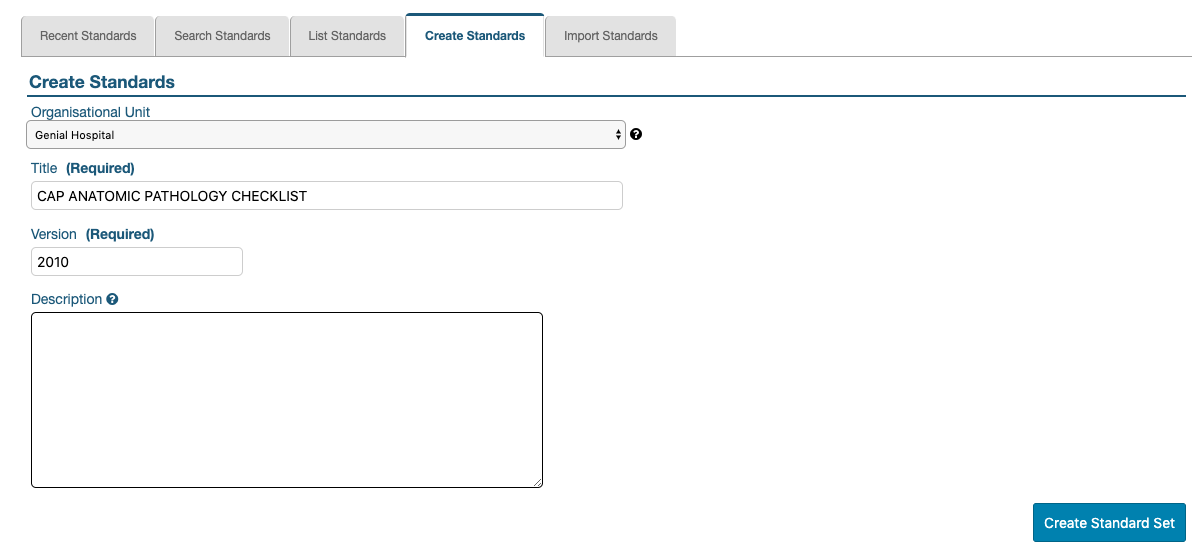
To illustrate, an example will be followed using the standard set, CAP ANATOMIC PATHOLOGY CHECKLIST.
Populating the Standard Set
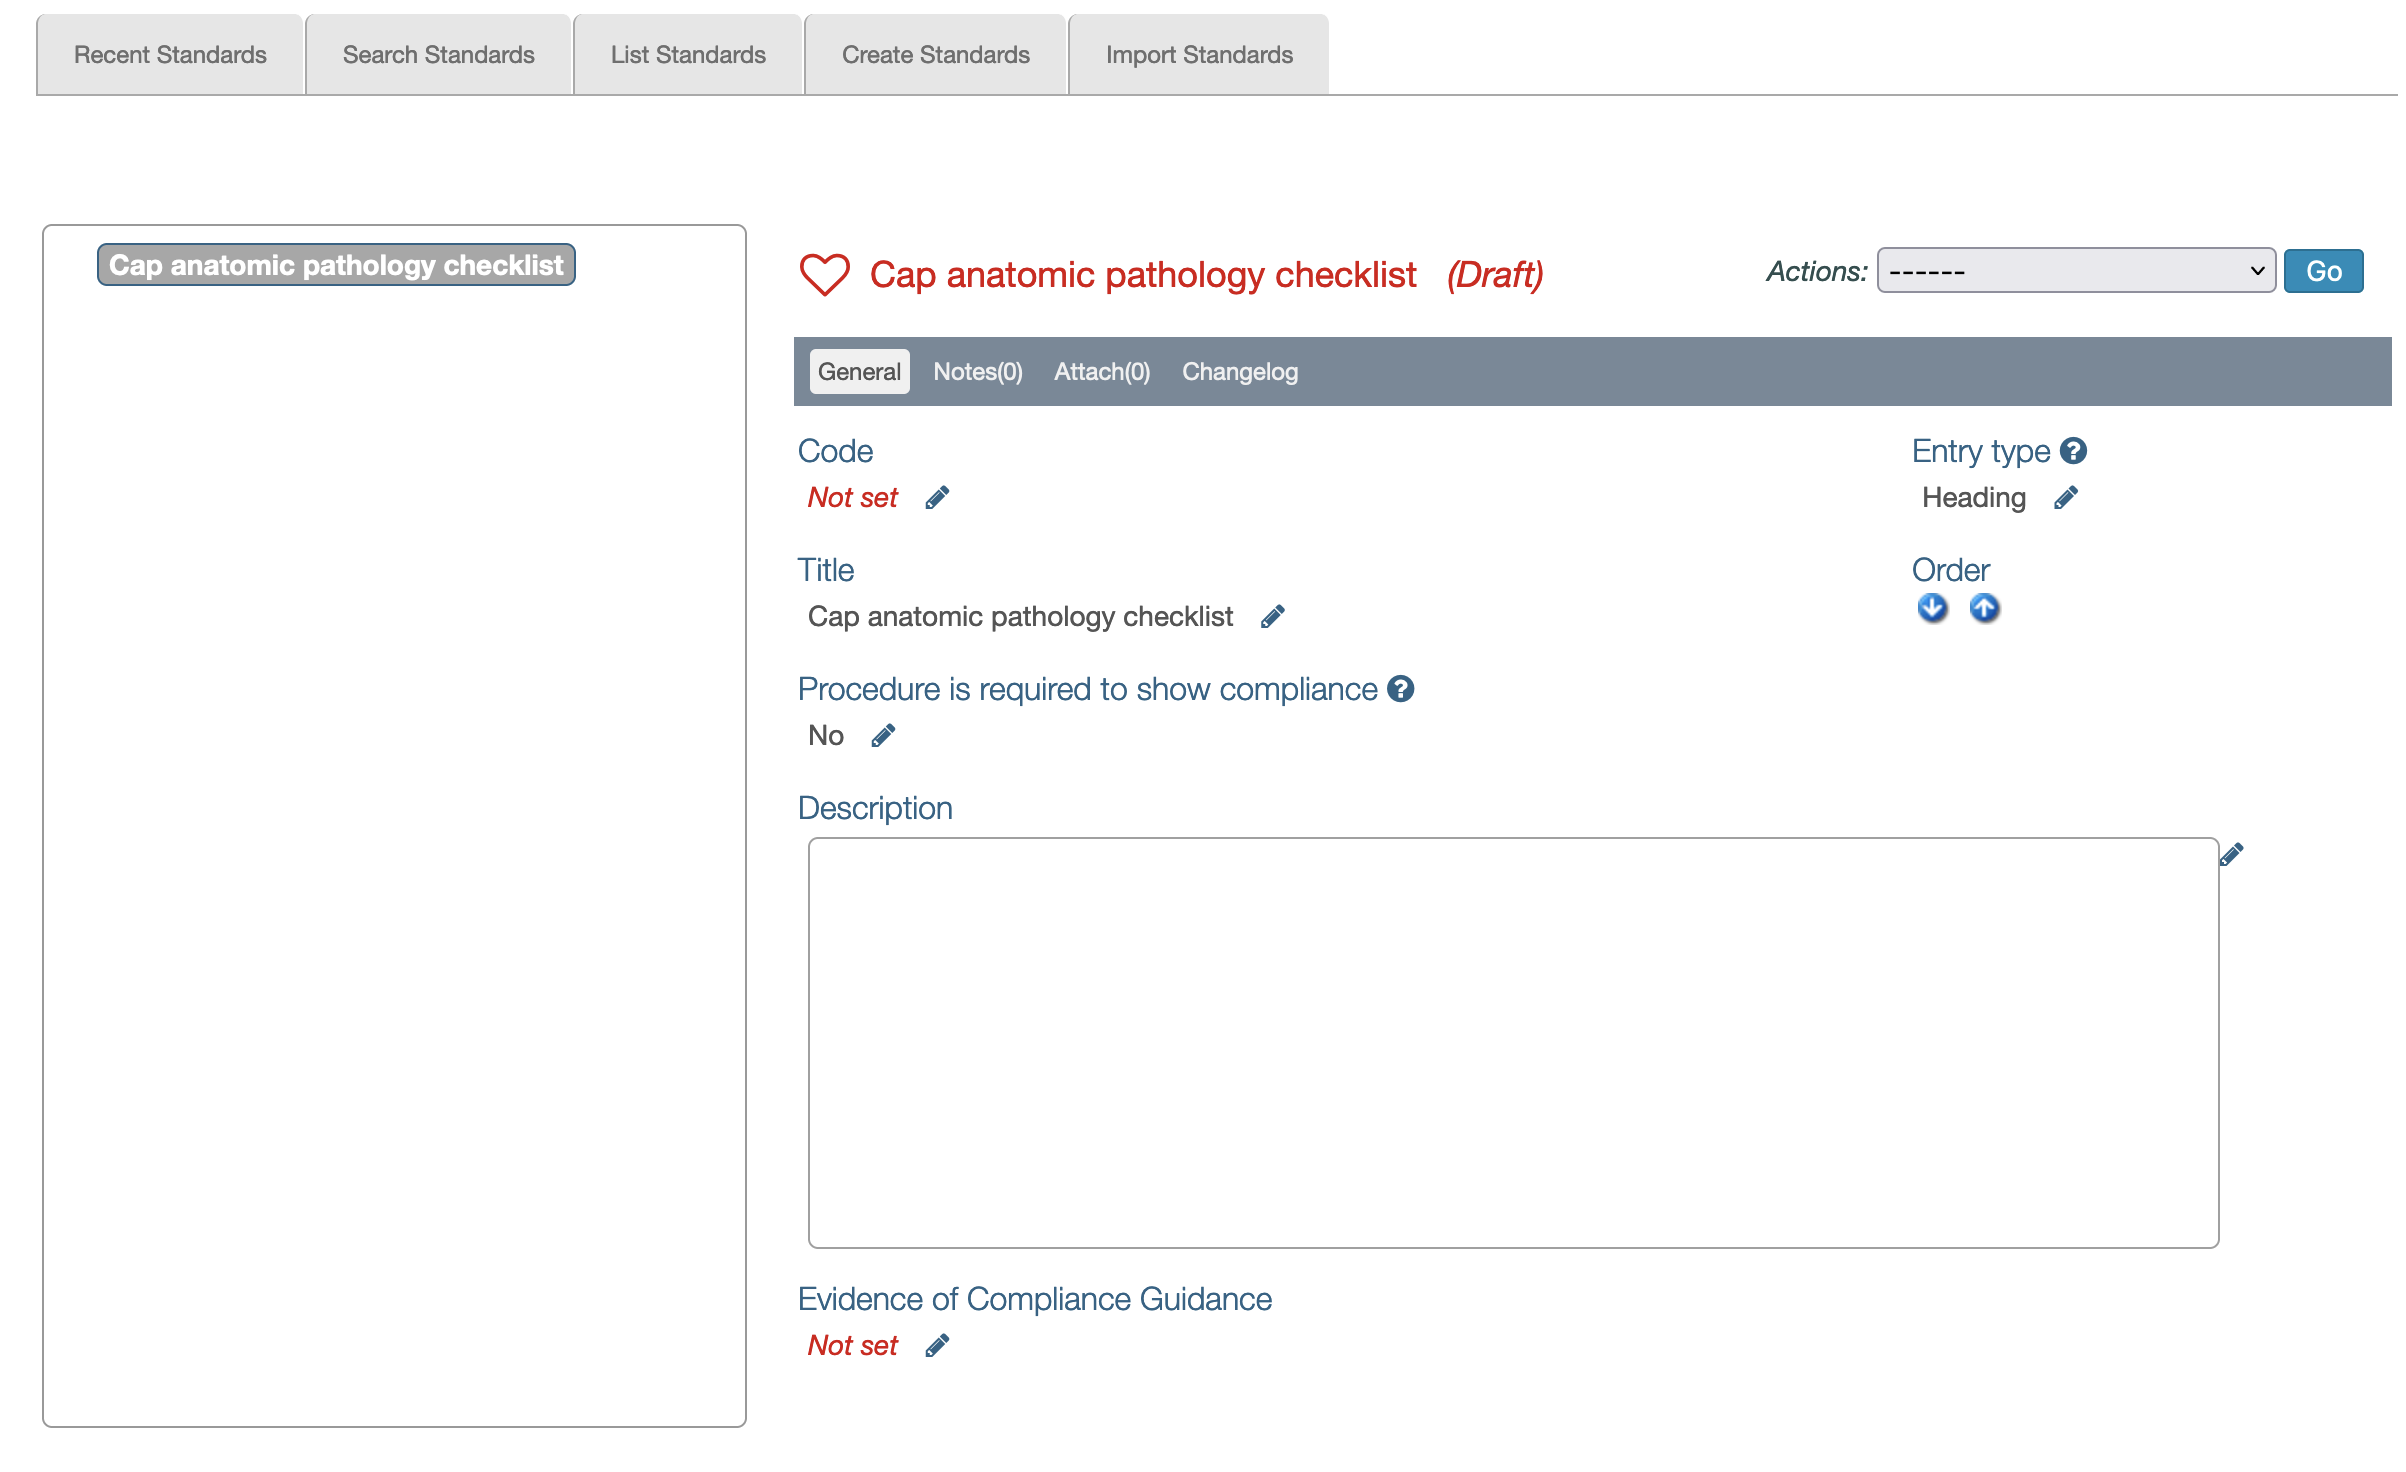
Once created, the screen refreshes to display the standard set. A section on the left shows a tree structure view of the standard set, which at this stage only has one entry - the title, entered in the creation step. This is now the root node and all sections will stem from it.
The right portion of the screen offers tabs and fields which relate to the currently highlighted item in the tree structure view.
To add a new node:
-
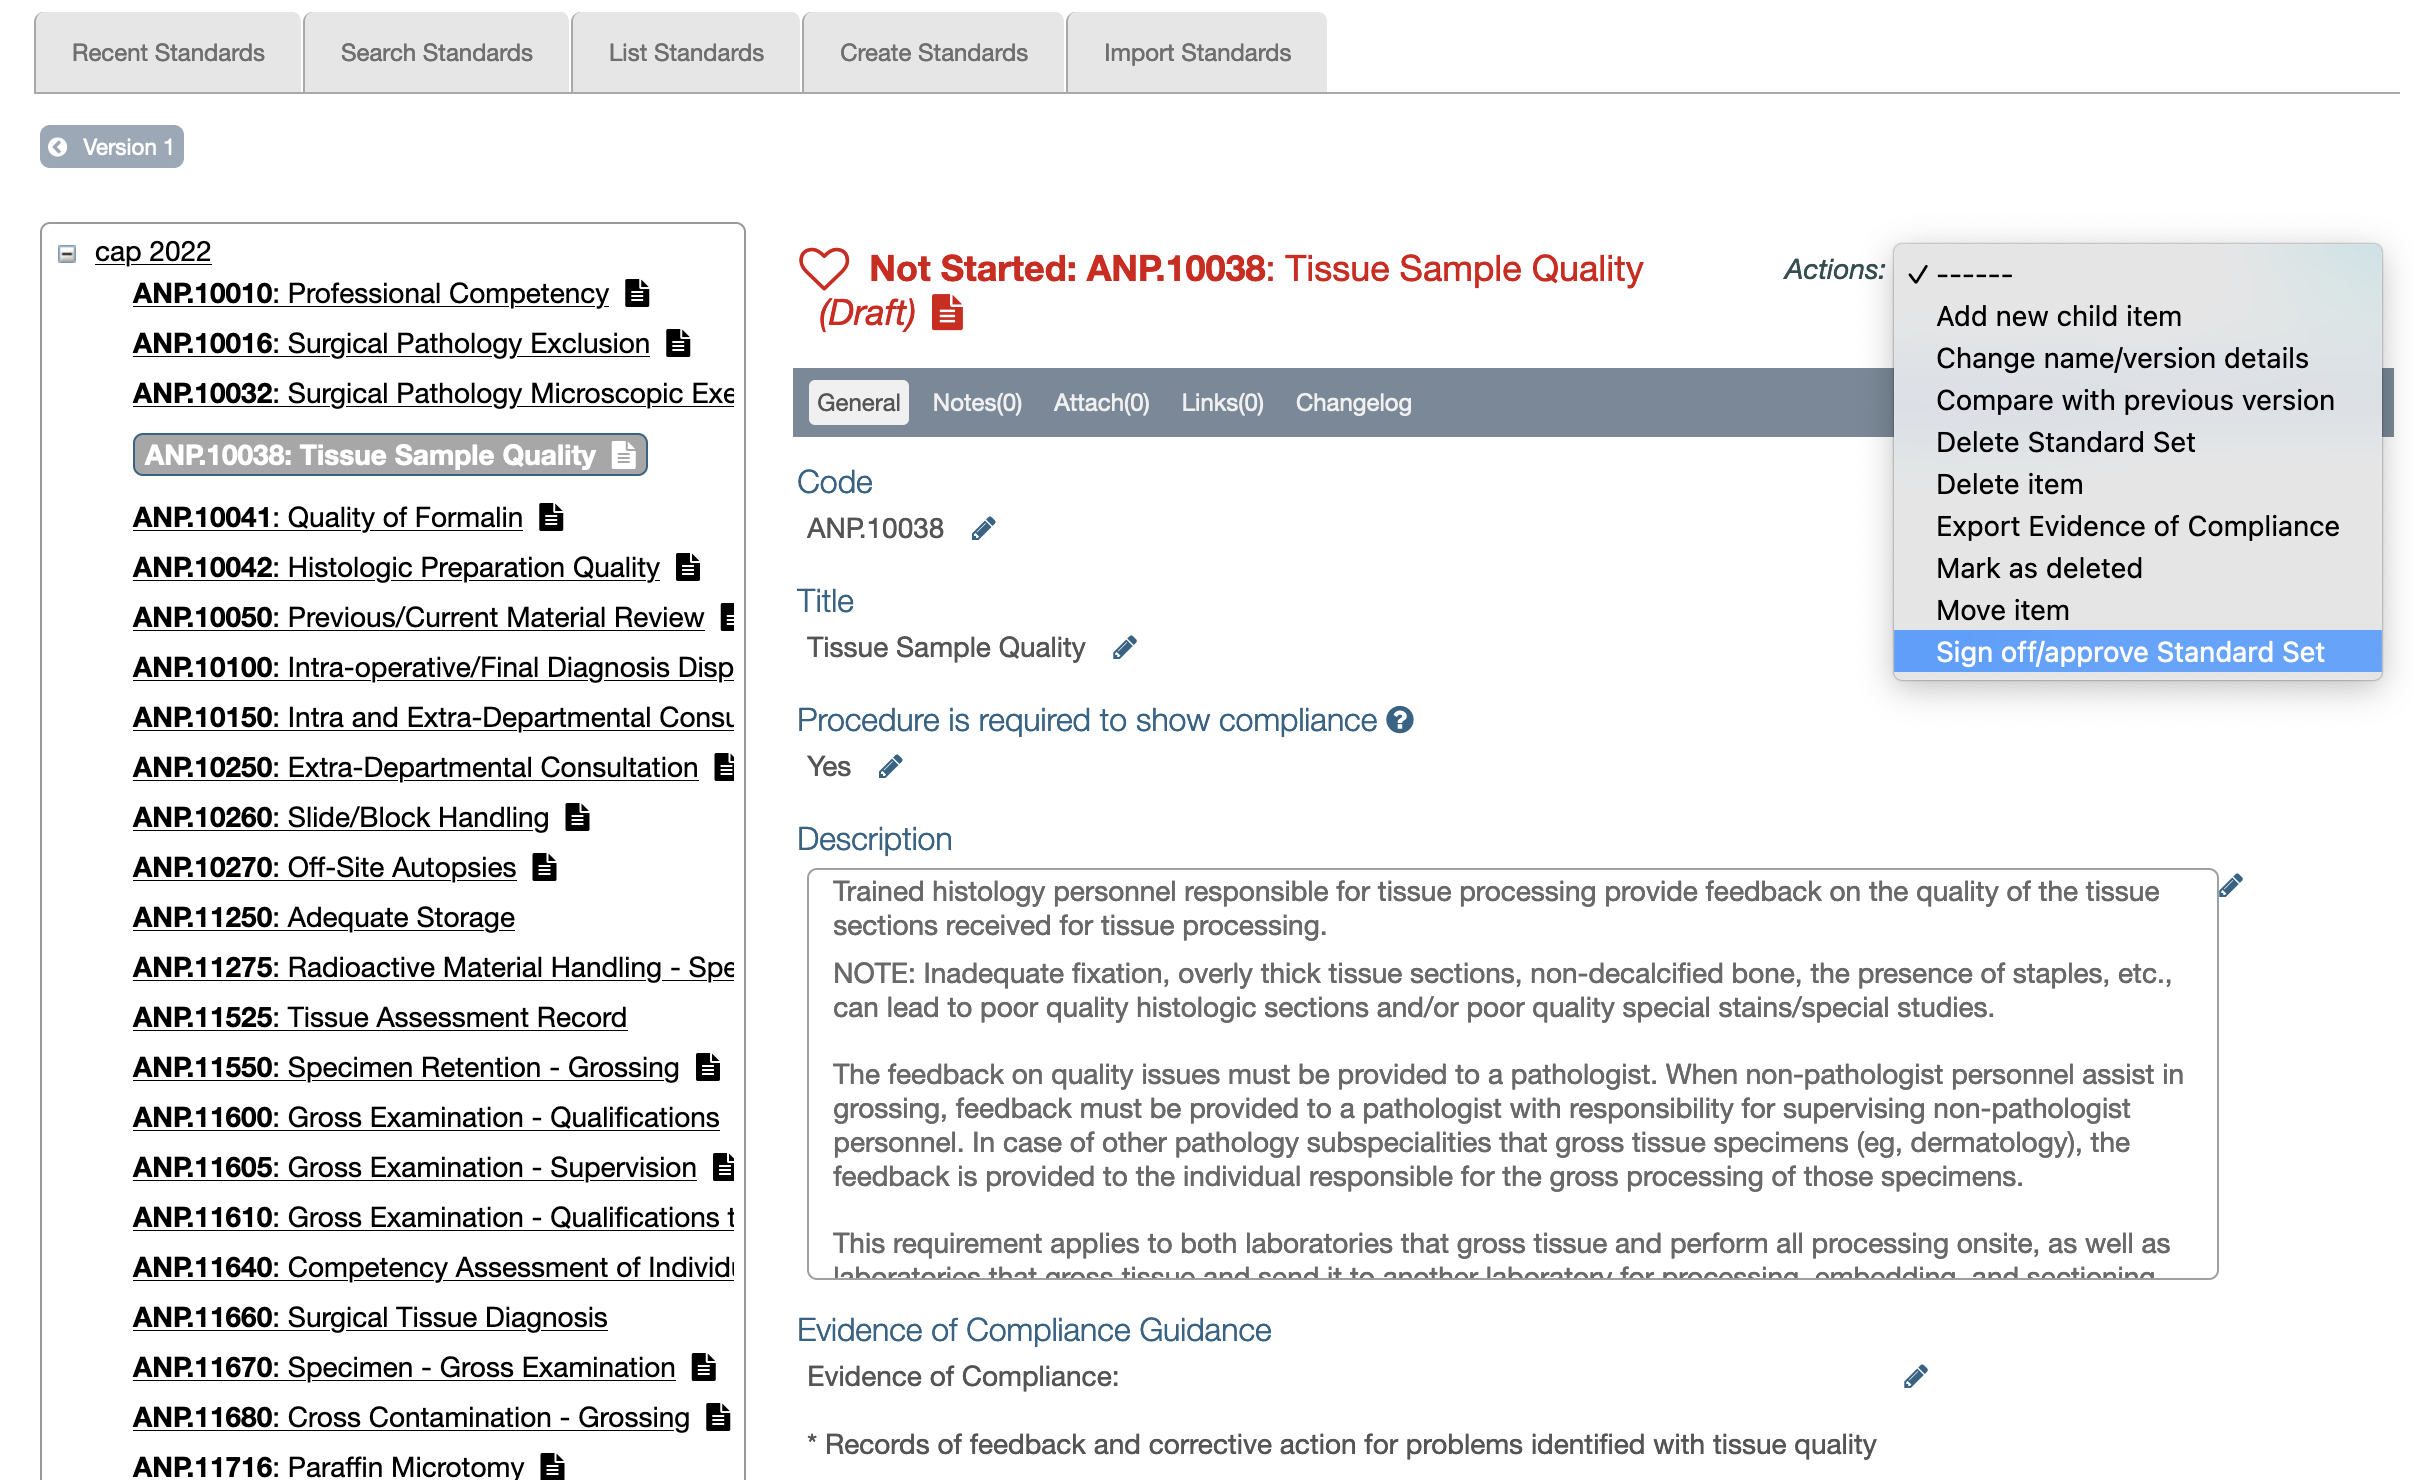
Click in the Actions field (to the right of the standard set title) and select Add new child item from the dropdown menu
-
Click Go (the item will appear on the left, under the root node and labelled, “No title”)
NOTE: A child item can be a Heading or an Entry (Entry Type); an Entry is considered a Standard, while a Heading is not. Headings don’t require a Code.
-
Add a code (when required) by clicking the edit (pencil) icon under Code, entering it in the field that becomes available and clicking Save
-
Add a title by clicking the edit (pencil) icon under Title, entering it in the field that becomes available and clicking Save
-
Click the edit (pencil) icon under Entry Type, click in the text box, select Heading or Entry (only a Standard should be of the type, Entry) and click Save
-
Click the edit (pencil) icon to the right of the Description field to open a text editor; text can be pasted here
NOTE: The Standard description text editor has tools to allow adjusting the format of a body of text that has been copied and pasted in.
TIP: For a double return, press Return; for a single return, press Shift+Return -
Click Save to close the text editor and return to the standards page
-
If required, click the edit (pencil) icon under Evidence of Compliance Guidance, click in the text box, enter pertinent text and click Save
CAP checklists (seen as Standard Sets by iPassport) have the column, “Evidence of Compliance” that corresponds to this field. For other standards, this can be a user created text or it can be left blank.

-
Before adding a new child item, click its parent in the tree view to achieve the intended hierarchy; the selected item is always visibly highlighted in the tree view section
-
The Up and Down arrows under Order can be used to reorganise items under the same parent
To relocate an item under a different parent:
- Select (highlight) the item in the tree view section
- Select Move item from the Actions dropdown menu
- Click Go
- Find the new parent for the item by entering its name (even partially) in the search filter, or scrolling down the list
- Click the radio button next to the new parent item
- Click Move item
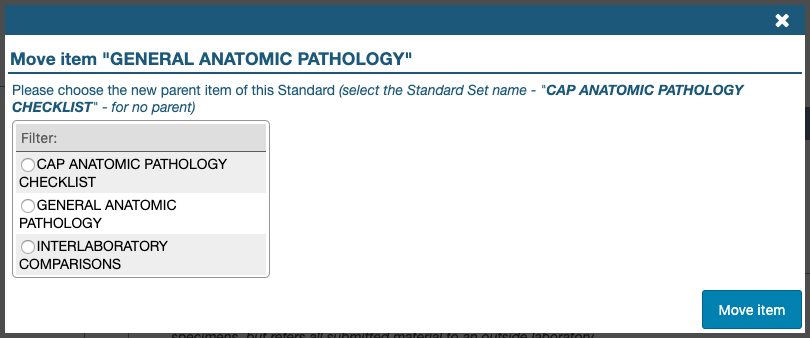
If an item is a parent of other items, the children will be moved together with the parent item.
If the tree view doesn’t refresh, navigate away and back to the Standard Set to see the move applied.
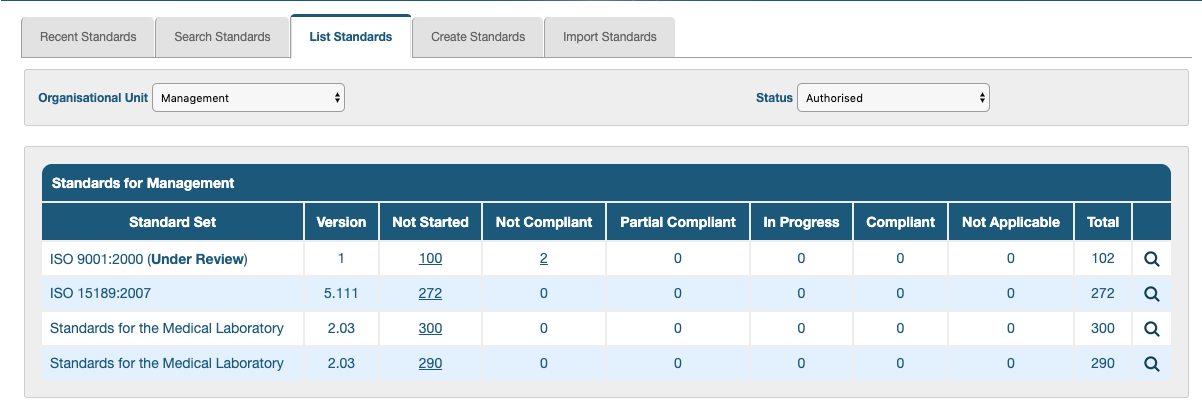
To navigate back to a draft standard:
- Go to Quality Management > Standards > List Standards
- Narrow the search by using the OU filter
- Set the Status filter to Draft so it can be found
Editing and Deleting Items from a Standard Set
All of the items within a standard set can be edited while it’s in draft state. To edit any content, the item must be selected (highlighted) in the tree view section to reveal all of its fields on the right. Clicking the pencil icon that appears under each field, opens an area to edit and then save the change.
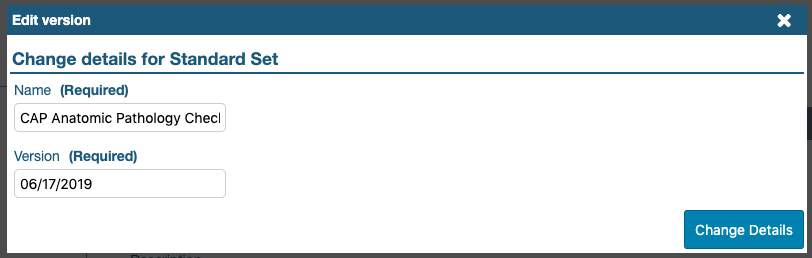
To change the name or version of a standard set, while in draft mode, go to the Actions dropdown menu and select, Change name/version details. This opens a lightbox (pop-up window) with editable fields for Name and Version. To save changes, click Change Details.
While in draft state, items can be deleted by highlighting them (clicking them in the tree view), going to the Actions dropdown menu and selecting, Delete item. If an item is a parent of other items, it can’t be deleted. The system first produces a message to acknowledge the request to delete the item and then produces another message saying, “This Standard cannot be deleted as it is the parent item of others, please delete all child items first”. Once all the children items are individually deleted, the parent item can be deleted as well.
NOTE: Certain browsers may offer the option, “Do not show this message again”. If this option gets ticked by the user, it will prevent deleting further items. Close and reopen the browser to remedy this.
Comparing Versions of Standards
When standards are updated by the issuing authority or internally, new versions can be created within iPassport to keep the system up to date. Information about this can be found in the user guide, Standards Importer.
The differences between two consecutive standard sets can be viewed at any time by navigating to the more recent set, selecting, “Compare with previous version” from the Actions dropdown menu and clicking Go.
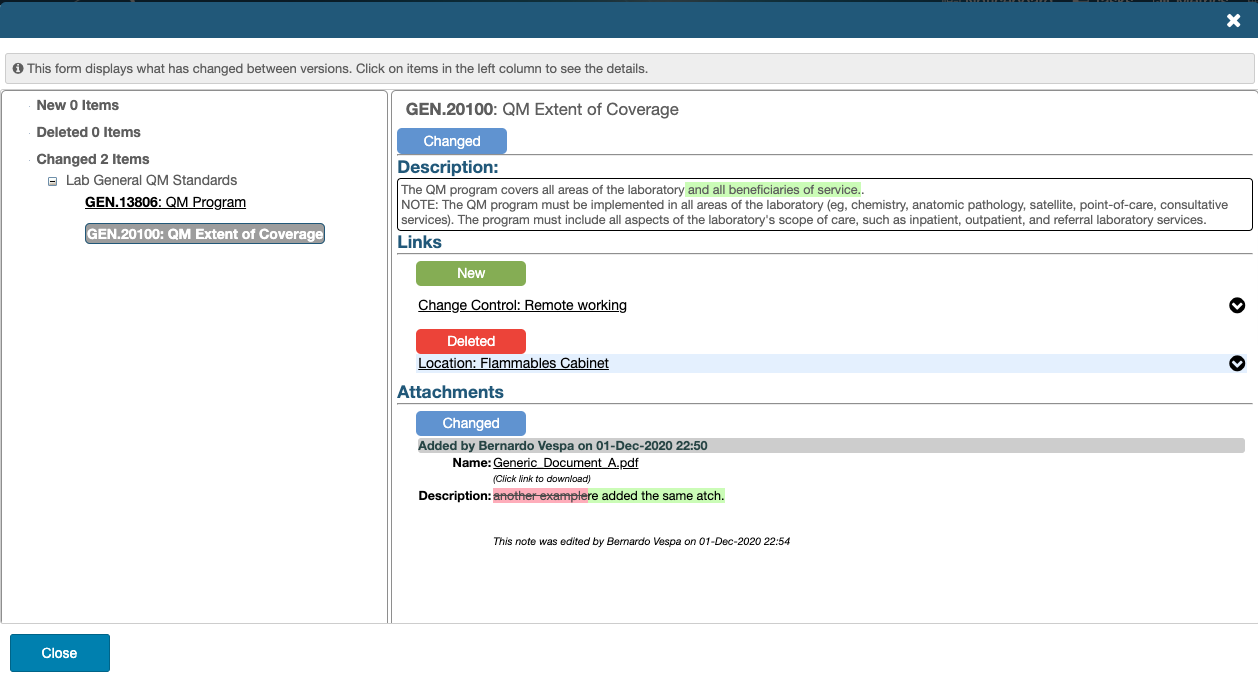
The lefthand part of the lightbox has three sections - ‘New Items’, ‘Deleted Items’ and ‘Changed Items’. Each section will only list relevant items in a tree form; when clicked, any item which has children will expand to display its items.
The details themselves are displayed in the righthand side of the lightbox when a bottom level item is clicked. Added text, links or attachments are highlighted in green; removed text, links or attachments are highlighted in red. It is possible to jump to any of the links or attachments in this lightbox.
Delete the draft Standard Set
The whole standard set can be deleted, while in draft mode, by selecting, Delete Standard Set from the Actions dropdown menu. A message pops up asking to confirm this operation before the set is removed.
Authorising a Standard Set
Once the addition of the standard set has been completed and it’s ready for release, it needs to be authorised so it can be used within the system.
To authorise a standard set:
-
Go to the Actions dropdown menu and select, Sign off/Approve Standard Set
-
Click Go
Once a Standard Set is signed off, this operation can not be undone
-
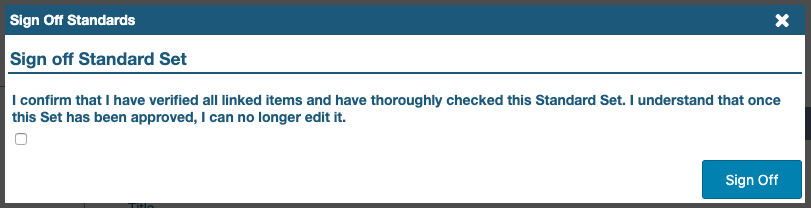
In the Sign Off Standards lightbox, tick the checkbox to confirm that the set has been thoroughly checked and to acknowledge that no changes can be made after it has been approved
-
Click Sign Off
Archiving a Standard Set
When a standard set is no longer used or wanted, it can be archived and permanently removed from view. The permission, Standards:Archive Standards is required.
To archive a standard set:
-
Go to the Actions dropdown menu and select, Archive Standard Set
-
Click Go
Once a Standard Set is archived, this operation can not be undone
-
Click OK in the dialog box that pops up to confirm the operation