- Equipment Importer
Importing Equipment in Bulk from Excel™ Sheets
Introduction
There are times when multiple equipment records need to be loaded into iPassport and the New Equipment feature only allows loading one at a time. To make this process more efficient, the Import Equipment feature allows loading a number of equipment records in one operation with the aid of an Excel™ sheet.
Equipment records carry many parameters, so the spreadsheet includes 34 columns but not all need to be populated to initially create the equipment records.
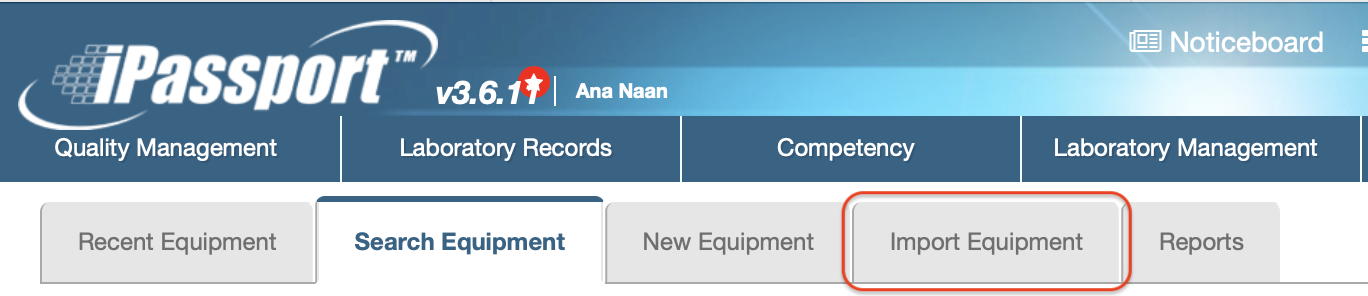
The importer tool can be found in the ‘Equipment’ area by navigating to ‘Laboratory Records > Equipment > Import Equipment’:
Records uploaded to the staging area of importer tools will not be added to the account until the final import operation is completed. They will remain in a ‘reception’ area until all parameters are validated and one of the import options is clicked.
Permissions
The Import Equipment section, is only visible to users with the permission, “Equipment:Create Equipment” (included in the system roles, “Equipment Editor”, “Global Editor (excluding admin)” and “Global Editor (excluding admin and personnel records)” ). The user performing the operation will need this permission in all OUs listed in the CSV file being imported.
Features and Considerations
A new framework has been developed for this tool and other importer tools in the system. The aim is to make it easier for users to quickly populate their iPassport accounts with information migrated from other systems.
- This importer tool accepts spreadsheets in Excel™ format (.xlsx) as well as in CSV format. There is no need to convert ‘.xlsx’ files to CSV here.
- The importer progressively validates the information, so large numbers of records can be processed.
- The staging area provides a much clearer and easier environment to edit the metadata and fix problems where required.
- When a record is marked as duplicate (within the staging area), the status will not be automatically cleared if the original record is deleted or uploaded. If the duplicate record is edited, after the original one is removed, the system will revalidate it and clear the ‘duplicate’ flag.
The data can be uploaded to a staging area in three steps and can then be checked and adjusted before importing it to the records within the account.
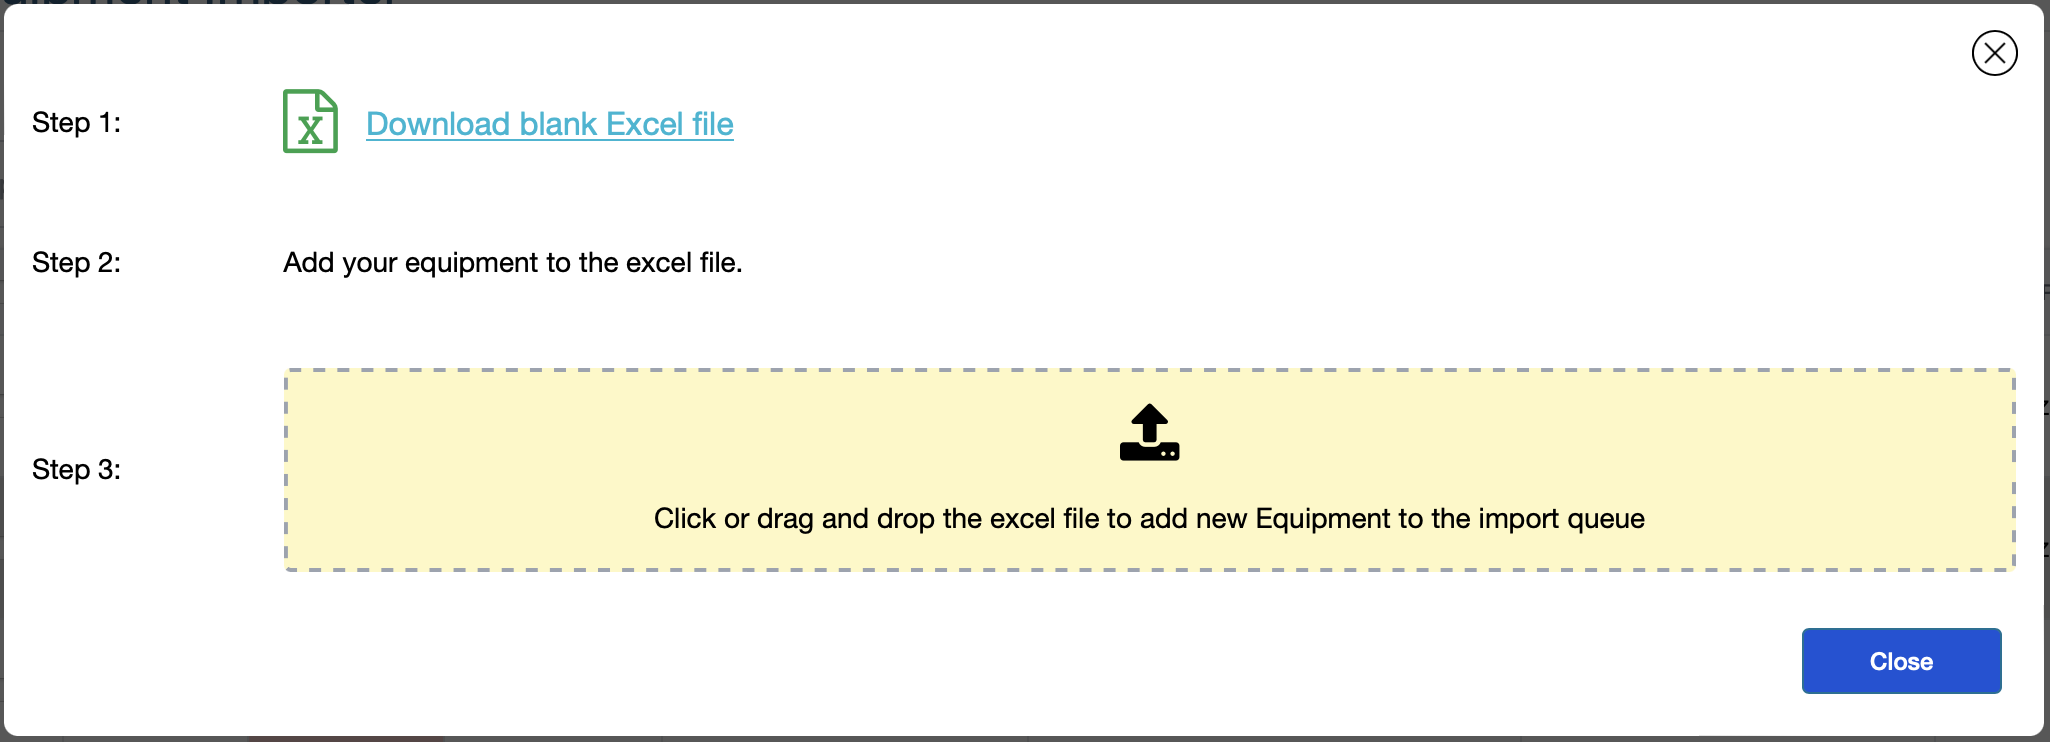
Step 1 - Download a Template
To facilitate the import, a formatted Excel™ template is available to download and populate, so the information can be uploaded to the system in a structured manner. Simply click the link, ‘Download blank Excel file’, to retrieve a template which you can open in Excel.
Step 2 - Preparing the Data
The template file will have a header row with the fields which will be imported. This row should not be altered; no additional columns should be added and they should be kept in the order they are presented. If such changes are made, the system will reject the file with a message saying the “upload validation failed” and a reason. The red triangles in the top right corner of cells in the header row, indicate that a ‘help’ comment is available when you hover over the cell.

To populate the spreadsheet, use one row for each equipment record and please follow these guidelines:
There are 3 types of fields on the spreadsheet - free-text fields, look-up fields and dates.
Free-Text Fields
These free-text fields are compared with other information in the account to ensure uniqueness,
- Name - the name of the piece of equipment must be unique in the OU where it is located; if there are multiple pieces of equipment which are the same, the name should be followed with a suffix which distinguishes it from the rest, for example, a sequential number
- Code - the code is not automatically generated by the system, so a code, unique across the whole account must be designed
These fields require a string of text, which is not compared with other data in the system. None of them are required to create an equipment record and they can be populated after the record is imported to the system. For information about their purpose, please refer to the article, Creating New Equipment Records.
- Model Number
- Manufacturer Serial Number
- Internal Serial Number
- Asset Registration Number
- Department Asset Registration Number
- User Manual ID
- Description
- Comments
- Purchase Cost
- Purchase Cost (Secondary currency)
- Estimated Replacement Cost
- Received Notes
- Installation Notes
These text fields only accept whole numbers (months),
- Warranty Cover (months) - this value is not used for any internal calculations, only for reference
- Life Span - this value is not used for any internal calculations, only for reference
Look-up Fields
The following fields reference records elsewhere in iPassport. It is important that the spelling of these exactly matches the record name or iPassport will not be able to pair them up. The lookup is case sensitive, so the most reliable way to get the information across is to copy/paste from the records in the system to the spreadsheet.
- Organisational Unit - OUs have a short name and a long name and both are accepted in the spreadsheet on condition that the spelling is exactly as it appears in the record
- Equipment Type - references a user configurable dropdown list
- User Responsible - references a registered active user in the system
- Equipment Manufacturer - references an existing Company record from the ‘Laboratory Management’ module
- Service Contract Provider - references an existing Company record
- Storage Location(s) - references Location records from the ‘Administration’ module
- Usage Location(s) - references Location records
Usage Locations require the tag, 'General'; Storage Locations require the tag, 'Storage'.
Use a semicolon as a separator to add multiple storage locations.
-
Received By User(s) - references a registered active user in the system; multiple users can be added, separated by semicolons
-
Equipment Received Condition - references a user configurable dropdown list
-
Install Supervised By User(s) - references a registered active user in the system; multiple users can be added, separated by semicolons
-
Installed By Company - references an existing Company record
-
Capital Equipment? (Yes / No) - is a required field and must be set to either Yes or No.
Date Fields
The dates should be formatted as a ‘Date’, using local Excel™ settings (‘Format Cells…’).
- Warranty End Date
- Date Received
- Estimated Replacement Date
- Date Installed
- Date Released Into Use
Step 3 - Importing the Data
Once the spreadsheet is ready, it can be simply saved and uploaded in one of two ways:
In the start page of the ‘Import Equipment’ tab, before any records have been added:
- Drag it into the dotted line rectangle labelled, ’Click or drag and drop the Excel file to add new Equipment to the import queue’
- or, click inside the rectangle and use the browser window which pops up to find and select it.
After adding equipment records, additional spreadsheets can be uploaded in the staging page:
- Click the button, ‘Add New Records’
- Drag the file into the dotted line rectangle labelled, ’Click or drag and drop the Excel file to add new Equipment to the import queue’
- or, click inside the rectangle and use the browser window which pops up to find and select it.
The data imported will immediately start appearing on the screen and the system will quickly validate all the information. Feedback is available on this screen to easily identify and fix problems.
Reviewing Data and Preparing to Import
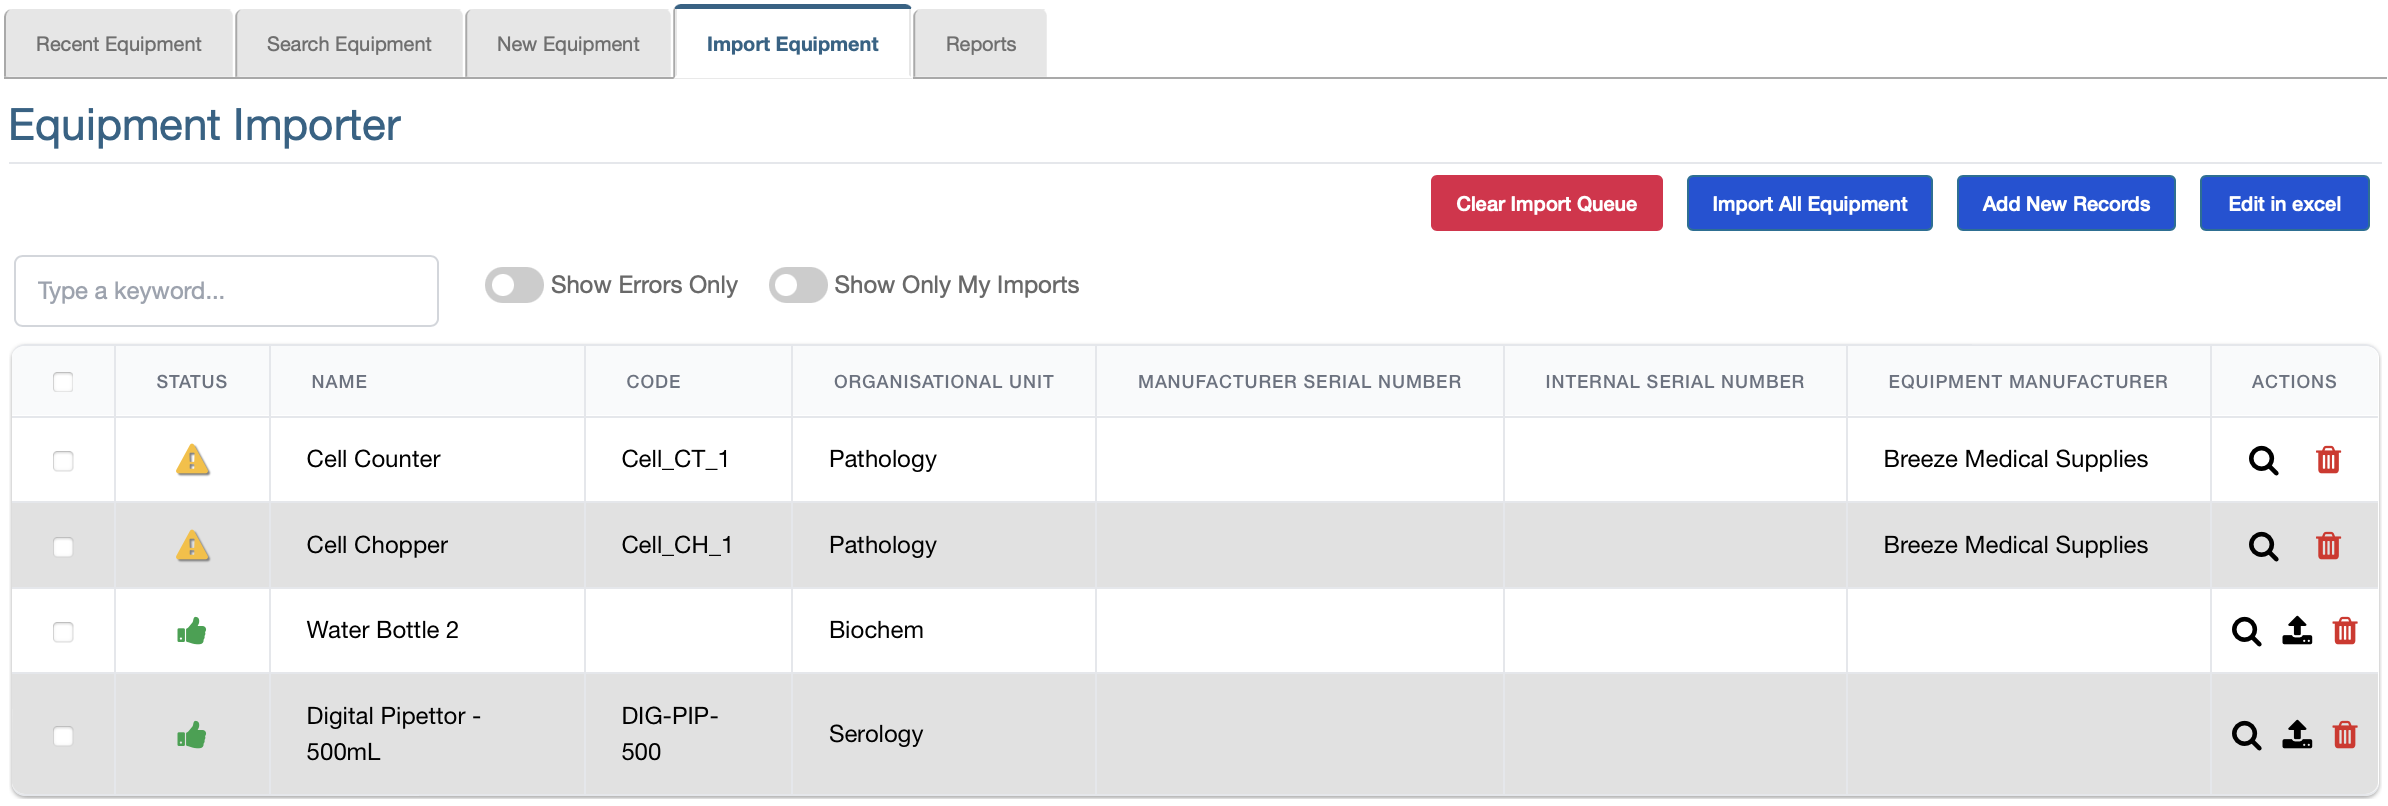
The staging area will display all records which have been uploaded.
It has a Search field to help locate particular records, and two filters:
- Show Errors Only - which hides all rows validated and ready to import
- Show Only My Imports - which hides all rows added by other users
Four buttons are available at all times:
- Clear Import Queue - This button will delete all the records in the staging area.
- If rows are selected by ticking their checkbox in the left column, the label will change to, ‘Delete x Equipment’, where ‘x’ is the number of rows selected.
- Import All Equipment - This button will import all rows below which have passed validation.
- If rows are selected by ticking their checkboxes in the left column, the label will change to, ‘Import x Equipment’, where ‘x’ is the number of rows selected.
- Add New Records - Records can be added to the staging area by clicking this button. It will bring up a pop-up window like the initial screen (before the staging area is populated), where a template can be downloaded, if needed, and where a populated file can be uploaded.
- Edit in Excel - Clicking this button will invoke a pop-up window, similar to the one above, containing a link to a spreadsheet populated with the information currently in the staging area (’Download Queue in Excel file’). It also offers a place to upload the edited file again. The system will identify individual records/rows when not the entire list is downloaded in the Excel sheet.
- Before clicking the button, rows can be selected and/or filters can be used to condense the list and only include in the Excel™ file those records which need amending.
The Staging Table
The information is displayed in a table with the following columns and features:
- Checkbox column on the left
- One or multiple rows can be individually selected.
- The ‘SHIFT’ (⬆️) key can be used to select or unselect multiple rows.
- The checkbox in the header area selects/unselects all the rows below.
- When at least one checkbox is ticked, an additional button appears above the table - ‘Edit x Equipment’, where ‘x’ is the number of rows selected.
- STATUS - If information is missing or not found by the system, a yellow warning triangle will display on the row of the problem record. Hovering over the triangle will bring up a message listing the errors. When a record is ready to import, the status will show a green thumbs-up.
- Record data uploaded from the spreadsheet (only the main parameters are displayed as the metadata for equipment includes many fields):
- NAME
- CODE
- ORGANISATIONAL UNIT
- MANUFACTURER SERIAL NUMBER
- INTERNAL SERIAL NUMBER
- EQUIPMENT MANUFACTURER
- ACTIONS - There are three icons in this column:
- Magnifying glass (🔍) - to open the ‘Edit this Equipment’ pop-up window; additionally, the pop-up window can be opened anywhere in the row where the pointer turns to a ‘pointing hand’
- Import row (↥) - to import a single row if it’s ready
- Trash/Bin (🗑) - to delete a single row
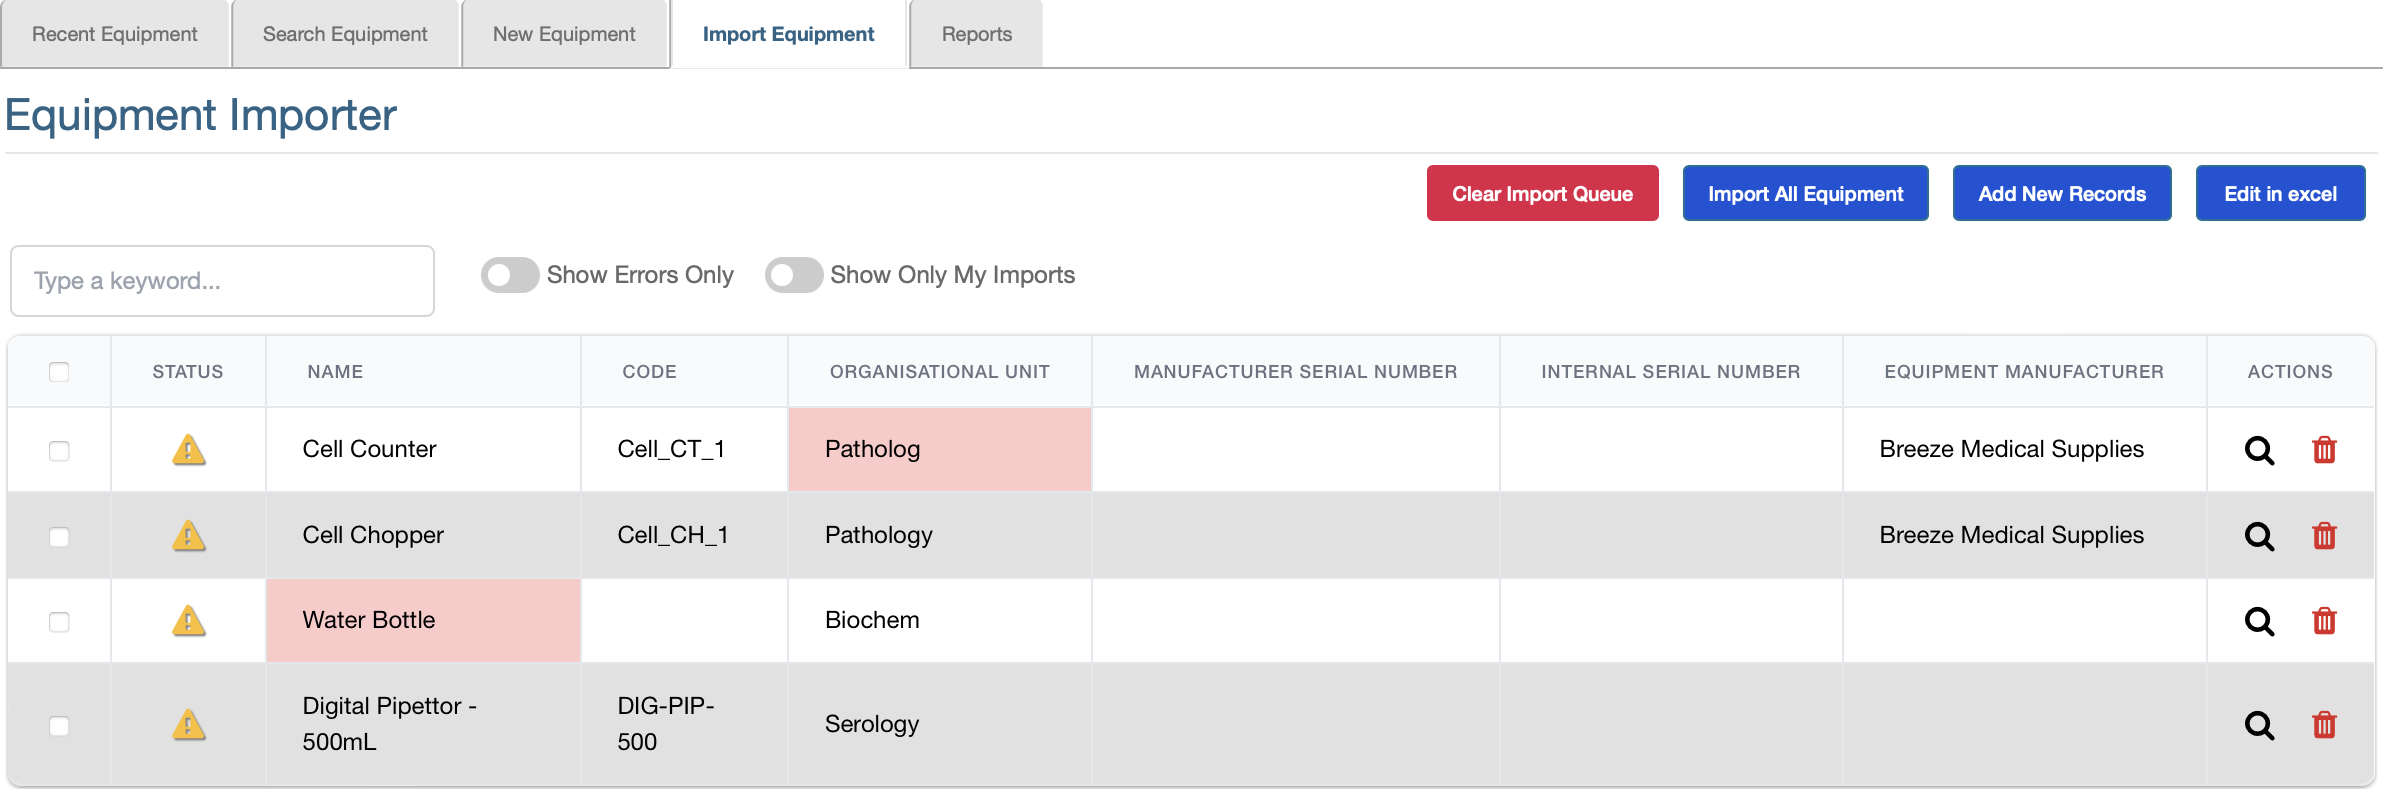
Fixing Errors
If any of the cells have an error, they will be highlighted in pink.
If a row still displays a yellow warning triangle in the status column, and no cells appear to be invalid (highlighted in pink), there might be other fields in the same record which need fixing.
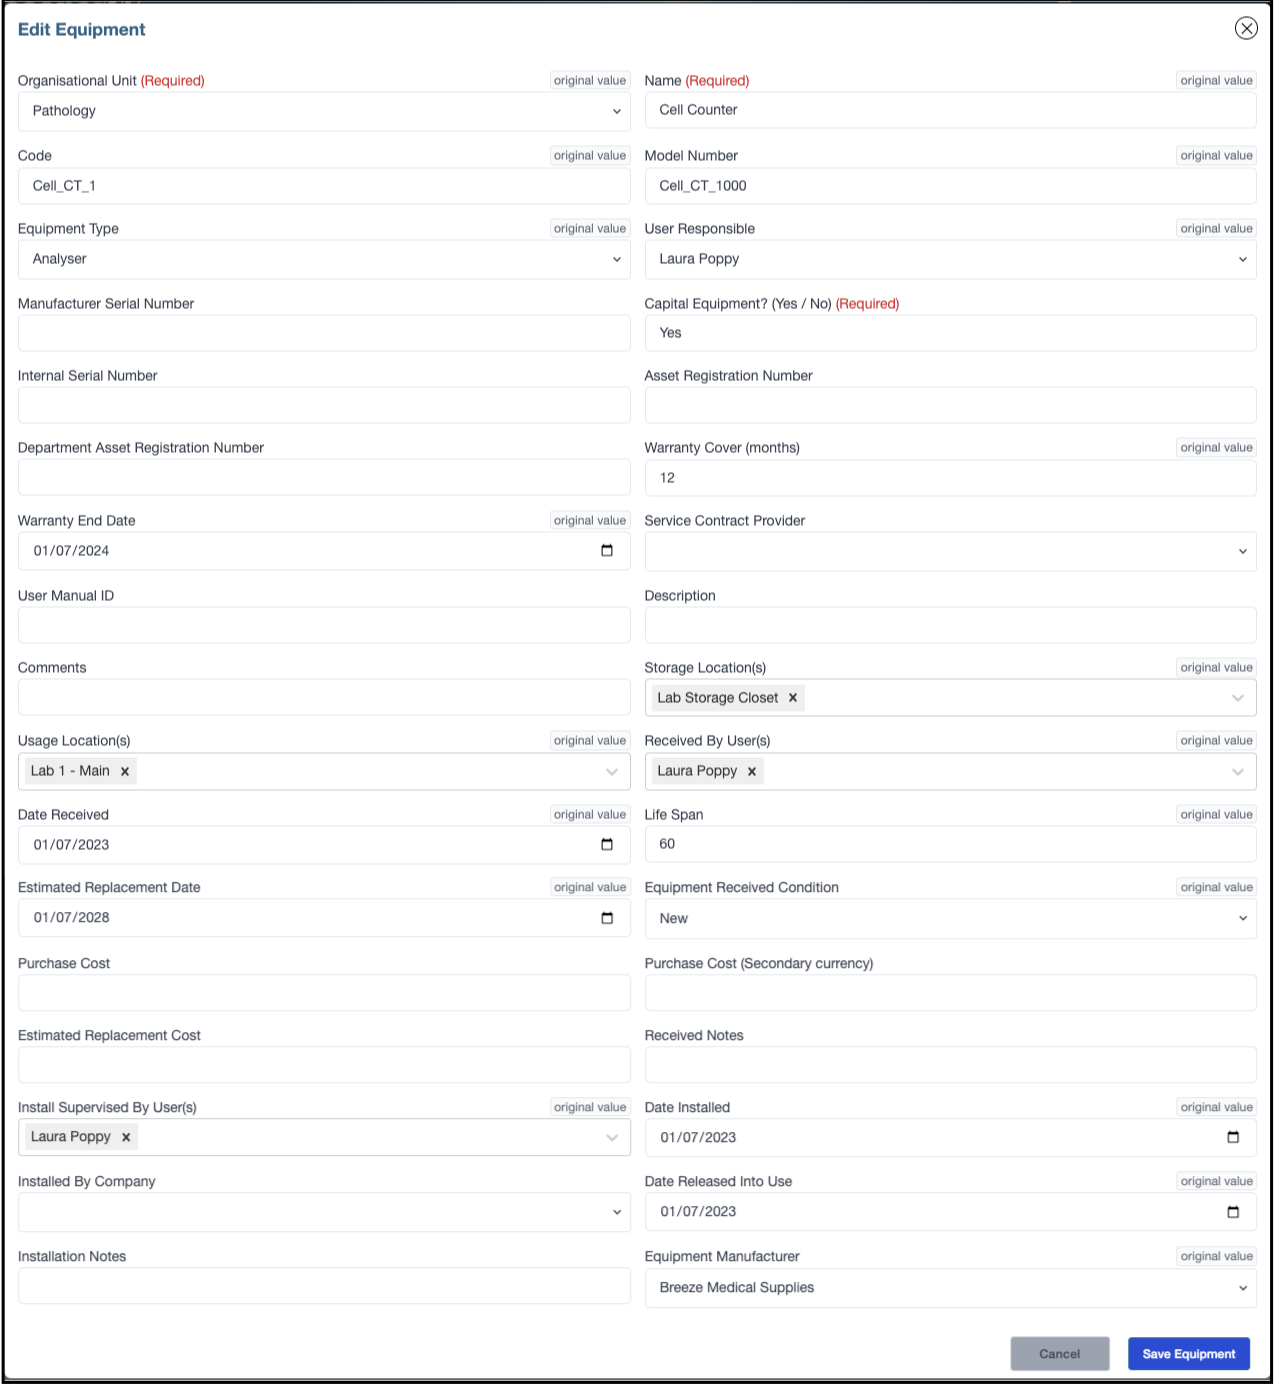
Clicking a cell (where the pointer turns to a hand) or the row’s magnifying glass, will bring up the ‘Edit this Equipment’ pop-up window, which includes all the fields of the single row so they can be edited.
- Fields which have an error will display the reason in small red text below them.
- Clicking any of the ‘Look-up Fields’, will bring up a dropdown menu of all options available. You can scroll down the list or start typing to jump to matching items on the list and click the desired item when located.
- All date fields produce a calendar when clicked, where dates can be selected, but dates can also be edited by highlighting the day, month or year, then entering a number or using the up/down arrows to increase or decrease the value.
Once fixed, click Save Equipment to validate, update and return to the staging area.
If multiple rows contain the same error, they can be selected and clicking the button, ‘Edit x Equipment’ will allow editing and applying the same fix to all the selected records. In this case, reasons are not provided for cells with errors; the fields will state, ‘Multiple values, click to edit…’. Upon clicking in a field, the message, ‘Leave this blank to clear on all selected records.’ will appear below it, with the option to ‘Cancel edit’.
When a single document is being edited and an error declares that the item was not found, another item can be selected if available, or the item which is producing the error can be selected and then removed before saving, to clear the field.
Importing the Equipment
There are three ways of importing equipment records once they are ready:
- Import a single row - Clicking the ‘Import’ (↥) icon in a row will import that record alone.
- Import multiple rows - multiple rows can be selected by ticking their checkbox and the button, ‘Import x Equipment’ will import them in one step.
- Import all rows - Clicking Import All Equipment will import all rows displayed below which have passed validation.
A confirmation dialogue box will appear, stating how many equipment records are to be imported.
Once imported, the equipment will be added in the corresponding Organisational Units within the ‘Equipment’ area.
This is the last article in this user guide.
PREVIOUS STEP:
The previous article covers Equipment Maintenance And Breakdowns.