- Competency Tests
Introduction
The competency module within iPassport allows for competency tests to be created. These can then be assigned to user(s) as a task.
Checkbox questions are automatically marked by iPassport whereas text questions are marked by an examiner assigned to the test template. The results are recorded against the item and within the staff profile.
Permissions
The system role of “Competency Editor” is required for staff to design and assign competency assessments. A user would not need to have this access level to complete a test.
To view the related permissions:
- Go to Administration > Roles > List Roles
- Select ‘Competency Editor’ or ‘Competency Viewer’ from the list
- Click the Permissions tab
- Click the text box by the filter, ‘Select a Permission Group’ and select Competency
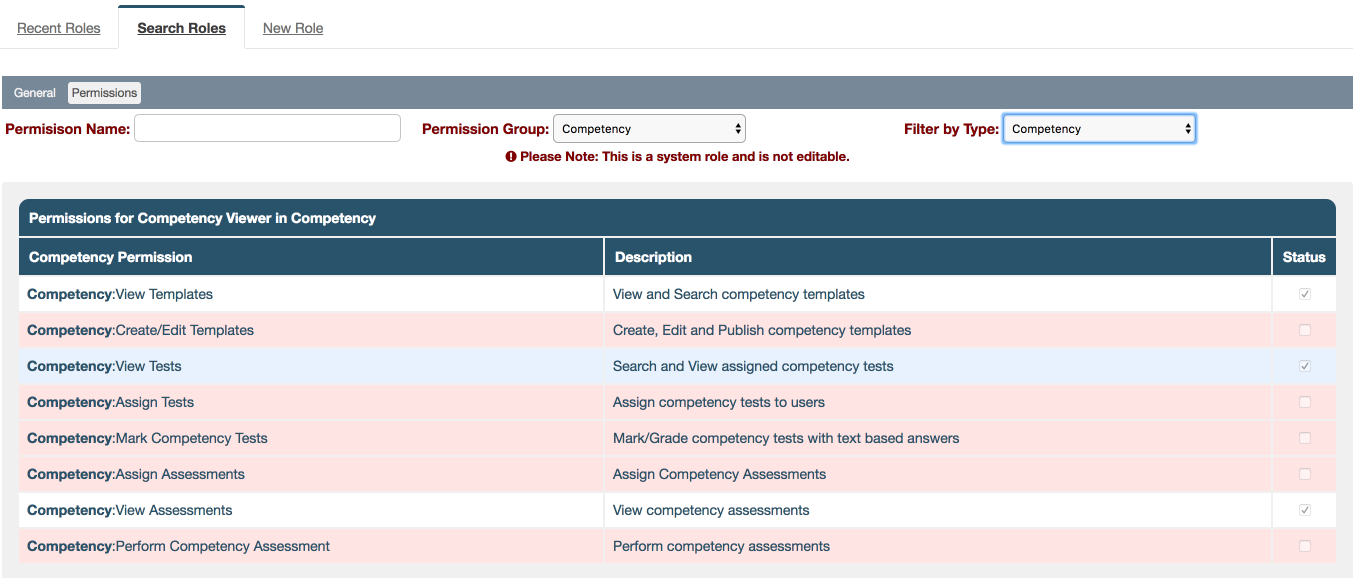
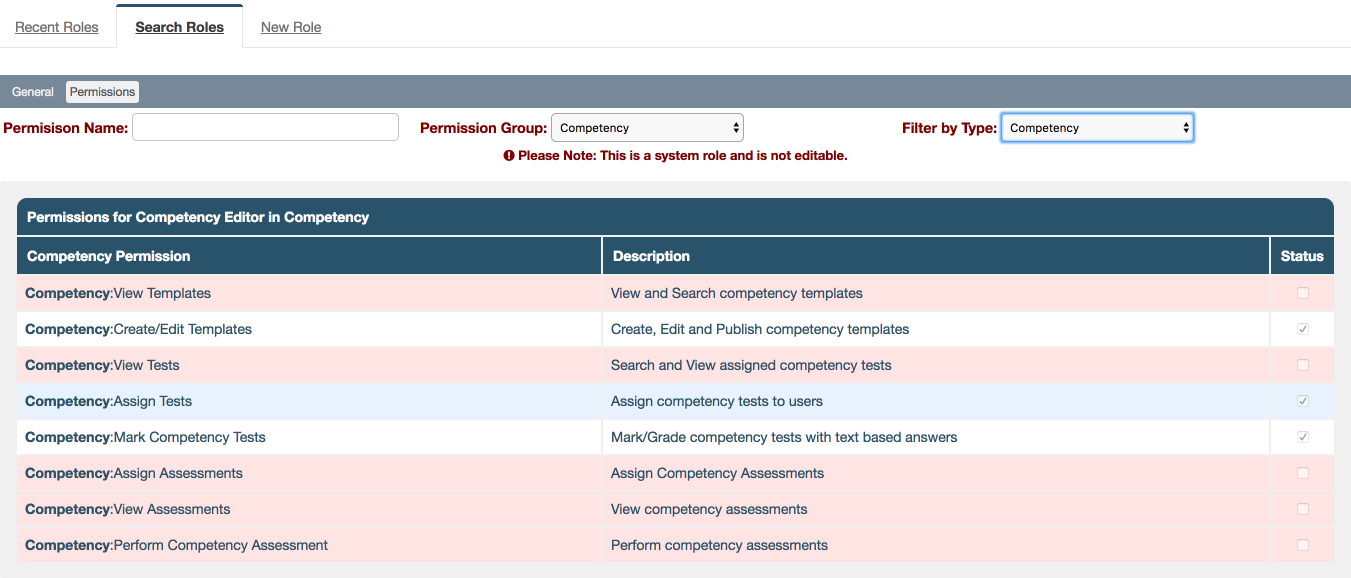
There are five distinct permissions:
- Competency: Assign Tests
- Competency: Create/Edit Templates
- Competency: Mark Competency Tests - To be an Examiner/ Mark a Test a user needs this permission.
- Competency: View Templates
- Competency: View Tests
New roles can be created, based on one of the two above, to tweak permissions according to requirements.
The role then needs to be added to a user group, within the OU(s) where the permissions want to be granted to given users.
Competency Tests Menu
The module is located under the Competency main menu, including ‘Tests’ and ‘Test Designer’.
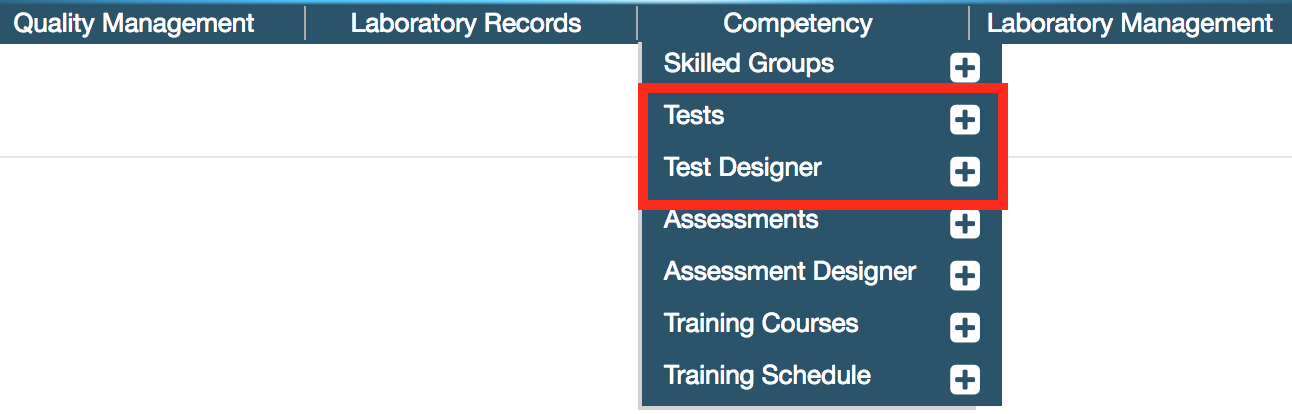
Test templates are the questionnaires and these are created in Test Designer. Tests refer to tasks to complete quizzes, which are assigned to users by selecting a template from the menu, Tests.
There are two tabs to be found in the Competency > Test Designer main menu:

- List Templates – Lists and allows a user to search existing templates.
- Create Template – Allows a user to create a new test template (questionnaire).
There are two tabs to be found in the Competency > Tests main menu:
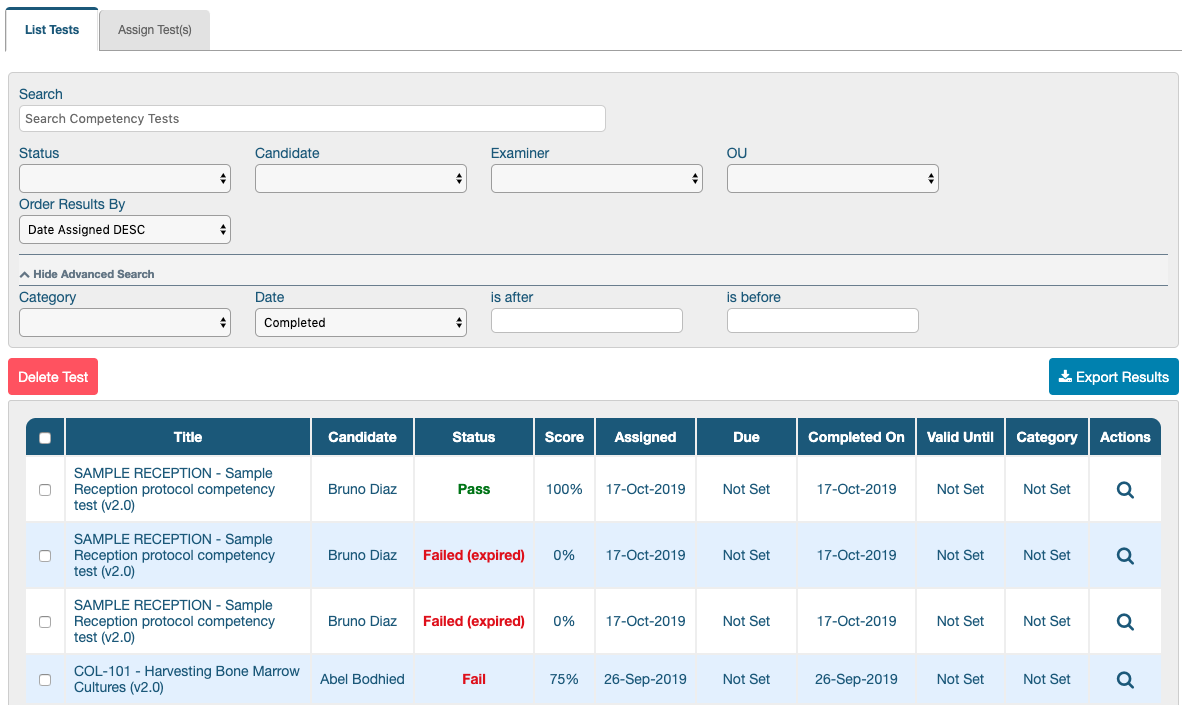
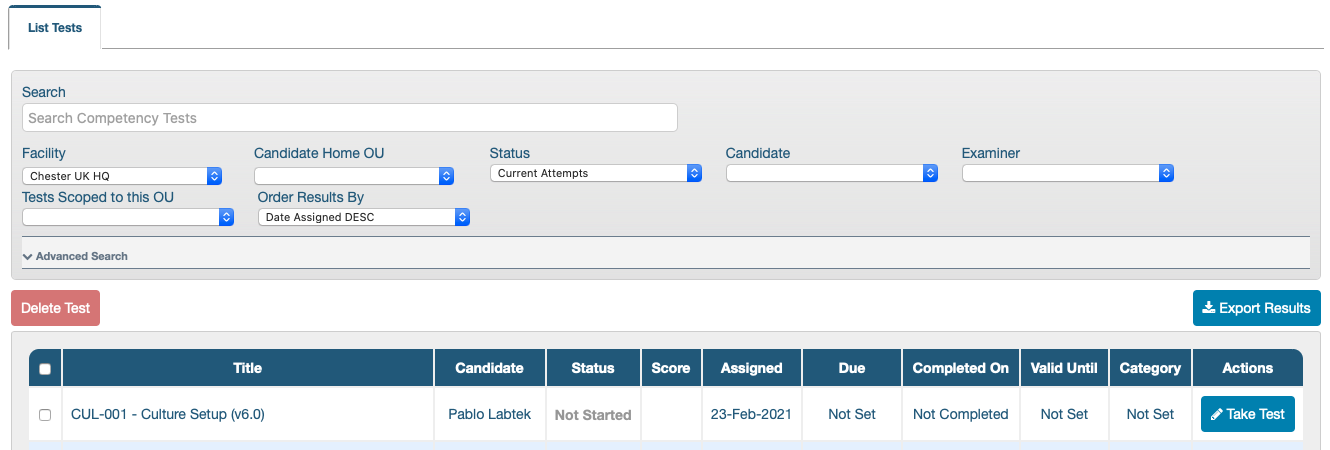
- List Tests - Once the test has been published and assigned to a user or users it can be found here. A user will be able to search for any competency tests with the help of 7 search filters:
- Search - the name of the test or candidate can be typed here
- Status - there are seven different options: Passed, Failed, Not Started, Awaiting Marking, Expired, Previous Attempts and Current Attempts
When a user has taken the same test version more than once, the default will be to only show the latest attempt (Current Attempts).
When a test has expired because it was re-assigned or it was taken again (more than one attempt), the Status column will show whether the expired instance was passed or failed.
- Candidate - the dropdown menu lists all candidates that have had tests assigned to them
- Examiner - the dropdown includes all examiners who have tests assigned to them for marking
- Organisational Unit - one OU can be selected (tests can be confined to one or more OUs)
- Order Results by - Date Assigned (A-Z or Z-A), Candidate Name (A-Z or Z-A), Status (A-Z or Z-A)
The last two filters are accessed by clicking the Advanced Search bar.
- Category - list of user defined categories that help classify tests
- Date - is after - is before - allows filtering by ‘Completed’ or ‘Assigned’ tests, within a given date range
- Assign Test(s) - Allows the user to choose a Test Template and assign it to individual staff members or to members of a distribution list.
Creating a New Test Template
To create a new test template (questionnaire) click the Create Template tab which then opens the new test template screen.
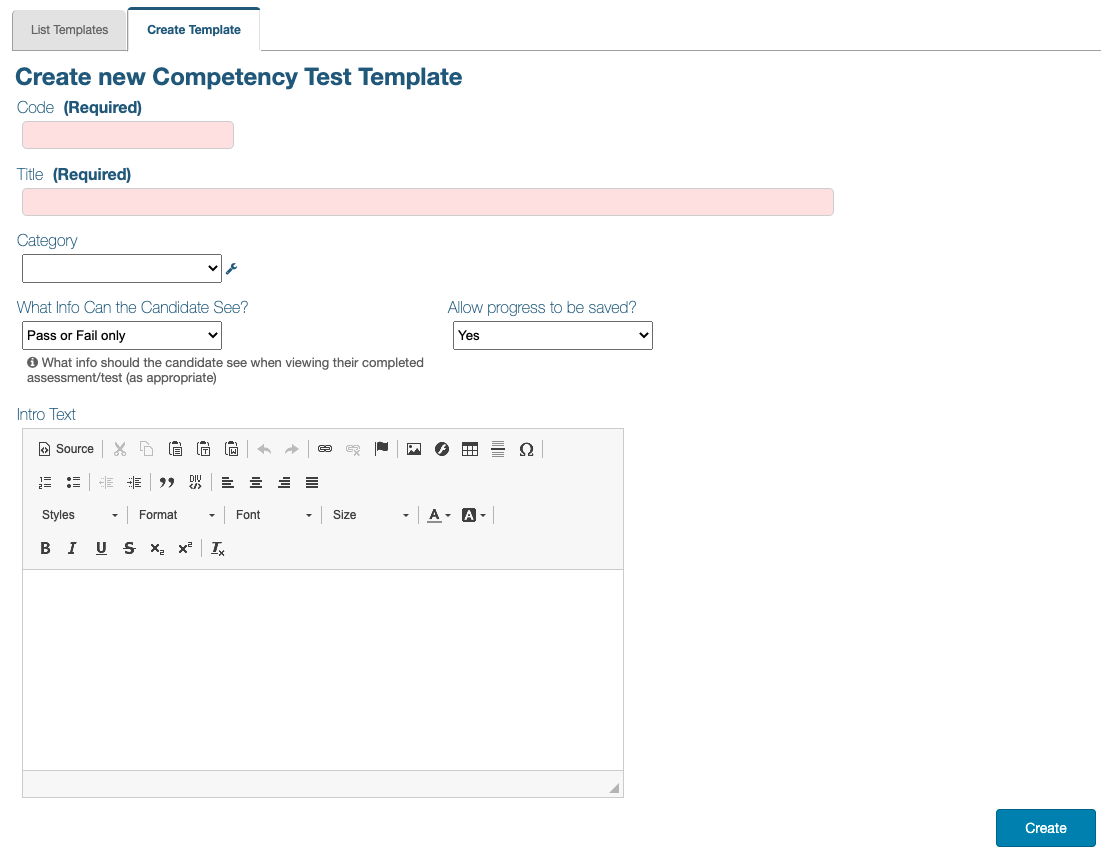
The ‘Code’ needs to be a unique combination of letter(s) and/or number(s) for the test template, this is a required field. The ‘Title’ refers to the name of the test template and is also a required field. The fields, “Category”, “What Info Can the Candidate See?” and “Allow progress to be saved” are not required at this stage and they can be edited until the test is published; they are described below. There is also a field to add introduction text to the test template in ‘Intro Text’; this field is optional. Once the details have been entered click Create.
Test Settings
The Create button generates a draft test template; at this stage the test template does not have any questions and all fields can be edited.
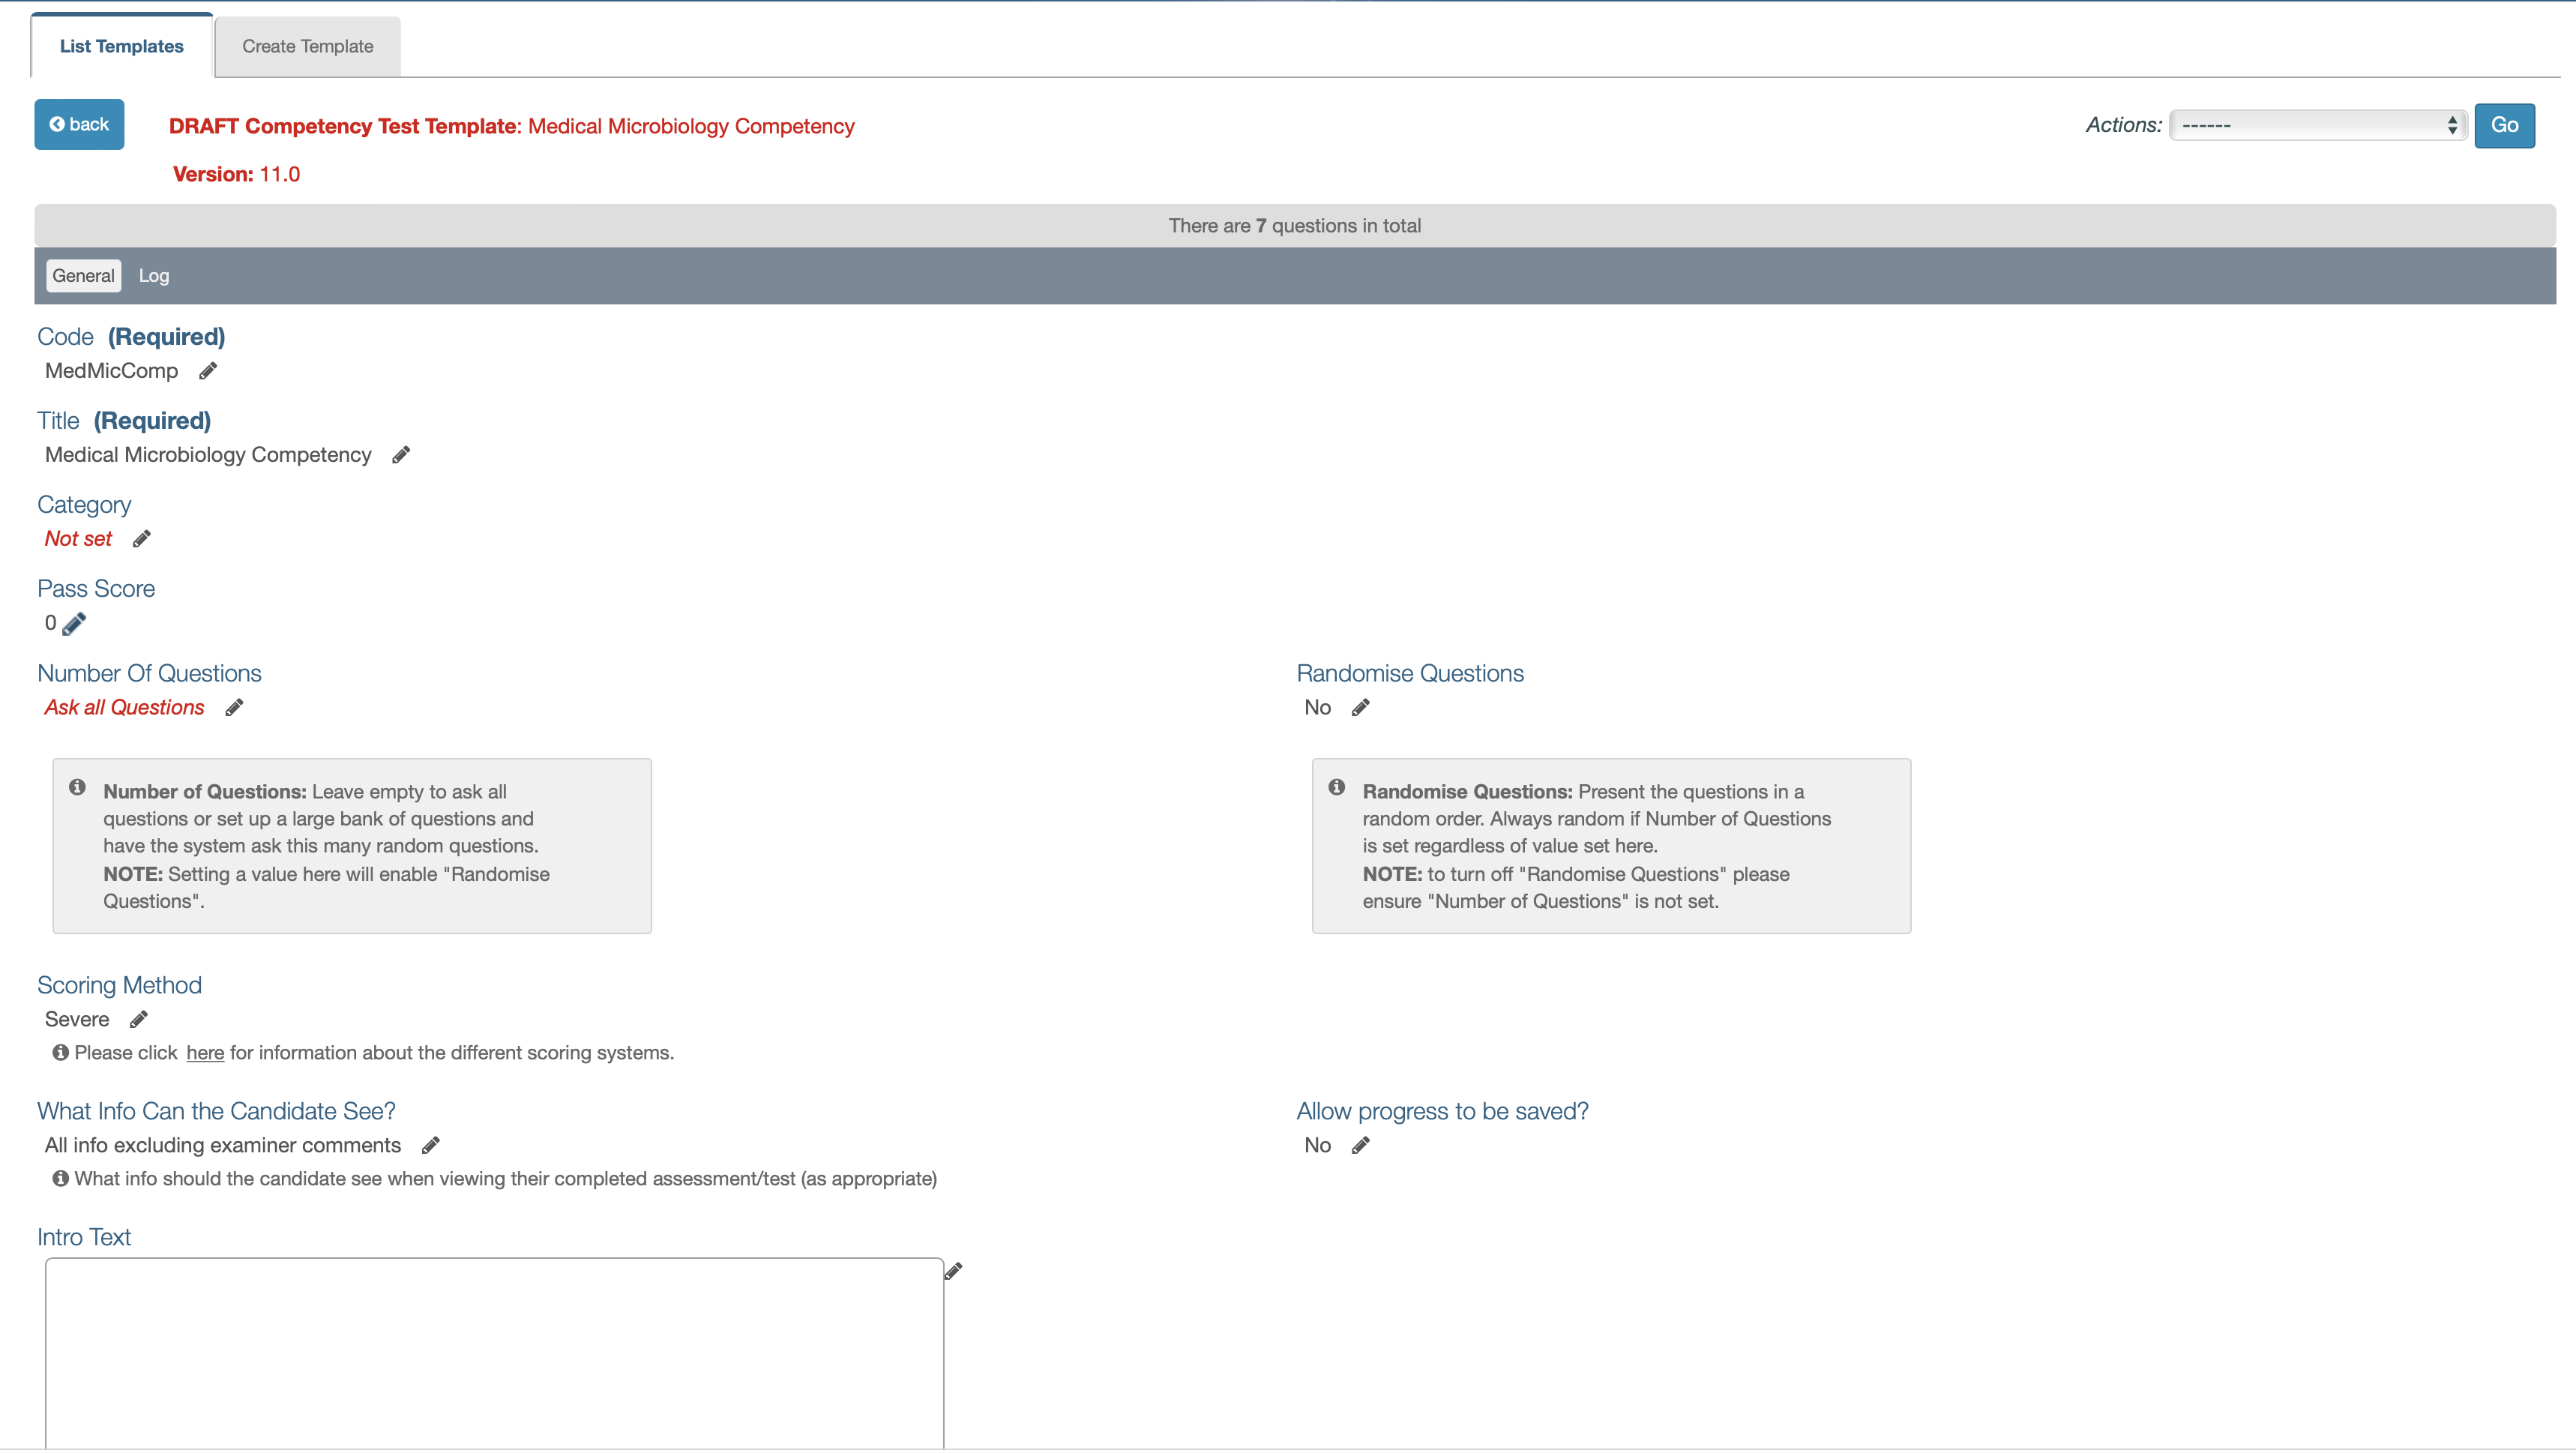
The test template is based on a questionnaire. Each test can have unlimited questions and it is possible to randomise the questions within a test. When creating a test the user can set some questions as ‘Mandatory’, which means even if randomisation is selected these questions will always be included.
iPassport’s competency question bank and randomisation function is optional. A test can simply consist of all the questions a user wishes to ask for a given topic.
Managing and Adding Categories
‘Categories’ help group and filter tests (and other items in iPassport) but don’t impose restrictions on access. The Tests section in iPassport has its own list of categories, not shared by other areas. Categories that are not in use can be deleted and this is noticeable because a delete (trash/bin) icon is visible under the Actions menu.
To add a category to a test (while creating a test or still in draft mode):
- Click the edit (pencil) icon under Category
- Click inside the text box to reveal the dropdown menu of categories
- Click a category to select it
- Click Save
To add a new category to the menu (while creating a test or still in draft mode): - Click the edit (pencil) icon under category
- Click the manage (spanner) icon under Category to open the Competency Test Categories lightbox
- Click [+] Add Competency Test Categories to expand the lightbox
- Enter the name of the new category in the Name field
- The Visibility field can be used to limit categories’ availability to certain OUs
- Click Create Competency Test categories
- Click the close (x) icon on the top right of the lightbox to exit
To edit or remove categories, you must reach the lightbox, Competency Test Categories as described above. For each category, under Actions, there should be an edit (pencil) icon that allows changing the name of the category. If a category is not in use, there will be a delete (trash/bin) icon, which can be clicked to remove that category.
Pass Score
This field always defaults to “0” and needs to be adjusted before the test can be published.
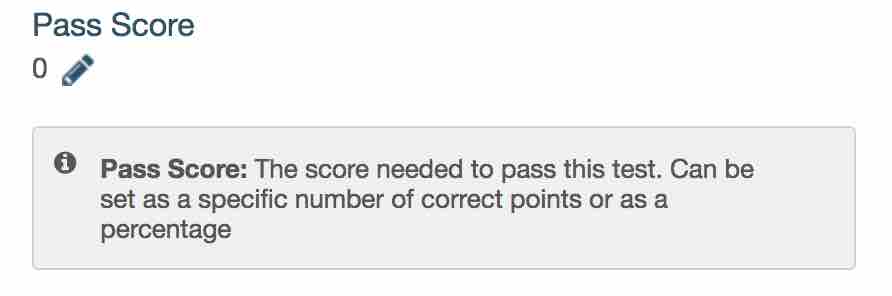
Two options are provided:
- the score can be based on a number of points relative to the total number of achievable points in the questions; for example, if the total number of questions is 10 and each is worth one point, the passing score can be set at “6 points” (6 out of 10 points needed to pass)
- alternatively, the score can be expressed as a percentage; following the example above, the score can be set as “60 percent”

Scoring Method
There are three choices for how the test should be scored.
- Severe (this is the default scoring method for new templates)
- Moderate
- Lenient
How the scoring systems work
Severe
- If the candidate selects any incorrect answers they score zero points.
- If the score for all correct answers is set, the candidate will score zero points unless all correct answers are selected. Otherwise, the candidate scores the sum of the correct answers selected, so long as the score if greater or equal to the minimum score set on the question, but it must be greater than 0.
Moderate
- If the score for all correct answers is set, each correct answer is worth (maximum possible score / number of correct answers for the question) otherwise they’re worth the points set per question.
- Any incorrect answers deduct the value of (maximum possible score / number of incorrect answers for the question) per selected answer.
- The score is rounded to the closest integer, if the score is negative it is set to 0.
- The question is passed if the score is greater or equal to the minimum score set on the question, but score must be greater than 0.
Lenient
- If there are only correct answers for the question and all are selected, the candidate scores full points.
- If there is one or more incorrect answer for the question and the candidate selects all answers they score 0 points.
- No points are deducted for incorrect answers unless all answers are selected which scores zero (if at least one incorrect answer is set).
- If points for all correct answers is set, each correct answer is worth (maximum possible score / number of correct answers for the question) otherwise they’re worth the points set per question.
Number of Questions/ Randomise Questions
You can have a larger number of questions in the template than are required for each test. This allows you to produce varied tests from the same template. The questions can be randomly selected from the pool available. When you create a question you declare if it should be mandatory. Mandatory questions are always included up to the number of questions declared for the test.

To set the number of questions (if you don’t want to Ask all Questions):
- Click the edit (pencil) icon under Number of Questions
- Type the number of questions to include in every assessment (leave empty to Ask all Questions); this field only accepts whole numbers
- Click Save
Randomise Questions
If a number is set above, questions will automatically be randomised.
If not, you can still randomise them:
- Click the edit (pencil) icon under Randomise Questions
- Click the checkbox
- Click Save
What Info Can the Candidate See?
This field allows defining what information the candidates should see when they receive feedback on their test results.
There are 4 choices:
- Pass or Fail only - no other information provided; the candidate only sees the result of the test

- Show failed Questions - the candidate sees each question with its answers and whether they passed or failed them but no information is supplied about which multiple choice answers were right or wrong
- All info excluding examiner comments - all questions, answers and details about which multiple choice answers were correct or required, without examiner comments
- All info including examiner comments - all of the above plus any comments entered by the examiner
To set the information a candidate can see:
- Click the edit (pencil) icon under What Info Can the Candidate See? to expand the area
- Click in the field to reveal the dropdown menu and select one of the choices
- Click Save
Before the test template can be published and tests assigned, questions need to be added to it.
Allow Progress to be saved?
Sometimes it is acceptable to allow a candidate to pause a test and return to complete it later without losing the answers already entered. This option is also useful to prevent loss of work when a candidate simply pauses to consult reference material, in case they get timed out and logged off the system in the middle of a test.
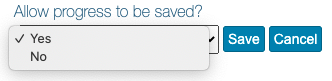
When this option is set to “yes”, candidates will see a ‘Save Progress’ button in the bottom left corner of the exam. Clicking it will save all completed answers and the user can close the test temporarily by clicking the “X” at the top.
Advanced Settings
Examiner Settings

A user can select here Examiner(s) to mark the ‘Text’ questions in this competency test. They must have the permission Competency: Mark Competency Tests. Click on the pencil icon to select examiner(s).
When a candidate submits their answers these users will be tasked with marking the text answers in the test. If several users are selected then all will be tasked but whoever marks the test first will cause any outstanding tasks to be invalidated. Only one person can actually mark the test.
See Marking a Test for more information
Completion Settings
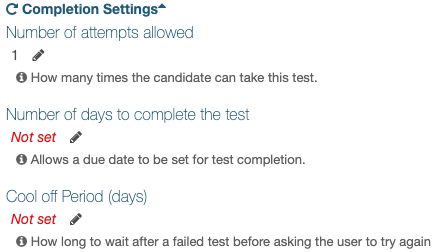
- Number of attempts allowed- Defines how many times the candidate can take this test; “1” means no re-takes are allowed
- Number of days to complete the test- Allows a due date to be set for completion of the test; any re-takes must be completed within this period
- Cool off Period (days)- The time a user must wait before a failed test is re-issued
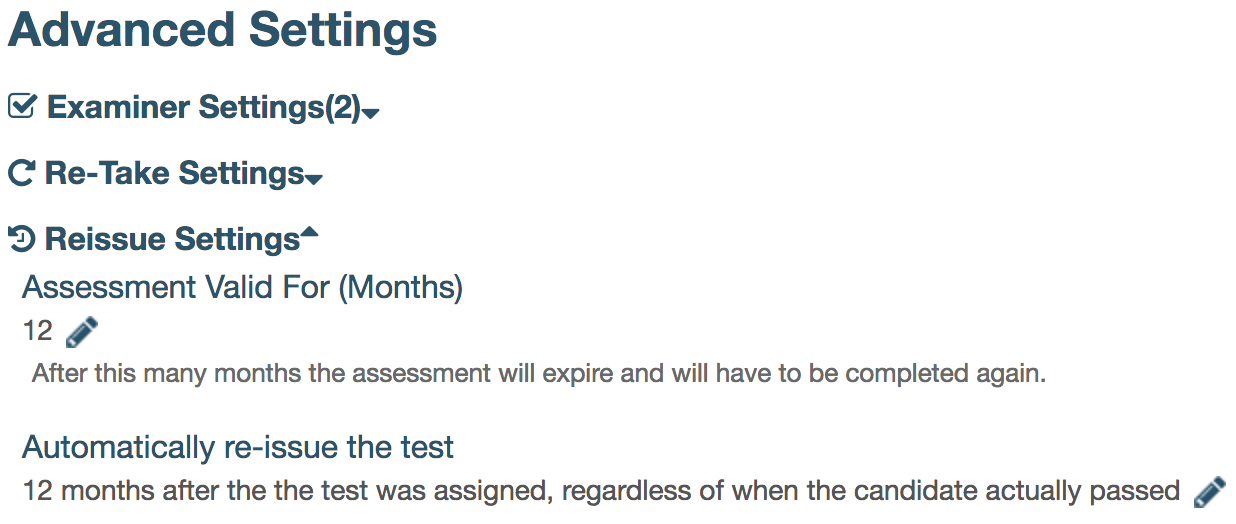
Reissue Settings
In some cases, staff members are required to take the same test every so often (e.g. once every two years) to ensure their knowledge is fresh. You can set an expiry time (in months) after which the test is automatically reissued.
When reissue settings are applied to a template, the test header will include the field, “Automatically Re-issue?:”, providing an option to stop reissuing it. If the validity time is left blank or set to “0”, this option won’t be visible.
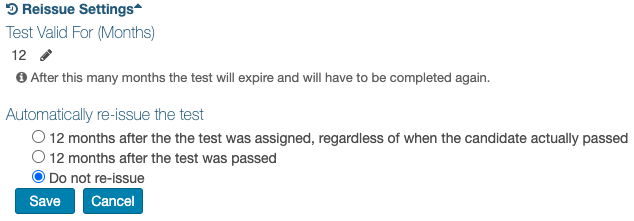
To adjust Reissue settings:
- Click Reissue Settings to expand the area
- Click the edit (pencil) icon under Test Valid For (Months)
- Type the number of months (’x’) the test accreditation will be valid for
- Click the edit (pencil) icon under “Automatically re-issue the test”
- Choose one of the following options -
- ‘x’ months after the the test was assigned, regardless of when the candidate actually passed
- ‘x’ months after the test was passed
- Do not re-issue
- Click Save
Notification Settings
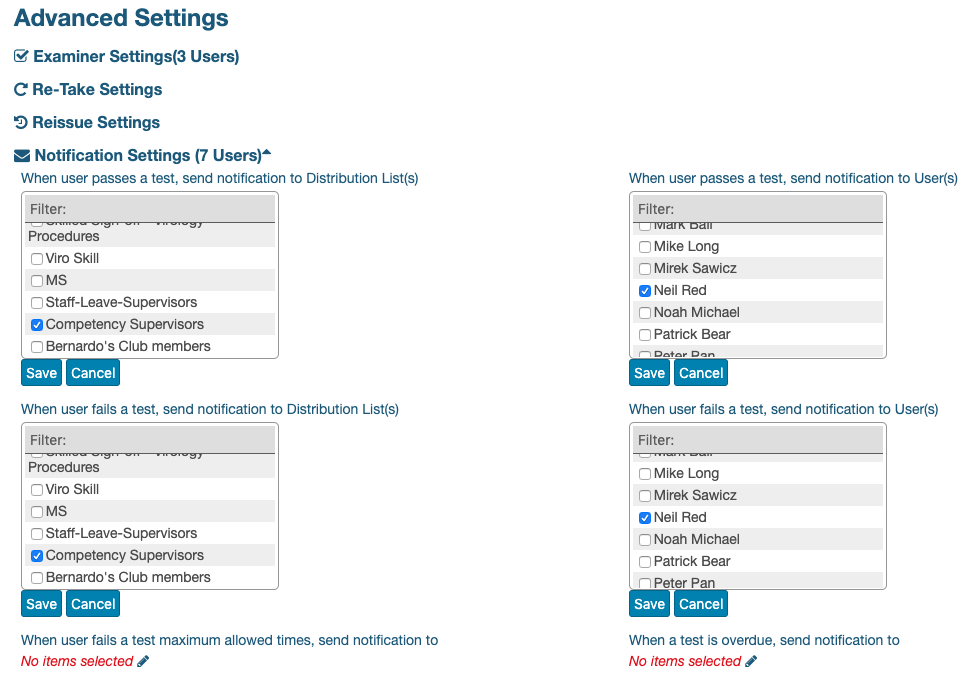
There are separate settings to notify selected people when a candidate passes the test, fails it, fails it the maximum number of times or when it becomes overdue. In all cases, a distribution list can be selected by clicking the edit (pencil) icon under the appropriate field. When a candidate passes or fails, it is possible to select individual users, as well as distribution lists.
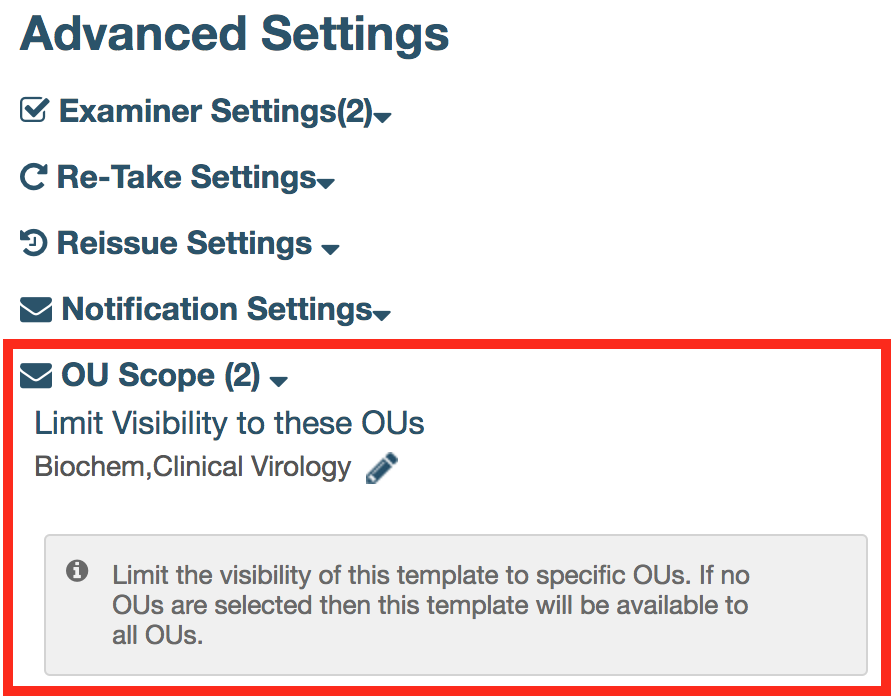
OU Scope
You can restrict the visibility and scope of test templates to OUs that you specify.
If the field is left blank, the assessment template will be visible to all OUs.
The number in parenthesis next to the title indicates how many OUs have been selected. If none have been selected, it will say, “OU Scope (All)”.
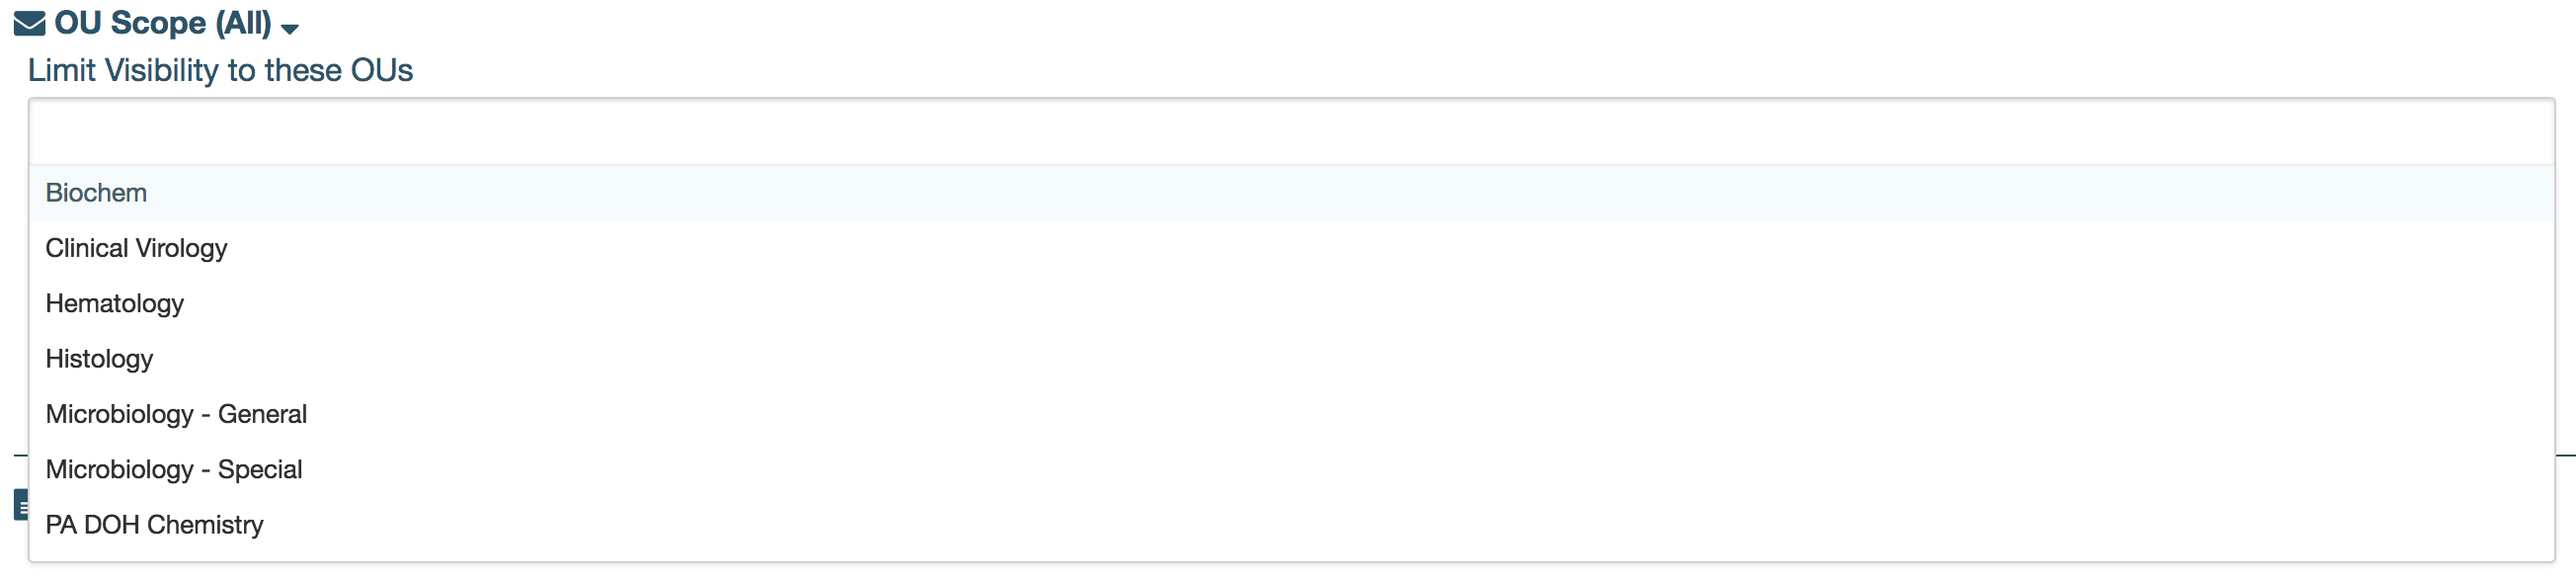
To set the OU Scope:
- Click OU Scope to expand the area
- Click the edit (pencil) icon under Limit Visibility to these OUs
- Click the field under Limit Visibility to these OUs
- Select the OU(s) and click outside the box
- Click Save
Reference Documents
Relevant controlled documents can be linked to a test to provide the candidate with reference material while completing it.

When a reference document is added, it appears at the top of the test, allowing the candidate to to consult the document before providing their answers. Clicking the link opens the reference document in a lightbox, leaving the test idle behind a grey background.

A user editing a competency test will only be able to add documents which they have access to read. Similarly, users taking the test will only be able to open the document if they have read access. To add one (or more) just click the ‘Add Link to document’ button and search for the document(s).
Adding a reference document also adds a link to the associated controlled document. This means that the test can be accessed, by staff member(s) assigned to the test, from the controlled document itself.
Questions
Adding a Question
There are two types of questions:
- Checkbox (default) - multiple choice questions where one or more answers can be selected by ticking checkboxes; the system marks these questions automatically
- Text - questions where a written answer must be submitted; an examiner is required to mark text questions
To add questions (both, checkbox and text types):
- Click the Add Question button

- this opens the question creation area
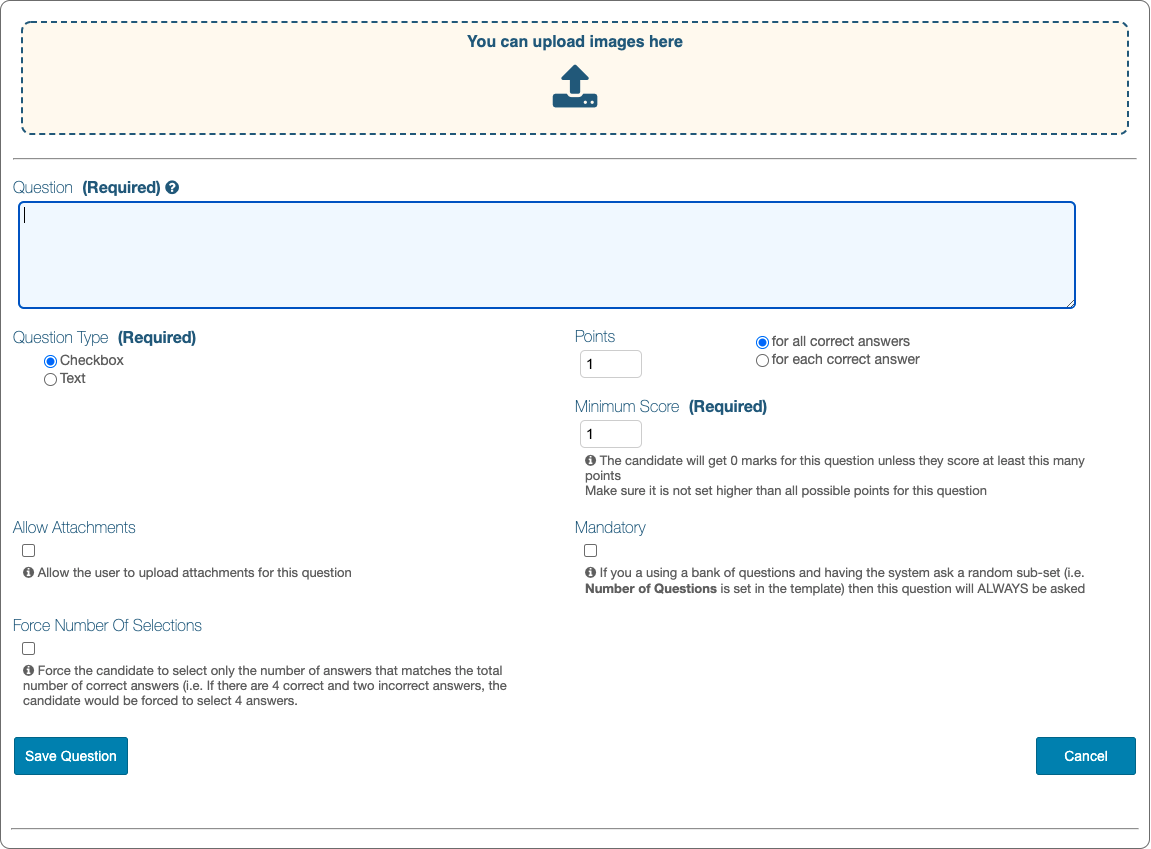
- To upload images which will appear above the question as a visual aid, click inside the field, ‘You can upload images here’ or drag and drop from a folder to this location; it is possible to upload more than one image against each question
- Enter the question in the Question field (some text must always be added, even if the question is contained in an uploaded image)
- Select whether the question is a Checkbox (multiple choice) or a Text type - the default is Checkbox
- For multiple choice questions, continue with the instructions under Checkbox Question;
- For text based questions please skip to the instructions under Text Question
Checkbox Question
Multiple choice questions have additional tools to allow designing a scoring strategy.
For Checkbox questions, it is possible to add more than one correct answer so:
-
First select if points should be awarded “for all correct answers” or “for each correct answer” , to the right of the Points field
- If “for all correct answers” is selected, enter the number of Points that can be earned for selecting all the correct answers (all or nothing); only whole numbers greater than “0” can be entered
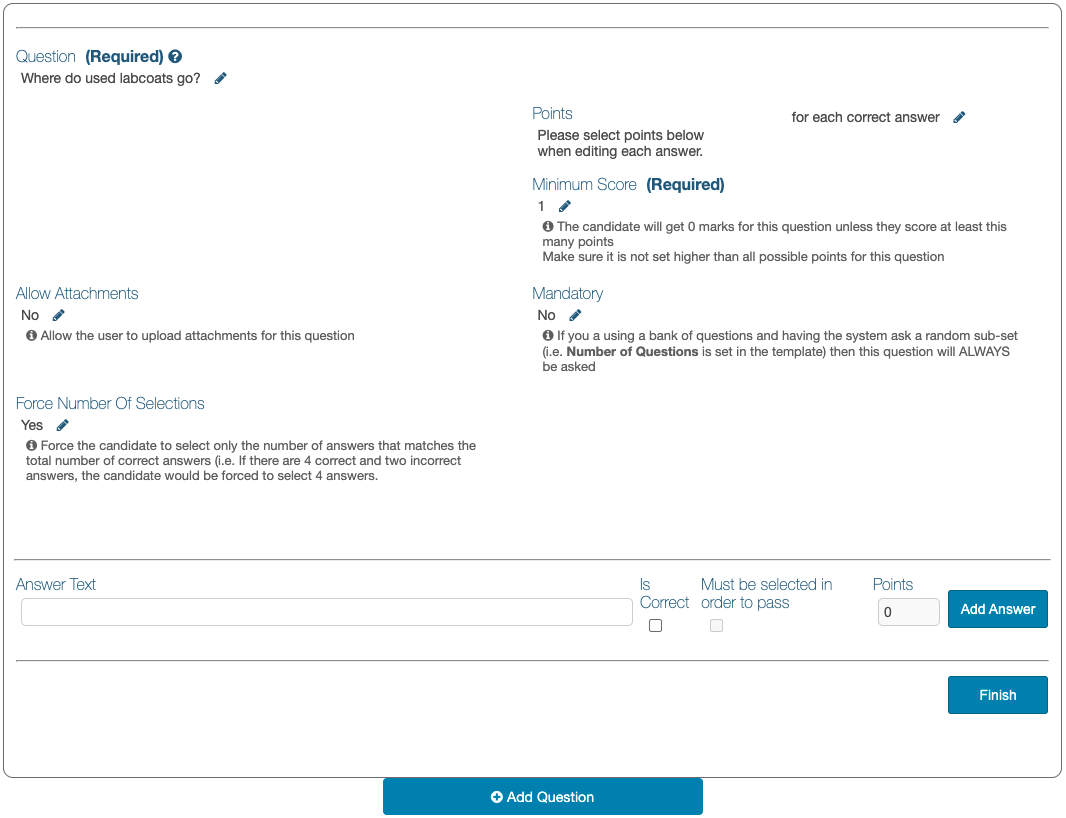
- If “for each correct answer” is selected, different scores can be assigned to each answer as they are created and the field is replaced with the message, ‘Please select points below when editing each answer’
-
Enter a Minimum Score if a minimum number of correct choices should be selected (e.g., if a question has 3 correct answers, worth a point each, and 1 is ticked but the minimum score is 2, the candidate will get 0 points awarded)
In all cases, if one incorrect answer is chosen, no points are awarded to discourage candidates from ticking all the boxes.
-
Tick the checkbox under Allow Attachments to let the candidate add a file that supports their answer
-
Tick the checkbox under Mandatory if you always want this question to be asked (when you have a large pool of questions)
-
Enabling the option, Force Number Of Selections results in the candidate being required to tick as many checkboxes as there are correct answers; when enabled, the question will display the message, “Select ‘X’ answers.”
-
Click Save Question
- for Checkbox questions, this leads the user to the “answers” section of the question (please see below)
Adding Answers to a Checkbox Question
When a checkbox question is saved, the area expands to allow adding answers.
 Each question needs to have a minimum of one correct answer.
To add answers:
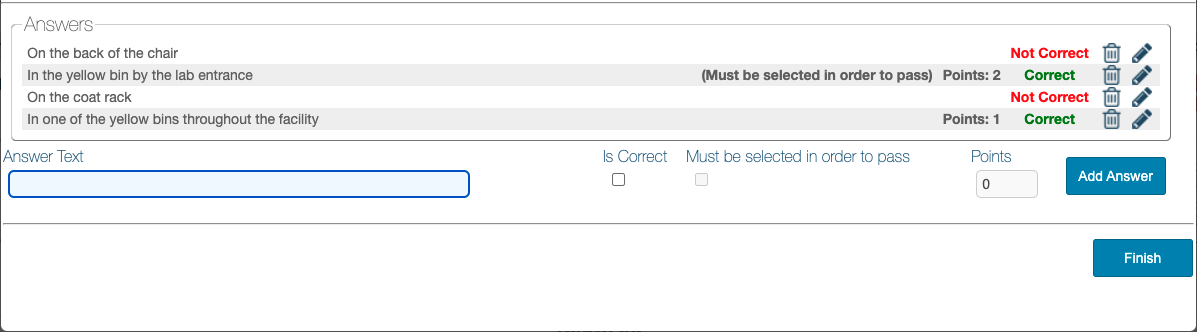
- Enter the text in the ‘Answer Text’ field
- If the answer is correct, check the box ‘Is Correct’
- Tick the checkbox under ‘Must be selected in order to pass’ to make this a required answer - no points will be awarded for this question if this answer is not selected
- If “for each correct answer” was selected, enter the number of Points this answer is worth; the default is “1” and only whole numbers greater than “0” can be entered
- Click Add Answer
- Repeat these steps to add as many answers as needed and click Finish when done.

Questions and their answers can be edited or deleted once created, as long as the template is in draft state.
To add further questions click the Add Question button again and repeat the process.
Text Question
Text questions require the candidate to write an answer in free-form text. The candidate can also add attachments if they are allowed in the question creation. The ‘Guidance for the Examiner’ field can be used to add the answer or bullet points that will help the examiner mark the longer essay style questions.
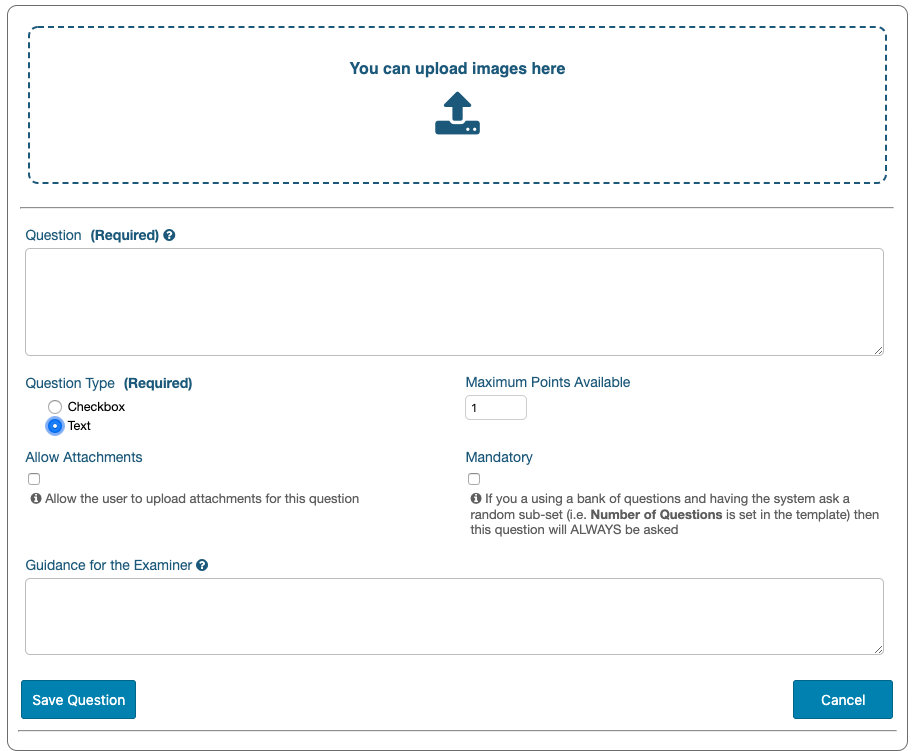
To complete a Text question:
- Enter a whole number, greater than “0” in the field, Maximum Points Available
- Tick the checkbox under Allow Attachments to let the candidate add a file that supports their answer
- Tick the checkbox under Mandatory if you always want this question to be asked (when you have a large pool of questions)
- Enter information in the Guidance for the Examiner field if appropriate
- Click Save Question
- for Text questions, this completes the question creation
Once saved, questions can still be edited or deleted before the test template is published.

The order of questions can be changed except when the ‘Randomise Questions’ option is selected.
When randomisation is enabled, mandatory questions get moved to the top.

Publishing the Test
Once the requisite number of questions has been added it is possible to publish the test so that it can be assigned to and completed by users.
To publish the test expand the drop down menu, select ‘Publish’ and click ‘Go’.

It is possible to delete the test still at this stage using the ‘Delete’ option in the drop down menu.
Until the test template is published the tests cannot be assigned. The template sits in the system as a ‘Draft’ template. As soon as the test is published it automatically becomes version 1.0 and is locked. Creating a new version and publishing would create version 2.0.
Assigning the Test
Once the test has been published it can be assigned to individual users or to groups of users collected in distribution lists.
This can be done from two locations as follows:
-
To assign tests from an open published test template:
-
Select Assign Tests from the Actions dropdown menu
-
Click Go
-
Select the Test Template (only one test template should be listed in this selection filter)
-
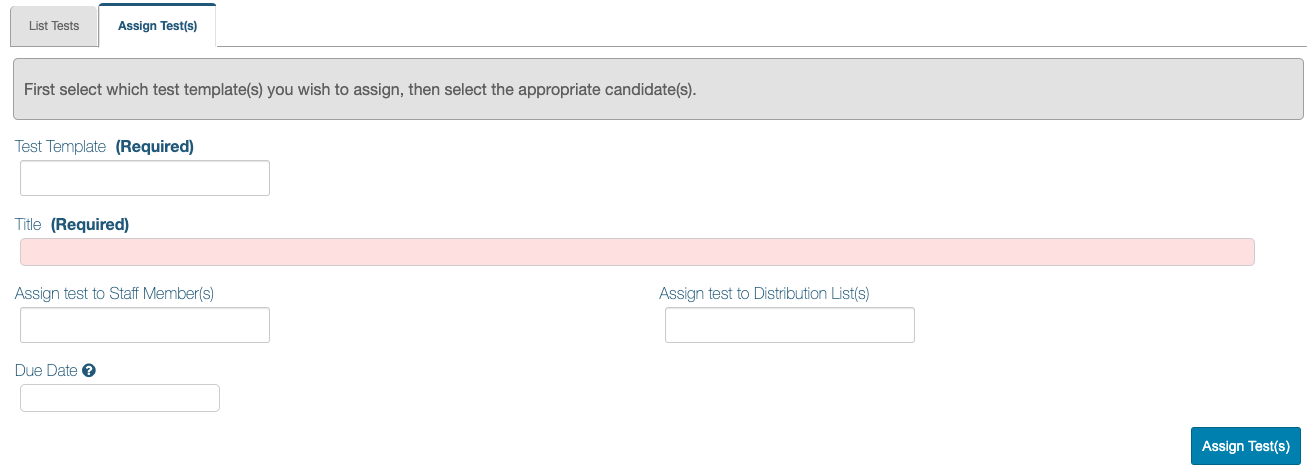
To assign tests from the Assign Test(s) tab (MULTIPLE TESTS CAN BE ASSIGNED):
-
Go to Competency > Tests > Assign Test(s) or click the plus [+] sign by Tests
-
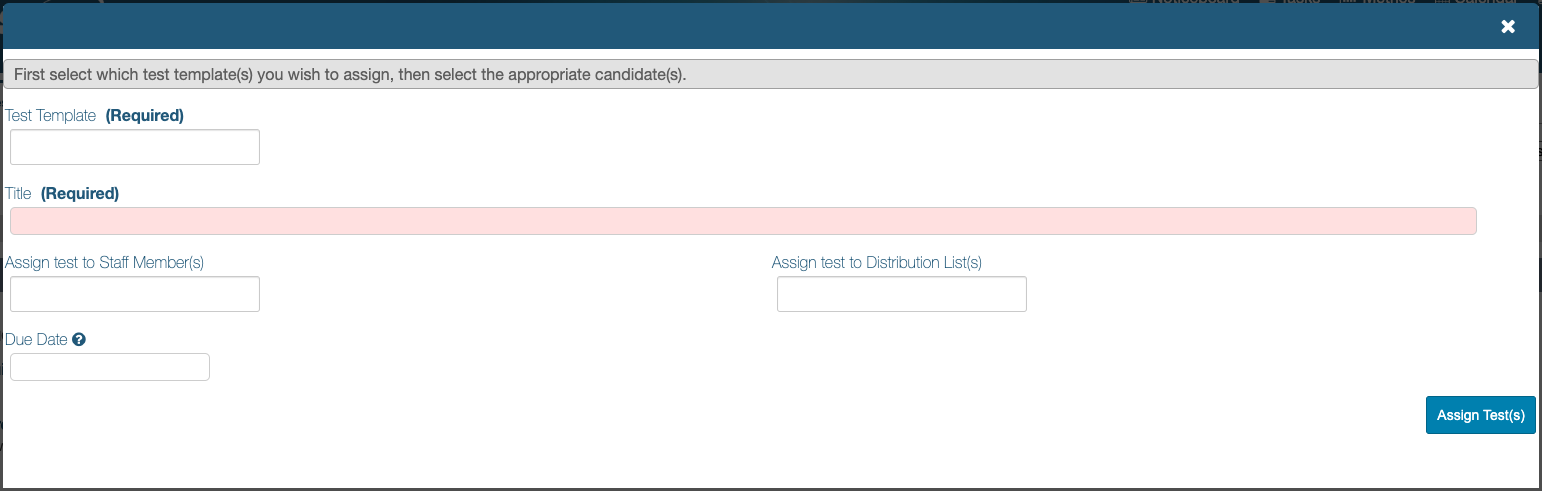
Select one or more tests from the Test Template field (all test templates available to the user are listed)
-
A Title can be entered when one test is assigned; when multiple tests are assigned, the system pre-populates the field with the message,“Multiple templates have been selected, the templates’ name will be used” (when the test assignments are notified)
-
Add candidates either by selecting individuals from the Assign test to Staff Member(s) selection filter, or by selecting distribution lists from the Assign test to Distribution List(s) selection filter
-
A Due Date can be added by clicking in the field and selecting it from the pop-up calendar
-
Click Assign Tests
A confirmation message is displayed to inform the user of the details selected.

If a test has been re-assigned before it has expired (whether passed or failed), clear indication will be given in the confirmation screen.

If a test hasn’t been completed by the candidate, the system will not allow re-assigning it.

Completing the Test
Upon assignment iPassport creates a task for the user to complete the test.
It can be found in several places:
- under the Tasks > My Tasks menu
To open the competency test, the user can simply click the row or expand the item by clicking, “task details” and then clicking “Take Test”.

- under My Tasks in the sidebar menu
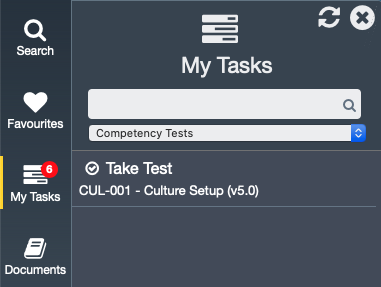
- If the user has access to the Competency > Tests > List Tests tab, they will also find “Take Test” buttons for tests assigned to them there
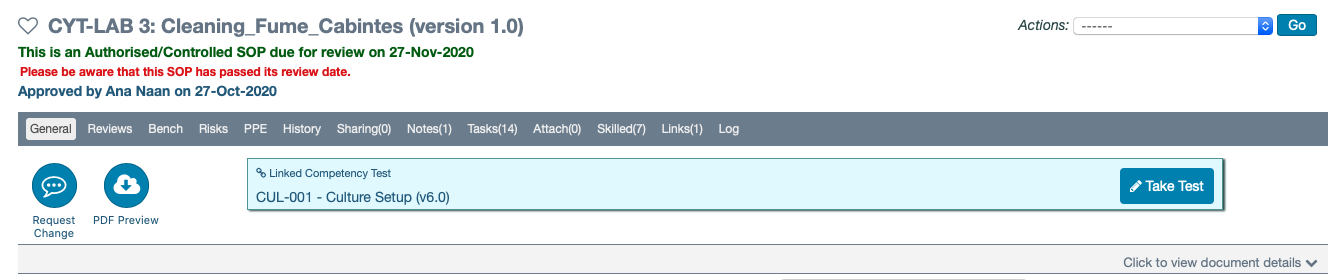
- If the test is linked to a document (Reference Documents), the candidate will also find a “Take Test” button under its General tab
The test opens as a lightbox and it can be closed before answering any questions (without affecting its ‘Not Started’ status) by clicking the “X” in the top right corner.
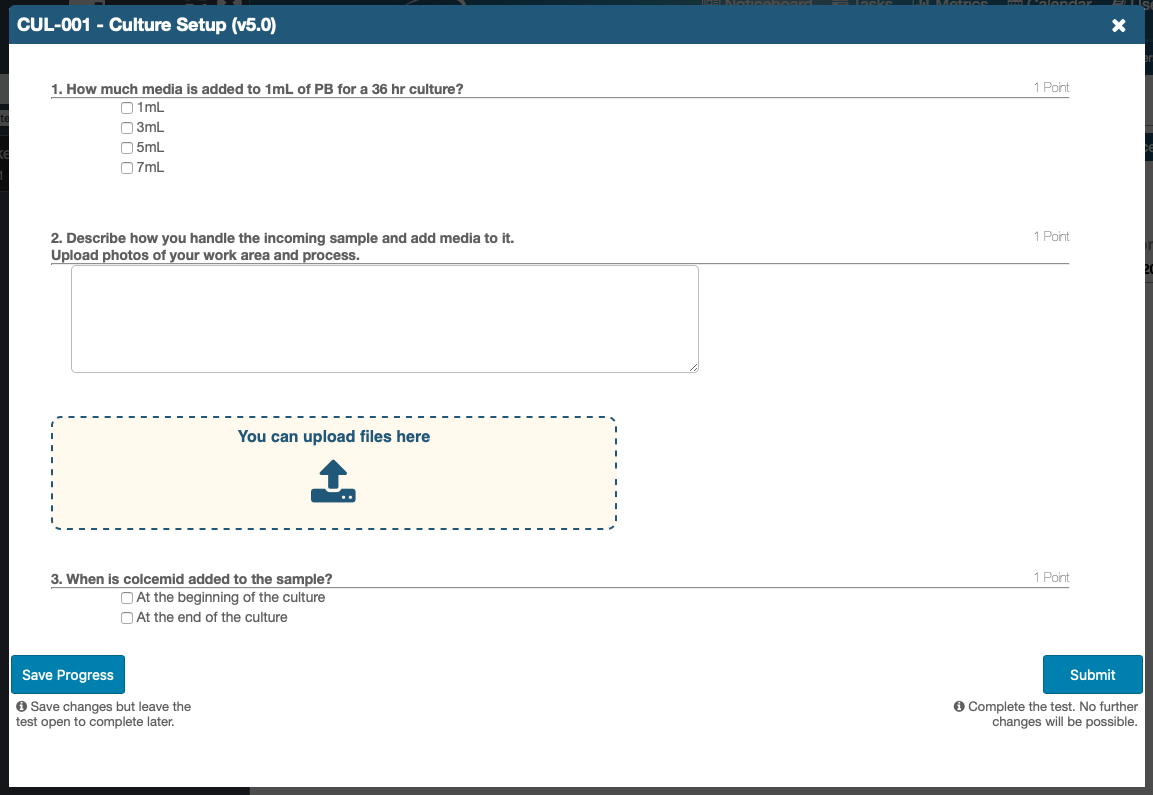
The candidate must answer all questions before submitting the test. If the option to allow saving progress was enabled, it will be possible for the candidate to click, ‘Save Progress’ and stop/start the test without losing any of the answers entered. If any question has been checked to ‘Allow Attachments’, they will see a field labelled, ‘You can upload files here’.
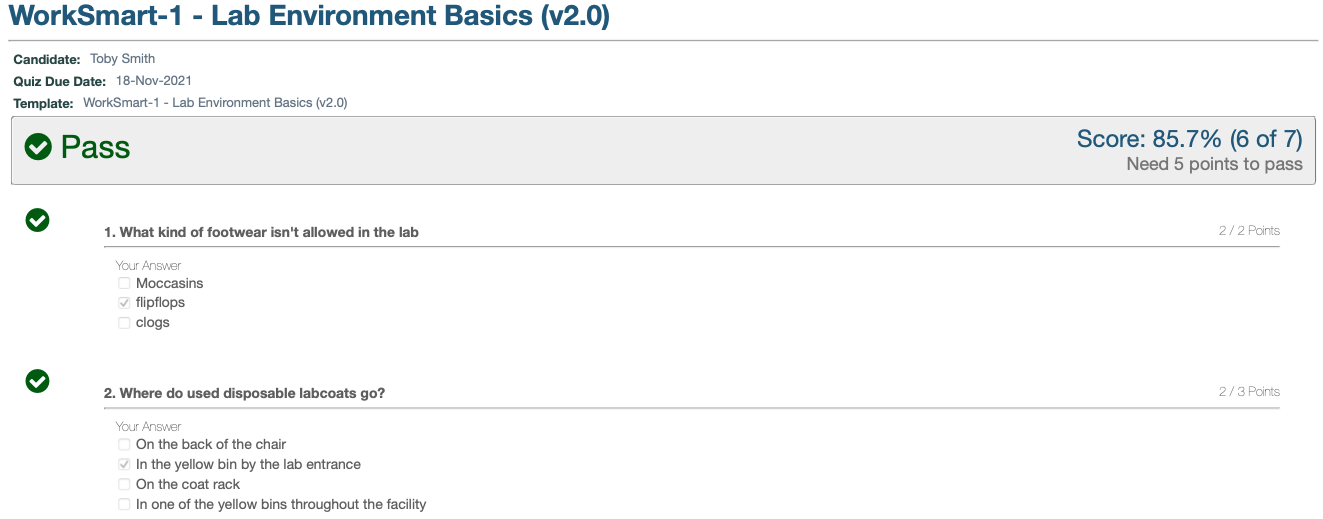
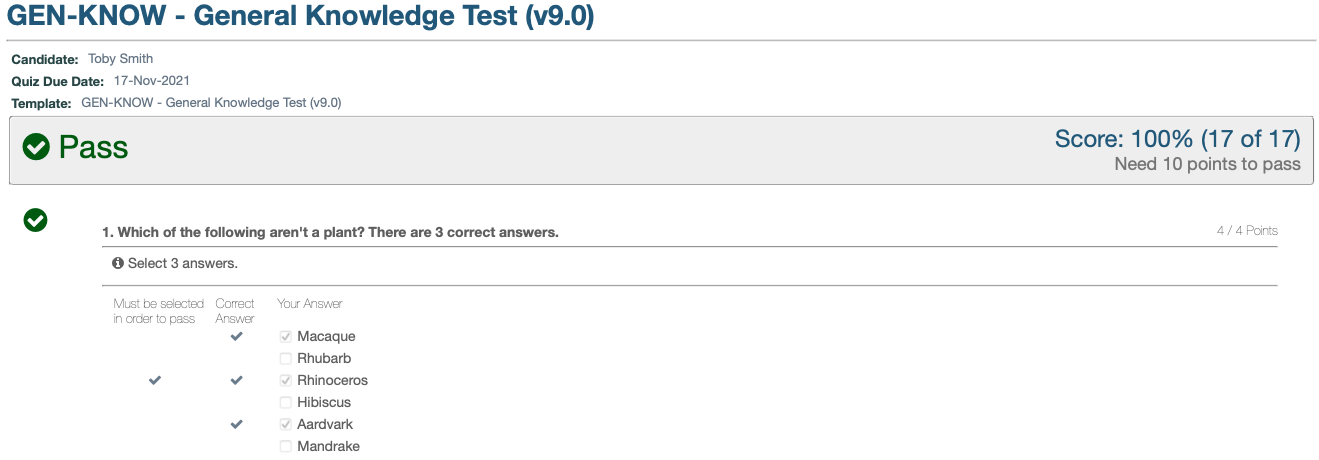
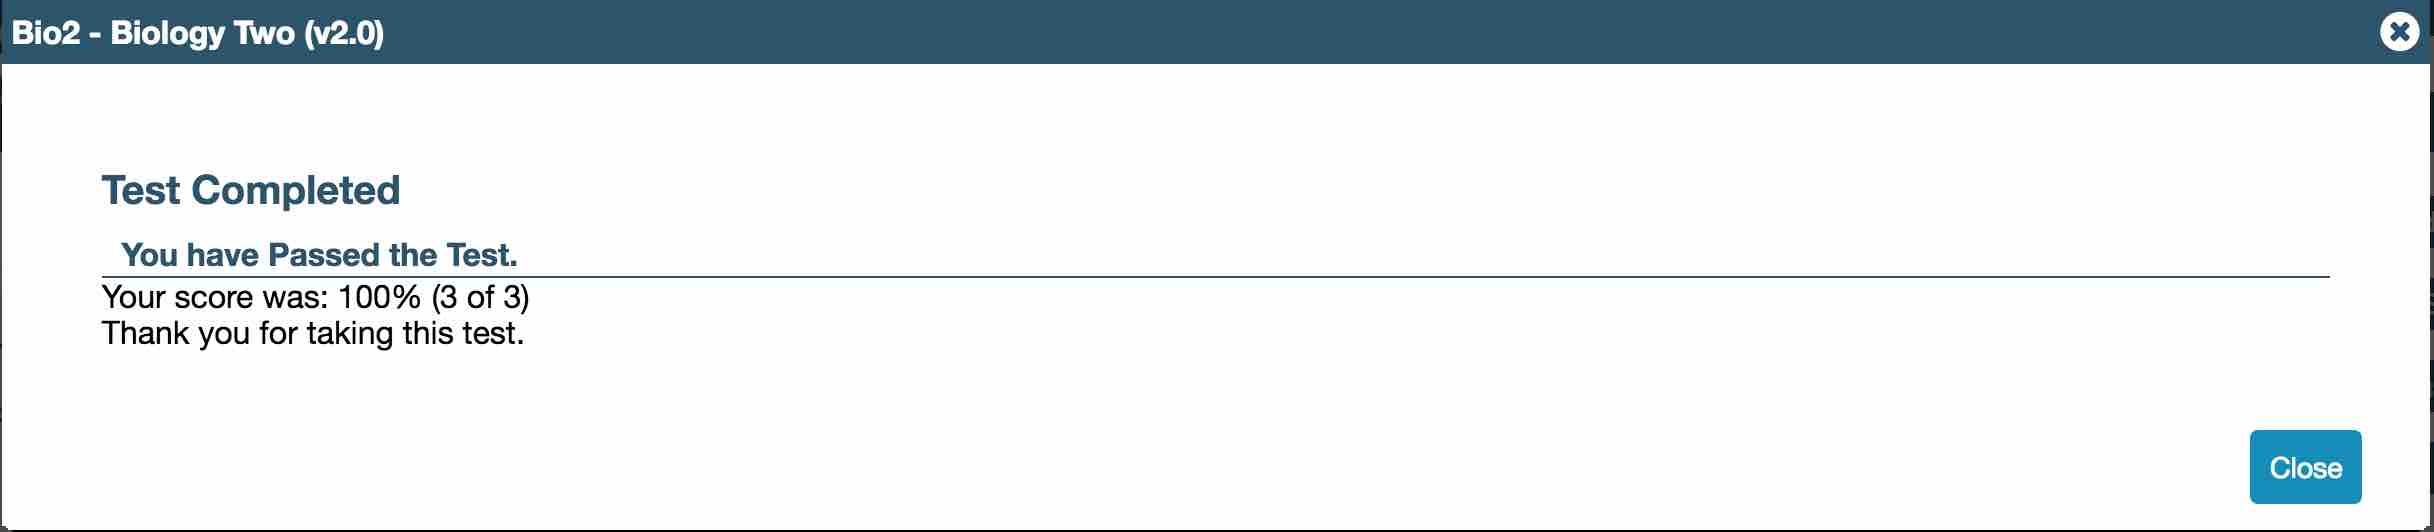
Once the assignee has completed the test, they can click the ‘Submit’ button. A message is then displayed confirming the competency test has been submitted. If the test has only ‘Checkbox’ questions the score will appear automatically.
The test results are then displayed under the List Tests tab. There are 9 available search filters to help locate any record. Four of them are hidden by default to provide more screen space below and they can be revealed by clicking the Advanced Search bar under the 5 main filters. The bar toggles between v Advanced Search and ^ Hide Advanced Search.
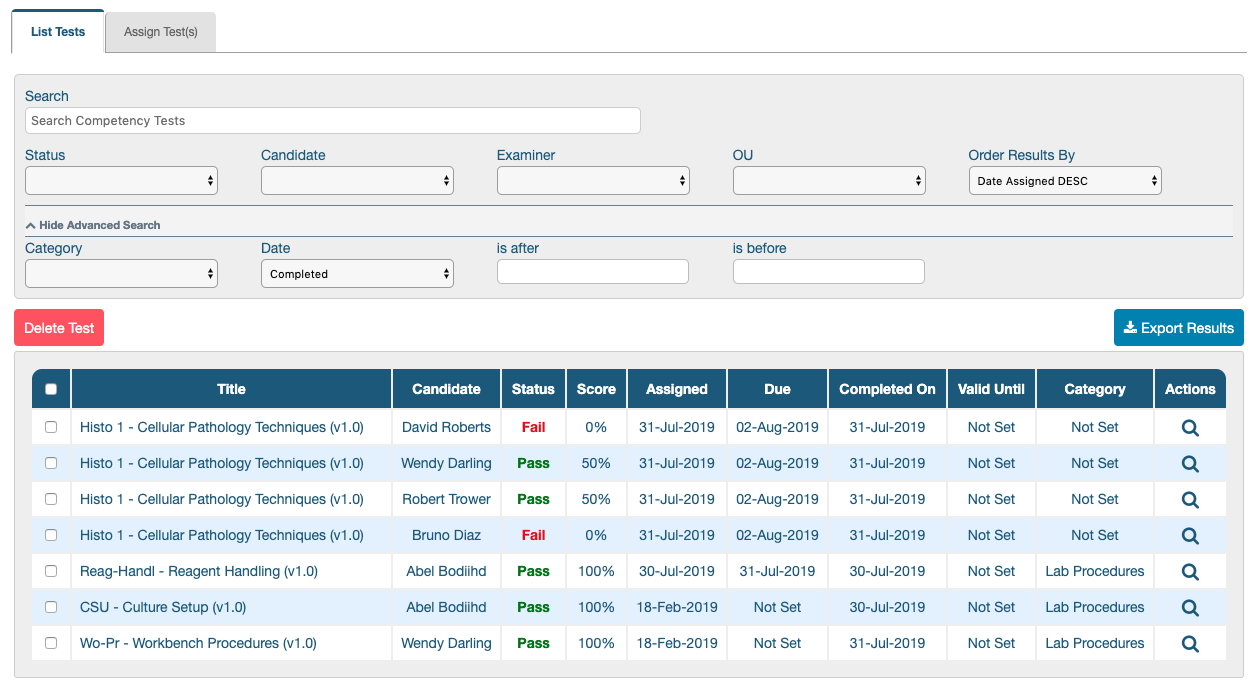
To view further details of the competency test and the individual answers, click the row of the item to be investigated or the magnifying glass in the ‘Actions’ column. This opens the test results page.
A user can select whether to show or hide candidate’s answer when they are viewing their own test. This is controlled by ‘Re-take Settings’ section with ‘Show Answers’ menu.
All responses are stored within the ‘Staff Profile’ and can be viewed if a user has enhanced access levels. For the individual user, they can review their Passed, Failed and Not Started competency tests (via Profile -> View My Staff Profile -> Click on the Tests Tab).

Marking a Test with Text Question(s)
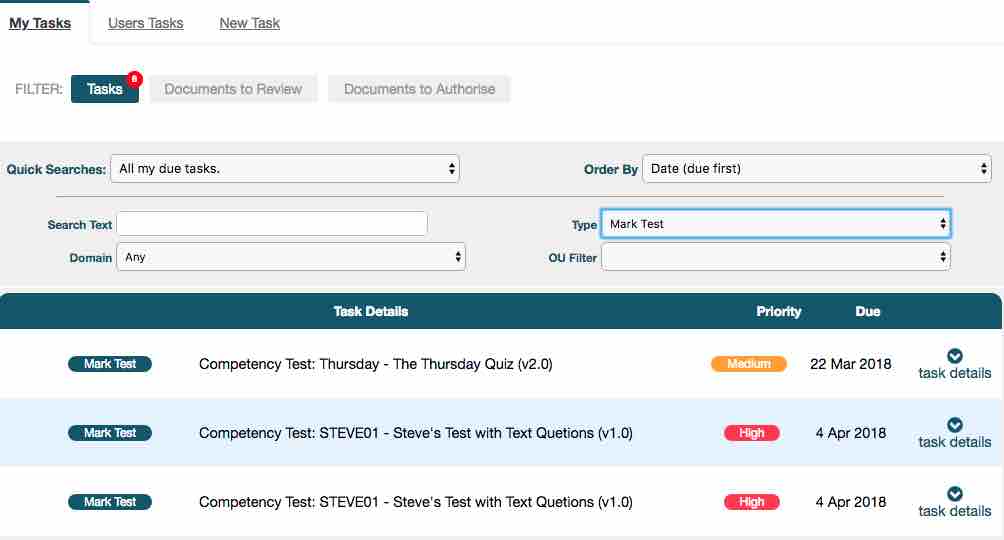
The chosen ‘Examiner’ of the test with ‘Text’ question(s) will receive a ‘Task’ notification to ‘Mark Test’. This can be filtered in the ‘My Tasks’ area:
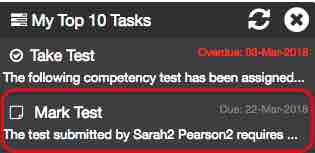
Or a user can use the ‘My Task’ side bar:
Even if the user is not selected as the examiner but still has the permission to mark a test they can navigate to Competency -> Tests -> List Tests and mark tests that are ‘Awaiting Marking’.
When marking a test the examiner will be able to view the question, the user’s answer, the ‘Guidance for the Examiner’ information, the ‘Score’ (max number of points) and be able to enter their comments in the ‘Examiner’s Comments’ field.

The examiner will score the answer out of the maximum number of points and click ‘Save’.

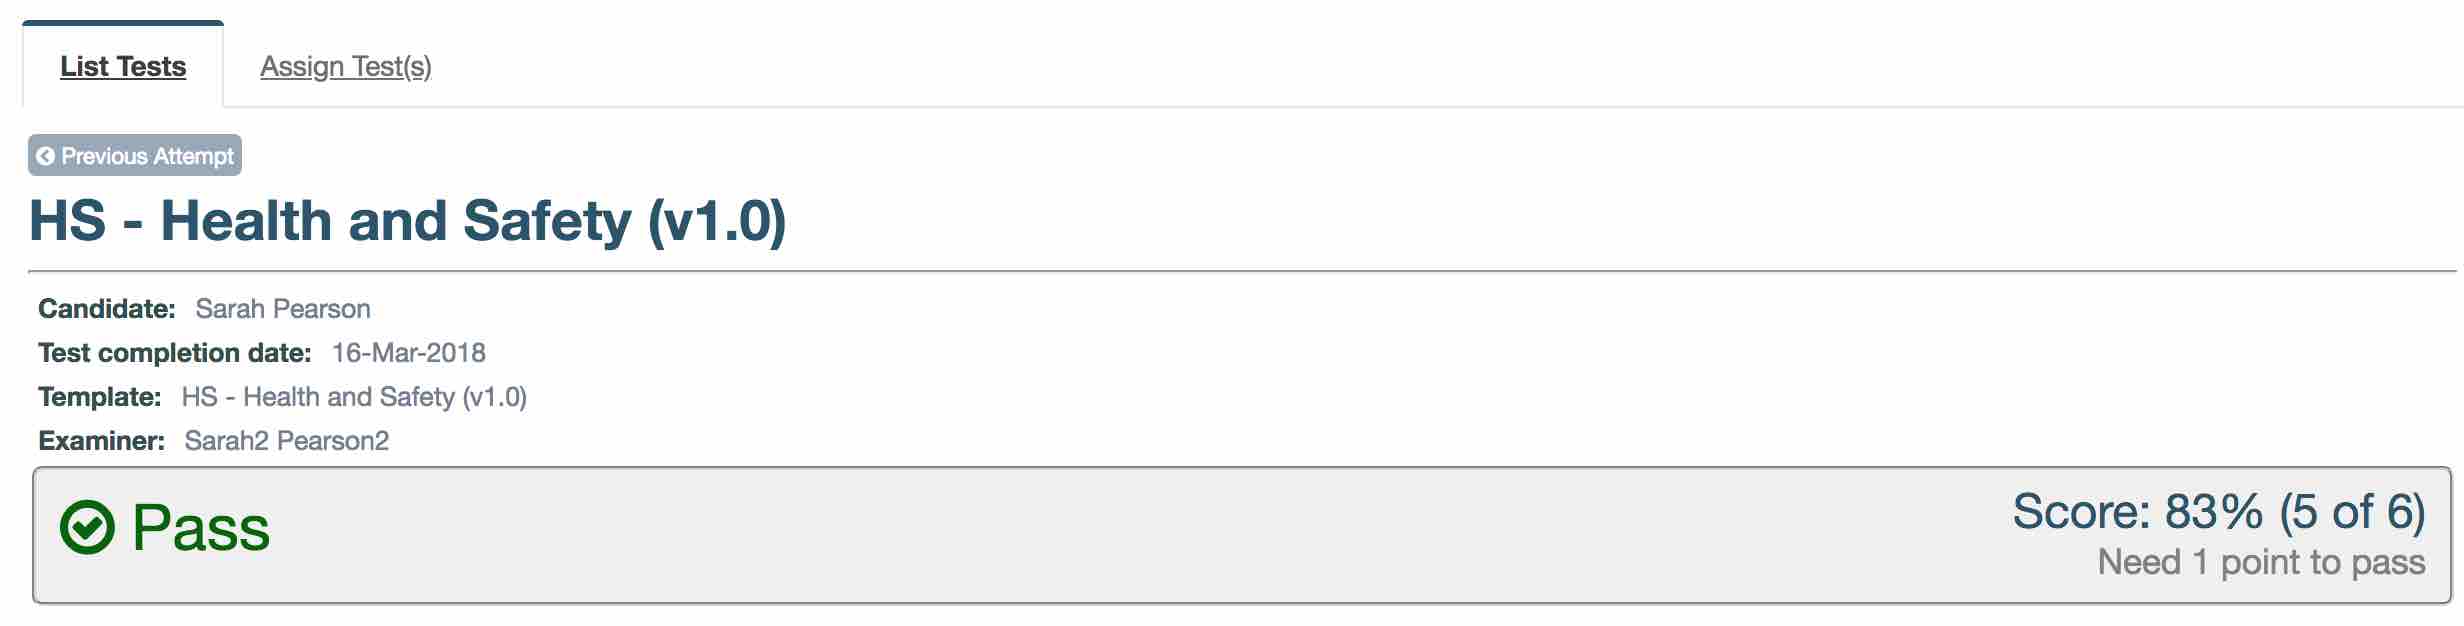
Once the examiner is happy that all ‘Text’ questions have been marked click the ‘Submit Test’ button at the bottom of the test. A message will appear ‘The test marking has been submitted’. A Pass or Fail status will be given to the test along with the score’s percent and how many points were correct out of the total number of points available. The ‘Pass Score’ is shown underneath.
Once the test marking has been submitted the The ‘Examiner’s Comments’ can be viewed but not edited.

Creating a New Version of the Test
A new version of a test can be created from the Competency -> Test Templates -> List Templates and select the test template that requires updating.
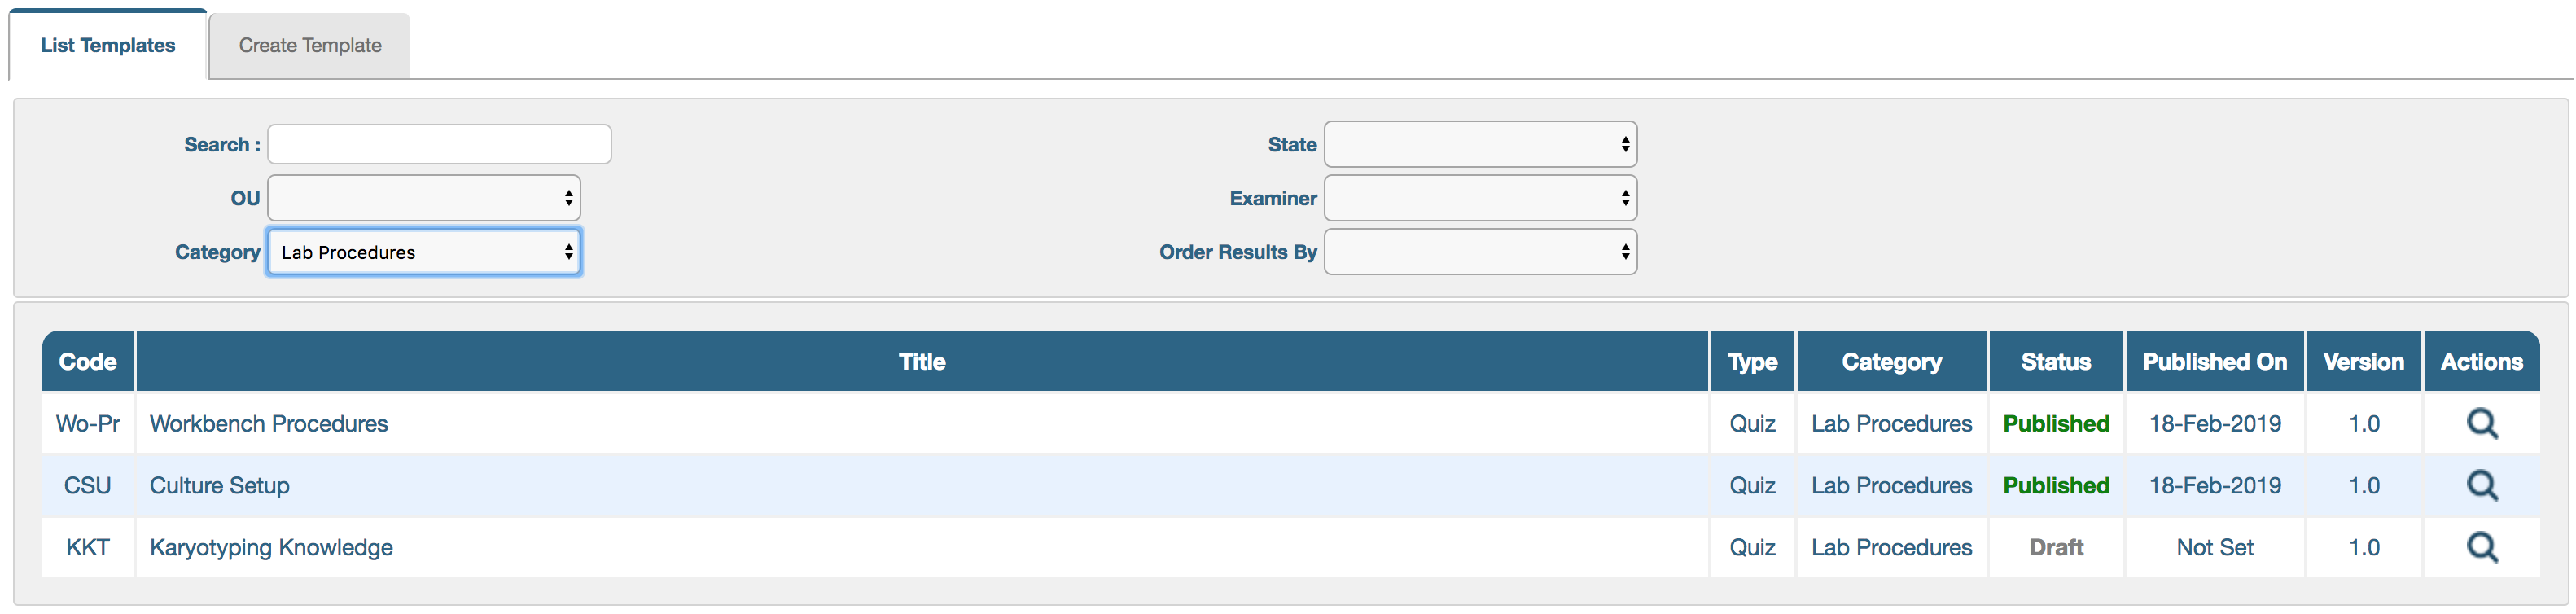
Note this has to be a Published Competency Template.
Expand the drop down menu and select ‘Create new Version’ then click ‘Go’, a confirmation message will then appear.

This creates a new draft version of the test for the user to add and edit questions to.

As with controlled documents the current test template goes into an ‘Under Review’ status. The competency test is still published and it is still possible to assign to users in the Assign Test(s) area.

Until the draft is published it cannot be assigned, it is also possible to delete the draft from the drop down menu.
Once the new version has been published it is no longer possible to assign the previous version of the test.
As with controlled documents when the draft version is published the previous current version is archived.


The user can still complete any tests already assigned prior to the test template being superseded.
Deleting or Archiving a Test Template
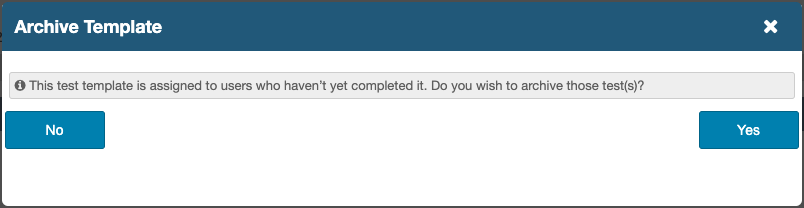
When archiving a template with any assessments that are still ‘Not Started’ or ‘In Progress’, a message will pop up allowing you to select if you’d like to remove the assessments or not.
To do this:
- Navigate to ‘Competency > Test Designer > List Templates’
- Search for the published test template and open it
- From the Actions dropdown menu, select ‘Archive’ and click ‘Go’

If any tests assigned with the template being archived are still ‘Not Started’ or ‘In Progress’ or ‘Awaiting Marking’ , a message will pop up asking whether to archive the assigned tests together with the template or not.
Should a test template need to be un-archived, contact the iPassport support team at [email protected]
All other states can simply be deleted. Again, enter the test template and this time select ‘Delete’ from the drop down menu and click ‘Go’.
Deleting an Assigned Test
If a test is no longer needed, it can be deleted as follows:
- Navigate to Competency > Tests > Lists Tests and locate the test (using search filters available, if necessary)
- Tick the checkbox in the left column of the test in the search results area
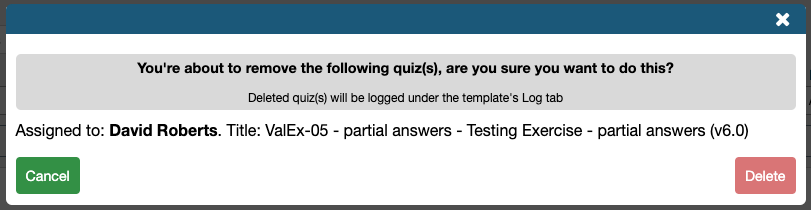
- Click Delete Test
- Check the details in the lightbox that pops up and click Delete Test
The test and the results are then removed from iPassport across all areas like, Tasks and Staff Profiles. If the same test had been taken previously by the user in question, the previous copy will revert to being the current attempt (whether passed or failed).