- Creating a new Checklist
Creating a New Checklist
Introduction
PLEASE NOTE: iPassport contains two elements in its Quality Management module: Checklists and Standards. These words are used differently on either side of the Atlantic and can cause confusion. Within iPassport, ‘Standards’ refer to regulations issued by a body such as CAP or ISO, whereas iPassport’s ‘Checklist’ functionality allows users to design and create the content of an audit by combining requirements from imported standard sets with additional user-generated items.
Checklists are currently central to the audit process within iPassport. They can be based on questions designed by users or on questions extracted from standards. Once a checklist is created within iPassport, it can be used time and again for audits. iPassport includes designated fields to allow auditors to respond to each item in a checklist within iPassport directly. With smart device compatibility, iPassport offers the ability to conduct audits and add responses in a live setting. Alternatively, checklists can be printed so that findings can be recorded manually before feeding them back into iPassport. This information can then be actioned if necessary, using the task engine within iPassport. Please refer to the user guide, Internal Audit Management for more information about this.
The checklist itself is a stand alone item and to enter the findings into iPassport, an Audit needs to be created.
Creating a new checklist
iPassport Checklists have been designed to be used in conjunction with an audit; an audit can be easily configured with one or more checklists. A checklist can be built up either directly from standards (already imported to the account), from a series of questions designed by the user or from a combination of the two.
To create a new checklist:
-
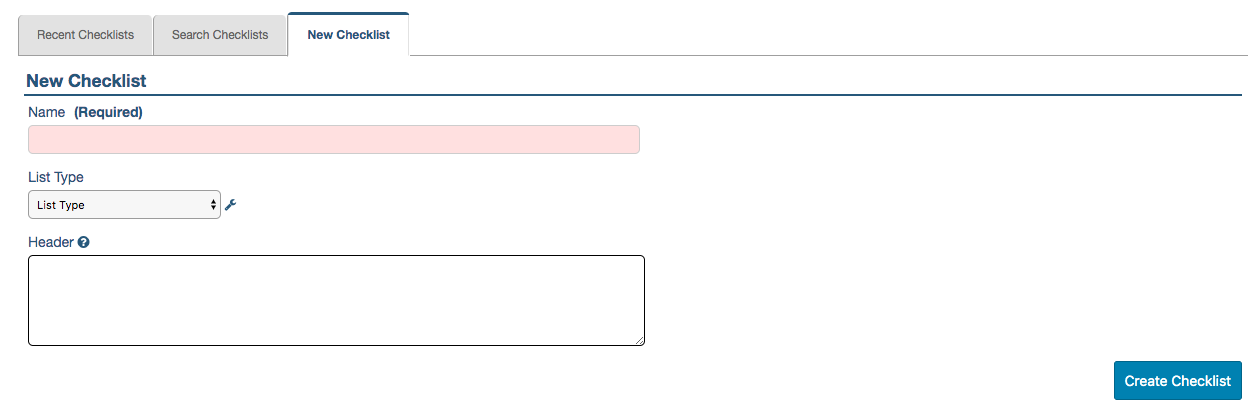
Go to Quality Management > Checklists > New Checklist (or use the add [+] sign as a shortcut)
-
Enter a relevant name for the checklist in the field, Name (this is a required field)
-
Enter a Type to help classify it (optional field)
-
Enter free text in the Header section (optional field)
-
Click Create Checklist
-
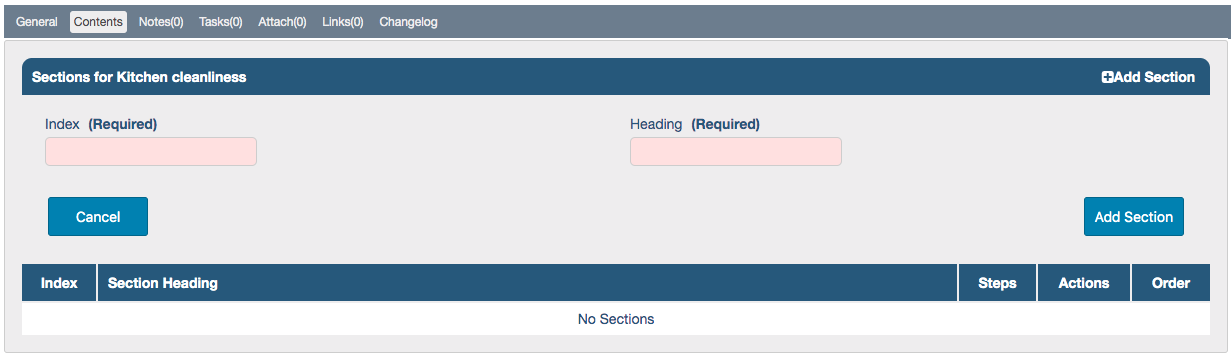
Click the Contents tab
-
Click [+]Add Section
A section must be added before standards or steps can be added.
-
Enter an index in the Index field
Only numbers can be entered (a decimal place is allowed); they help ordering and differentiating the sections. This field is required.
-
Enter a name for the section in the Heading field. If standards are used, it should make reference to them for clarity.
-
Click Add Section to expand the area for new additions
-
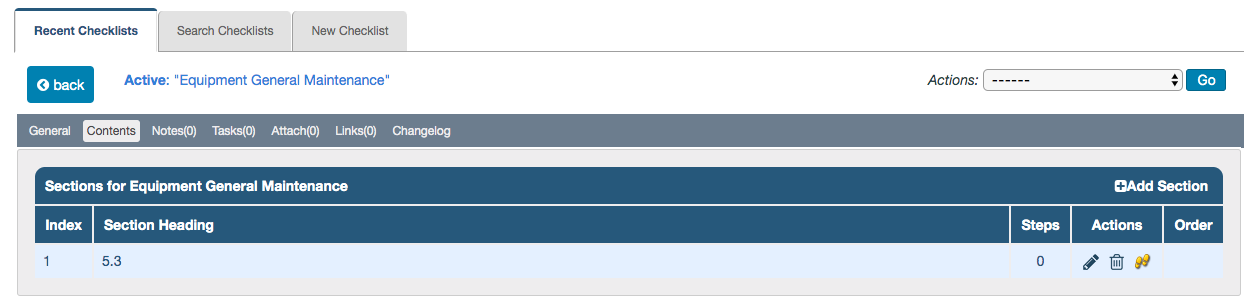
To populate the section, click the steps (footsteps) icon under Actions
-
To add a standard, click (+)Add Standard

-
Enter a standard search term (e.g., 5.3.1) in the Add Standard lightbox to find available standards
-
Select an OU to display only standards from that OU
-
Click the link (chain) icon under the Link column of the standard to add that item
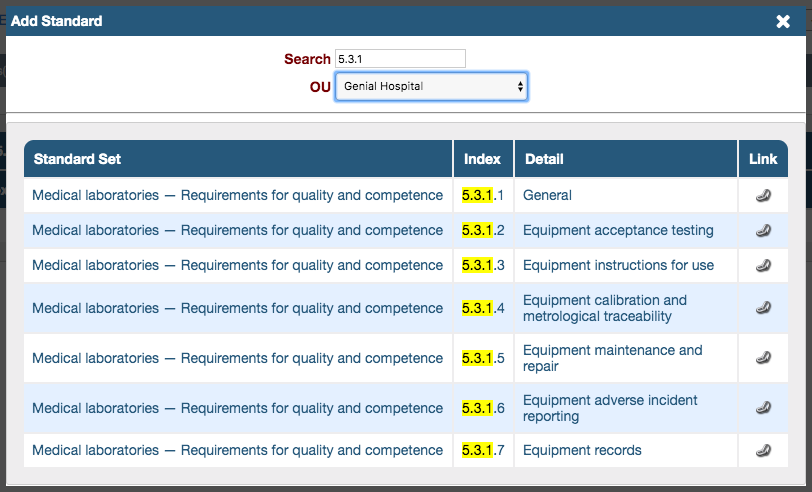
Standards can only be searched in the OUs the user has access to.
-
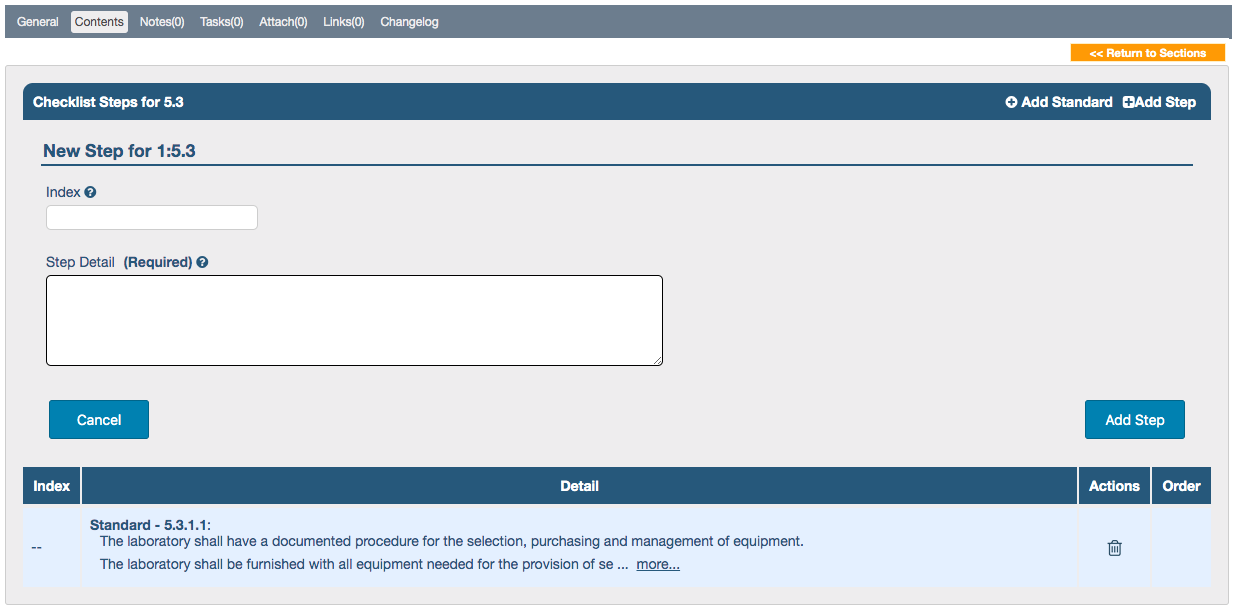
To add a user designed question, click [+]Add Step to expand the area
-
You can leave the Index field blank to let the system auto-generate it
-
Enter free text in the Step Detail field
-
Click Add Step
-
When all steps have been added, click Return to Sections
-
Additional sections can be added following the steps above

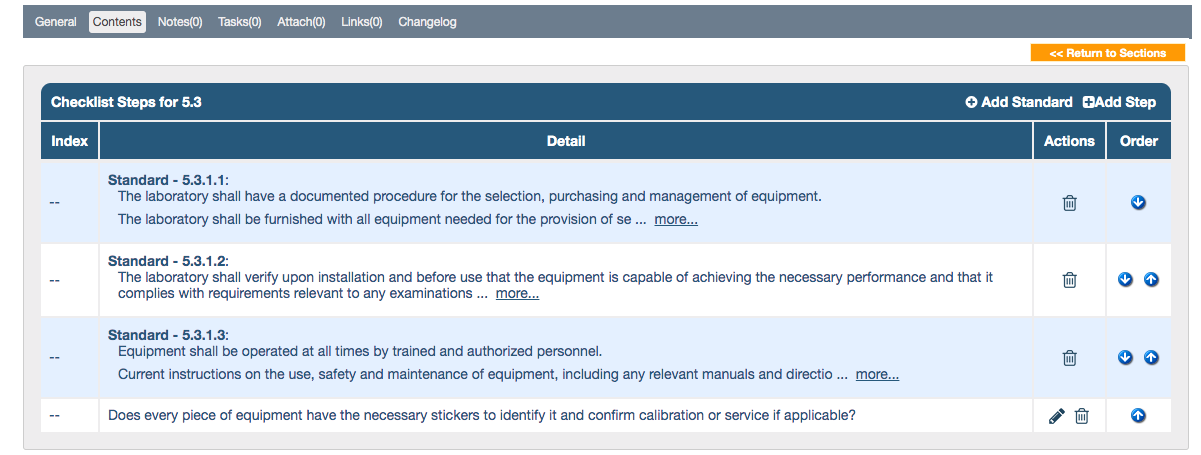
The number of standards and user designed steps added are grouped under the column, Steps for each section.
Standards and steps can be deleted by using the trash/bin icon under Actions. Steps can be edited. When they are added, they get placed at the bottom of the list. The arrows under Order allow moving the standards and steps into the desired order.
Once all sections have been added, the checklist is complete and can be used as part of an audit.
Managing Checklist Types
Instructions on how to manage this configurable look-up field can be found by clicking this LINK.