- Managing Document Ownership
Managing Document Ownership
Introduction
Document owners receive notifications on all events relating to the document. The document owner is the person or people responsible for managing the document within iPassport. This may very well be a different person to the author. Use this feature to specify who should approve/reject change requests and manage the document’s review lifecycle.
OU Settings
By default, document owners have permission (via Document Control settings) to perform any action with their owned documents, including authorising them. It might be preferable for some organisations (or their departments) to limit the number of users entitled to authorise documents so there are settings to control this in each Organisational Unit. When the setting is unchecked, the owners of documents in that particular OU will only enjoy the permissions they have been granted through user group membership in that OU and for the document type in question.
To enable/disable full document owner permissions in a given OU:
- Navigate to Administration > Settings > Organisational Unit Preferences
- Select an OU from the dropdown menu, Organisational Unit
- Click the row for Document Control
- Tick the checkbox for the preference, Allow Document Owners to perform any action on their documents, regardless of permissions
- Scroll to the bottom of the page and click Save.
Assign Owner(s) to Multiple Documents
- Use the Controlled Documents search screen (accessed via Laboratory Records > Controlled Documents), to search for and select the document(s) whose owner(s) need to be reassigned and click the Manage Ownership button.
Documents can be selected individually by ticking their checkbox in the left column or all at once by ticking the checkbox in the header area.
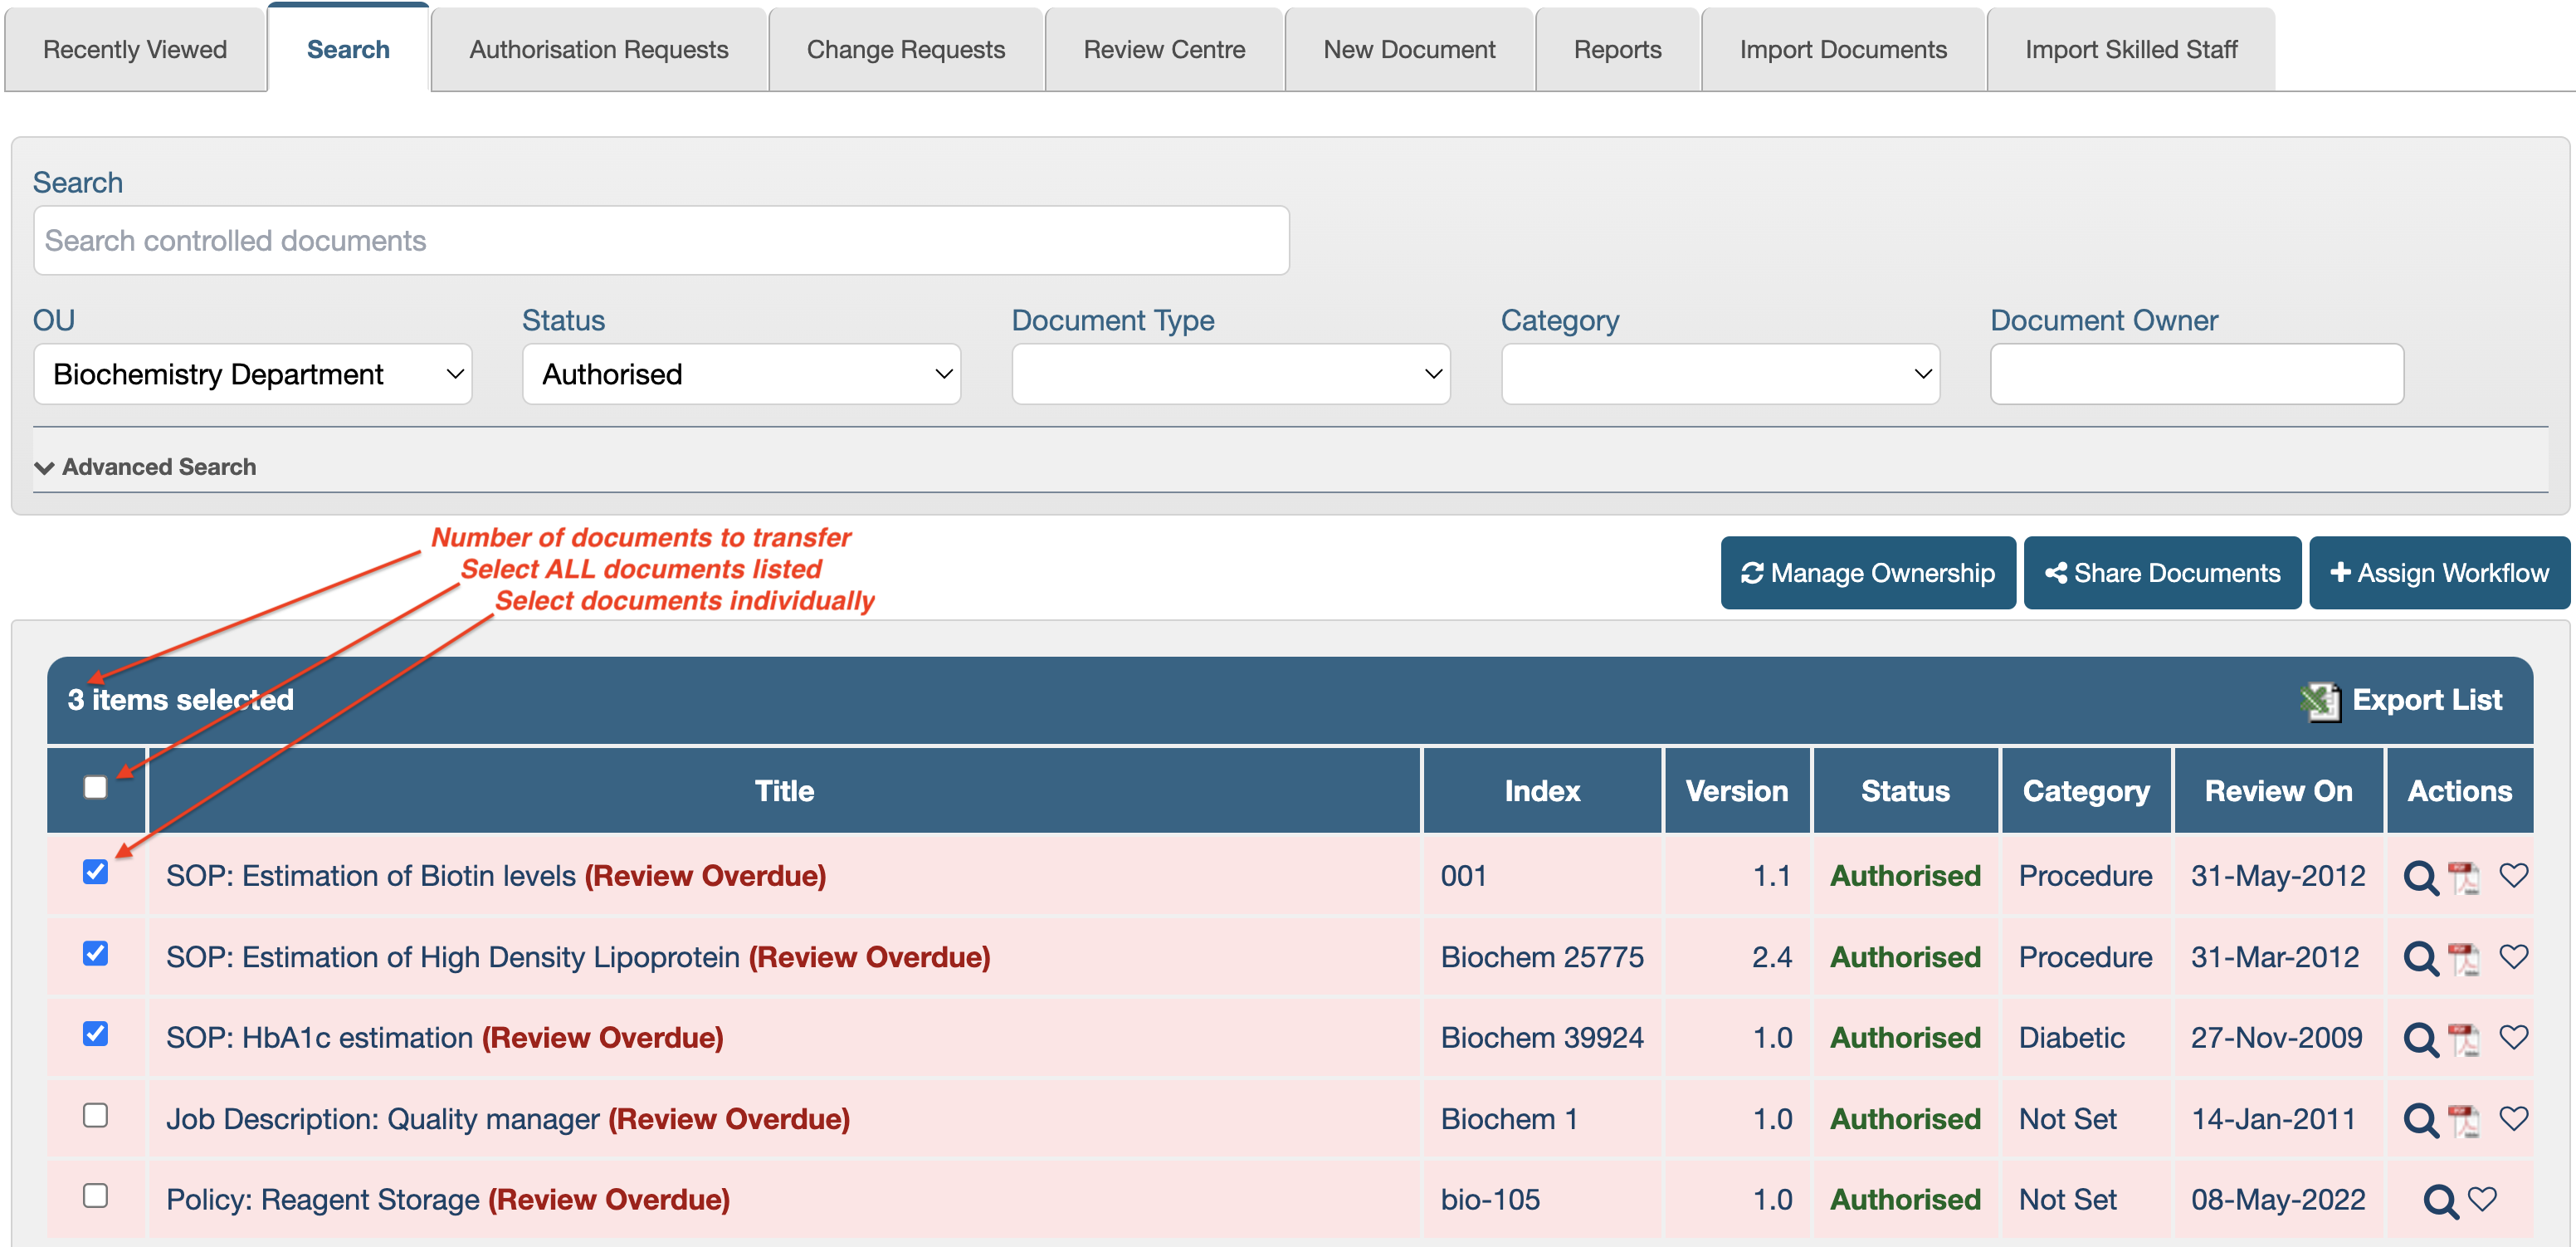
- Click the Manage Ownership button to open the Manage Ownership Lightbox.
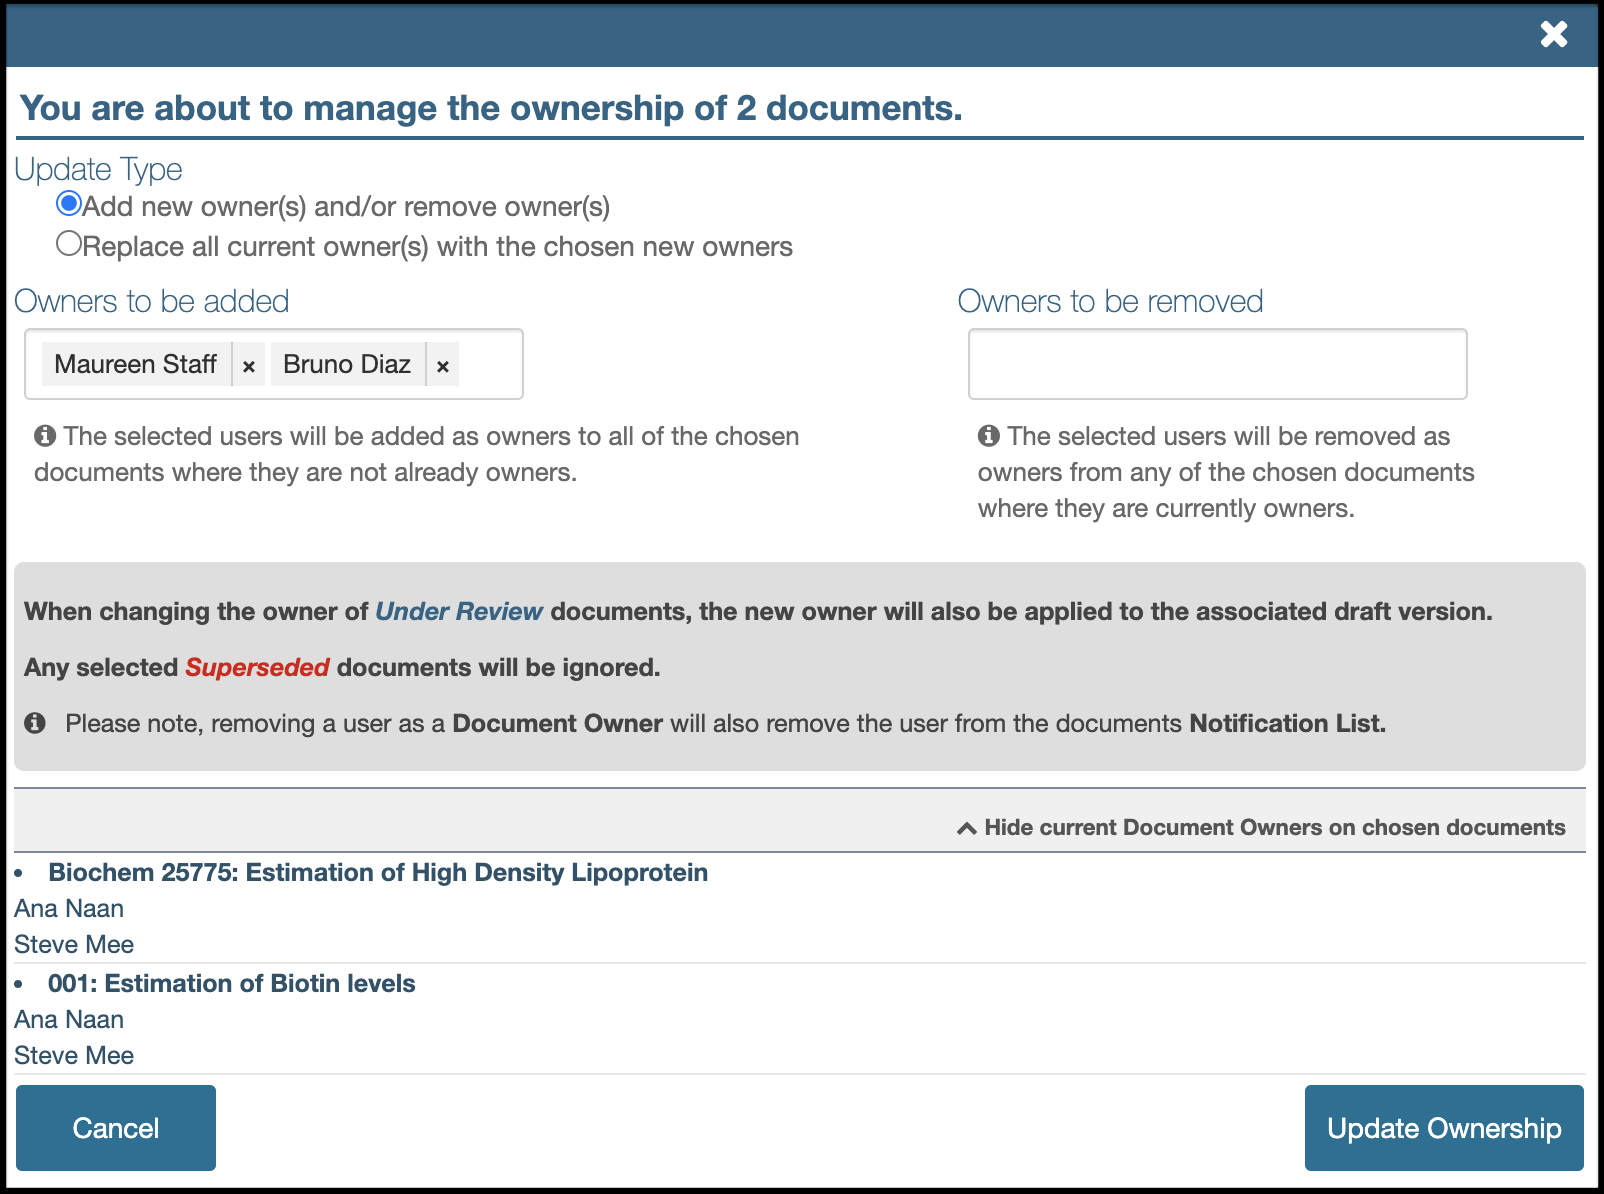
- Select whether the user(s) will be added to the existing list of owners or replace them entirely.
- Use the Owners to be added field to search for the user(s) to be applied as the new owner.
This field can be used to select individual or multiple users at the same time. - Click Update Ownership to complete the process.
Removing Owner(s)
- As above, use the Controlled Documents search screen to find and select documents with an owner who needs removing.
- Click the Manage Ownership button to access the Manage Ownership Lightbox.
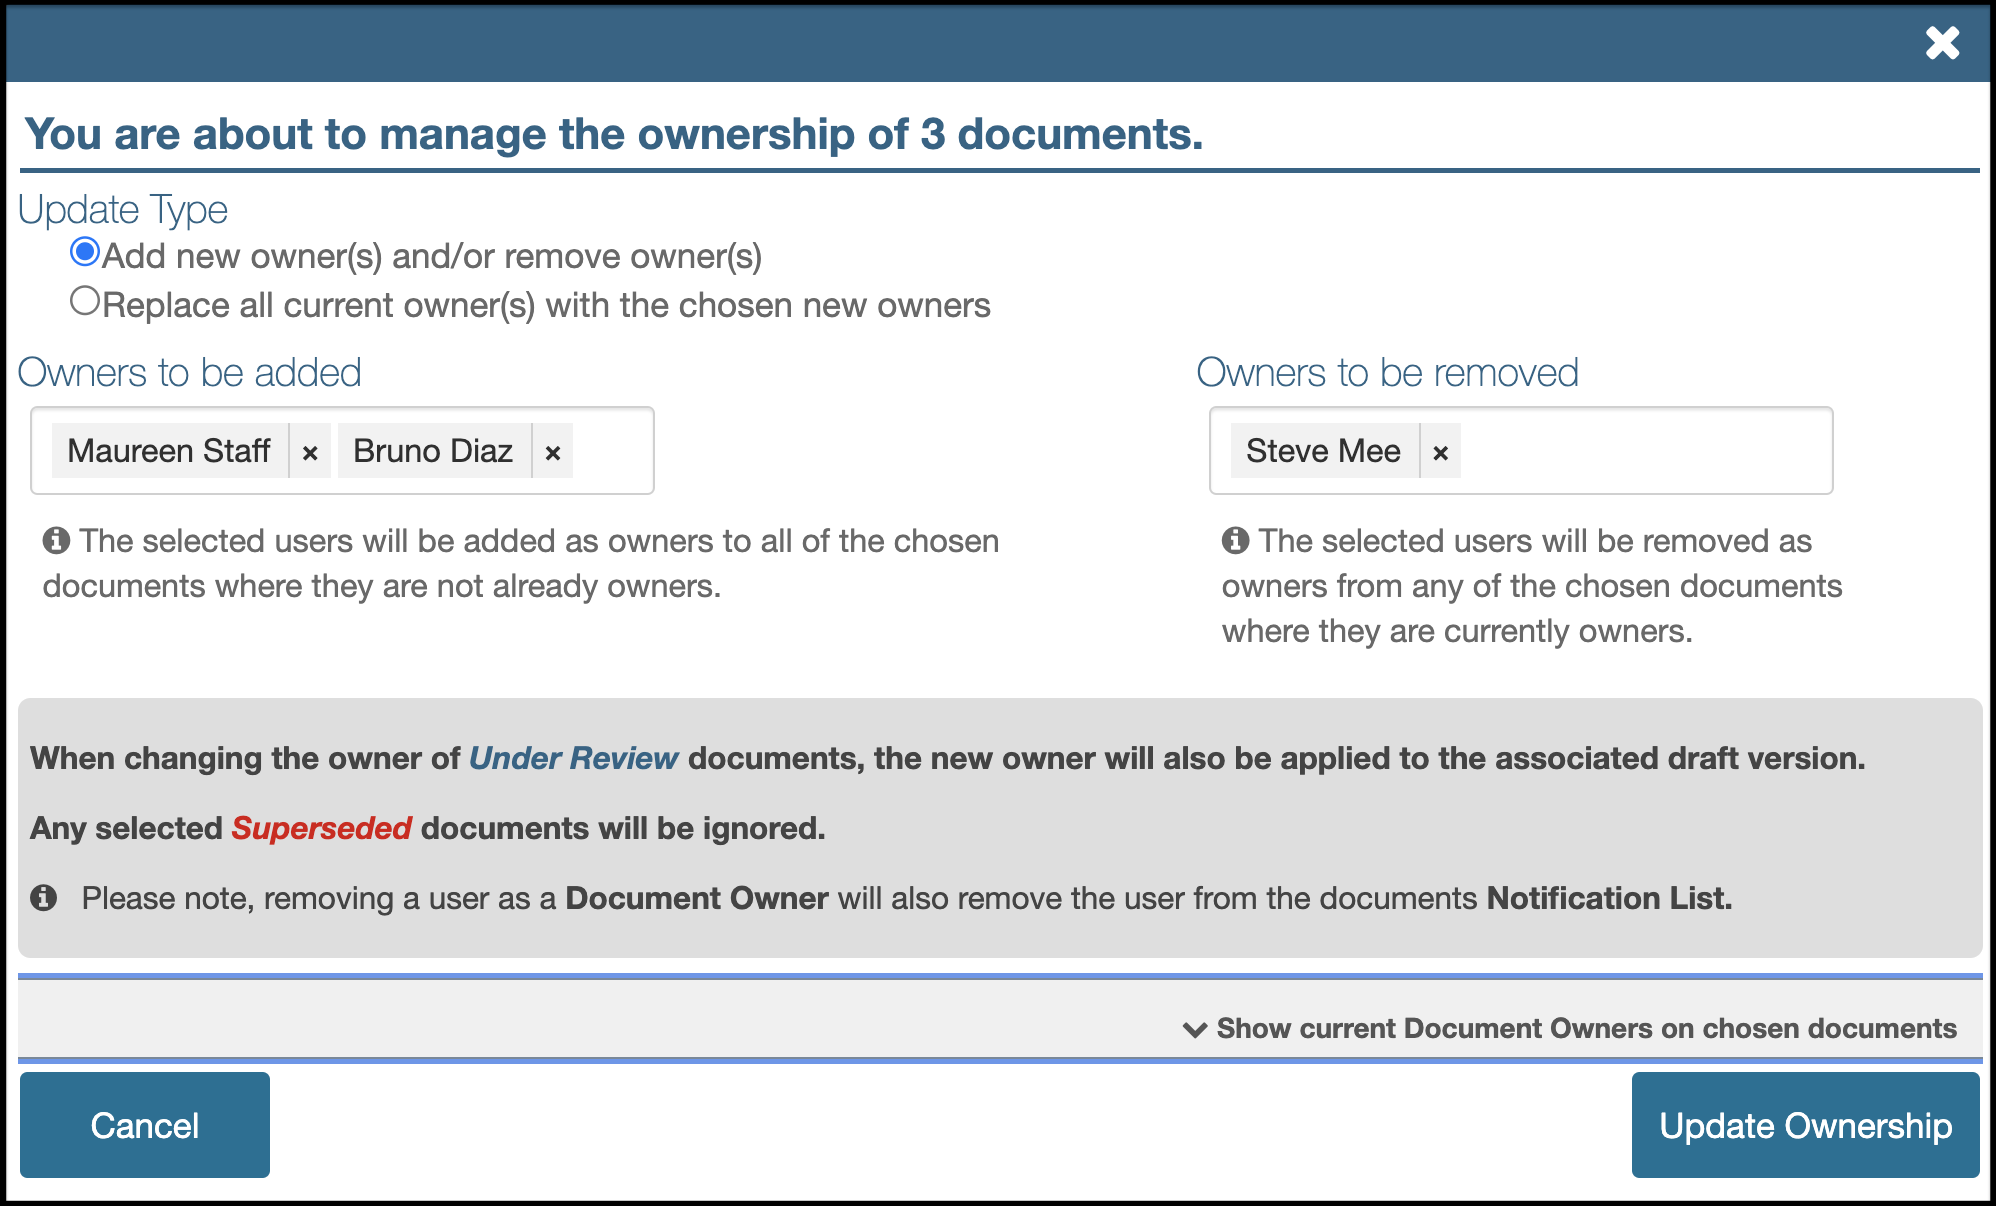
- Use the Owners to be removed field to search for the user(s) to be removed from ownership.
- Click Update Ownership to complete the process.
Edit Owner(s) on a single Draft Document
To change ownership on an authorised document or multiple draft documents use the above method from the Controlled Document search page.
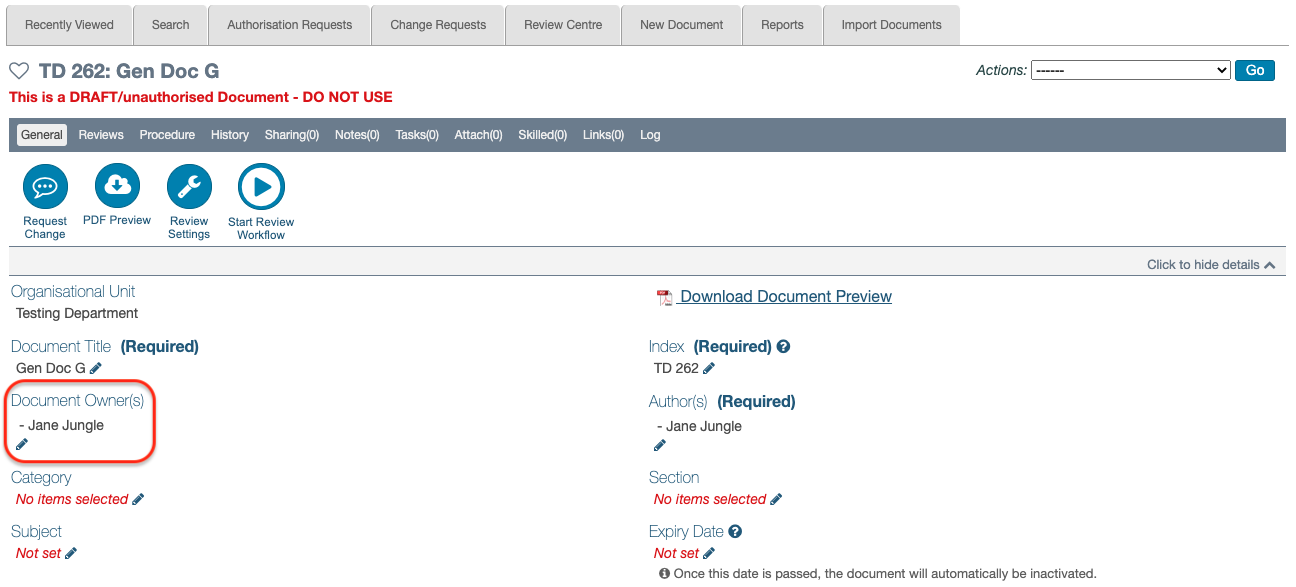
To edit document owners on an individual draft document simply open the document and edit the Document Owner(s) field on the document’s General tab.
Search for Documents by Owner
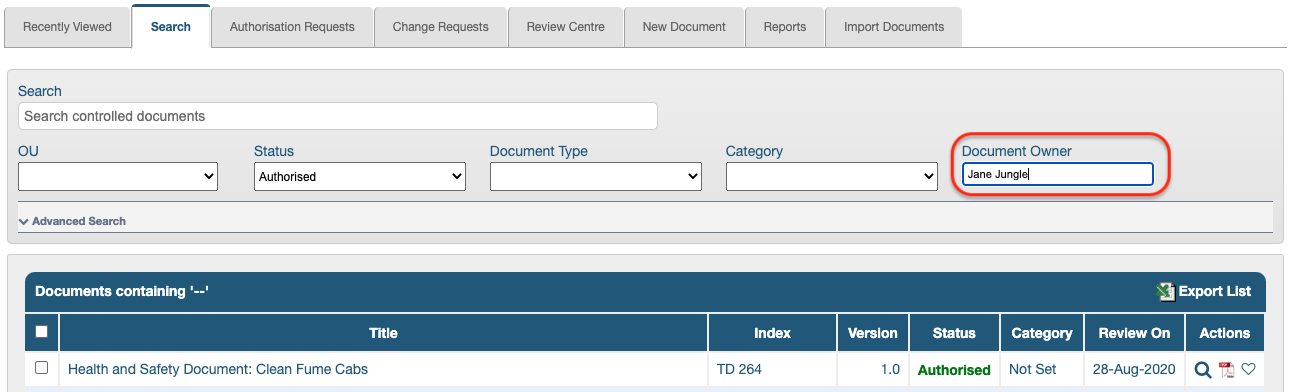
To search for all documents owned by a particular user simply use the Document Owner field on the Search form.
This search can be particularly useful when transferring ownership from one user to another.
Search for the current owner, select all records from the search results then use the Manage Ownership button.