- Getting Started
Beginners’ Guide - Skill Task Completion
Logging into iPassport for the first time
When a user account is created in iPassport, a welcome email with login credentials is automatically sent out to the new user. The email comes from [email protected], in case the address needs to be whitelisted by the user or the IT security team. A link is provided to open a tab with the iPassport login page for the user’s organisation. Note that the URL of the link does not include “www.” and the prefix should not be added.
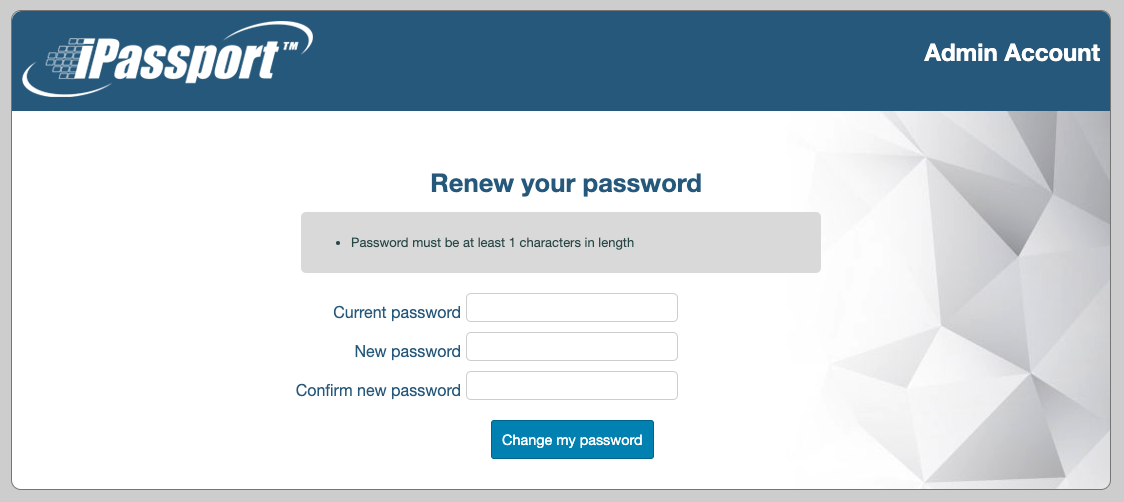
For safety and convenience, the user will be prompted to enter a new password as soon as these credentials are entered.
The welcome email looks like this:
Welcome to your new iPassport QMS user account.
This technologically advanced application provides many benefits over a traditional quality management system and we are sure you will find it a valuable asset.
To access your new account, please go to: https
(N.B. No “www.” is required.)
To enter the application you will need to use the login details below (you may change these to suit your own preferences once you have accessed the application):
Username: drob
Password: 9bcebfdf
It is necessary for iPassport to store your username, name and email address. To control who can see your additional personal information click Profile in the top right menu after logging into the application.
If you have any questions please do not hesitate to contact us.
Best wishes
Genial Compliance
It is also possible for the account administrator to reset a password manually, make note and share the new credentials directly with the user. Password complexity rules can be adjusted by the account managers. The new password rules are displayed in a boxed section, according to the current account settings. The system will validate the password before approving it.
Basic Navigation
For a complete description of the menu structure in iPassport, please refer to the user guides, Basic Navigation, Sidebar Menu and Simple View.
Depending on how the new user account was set up, the user will be presented with one of two views upon logging in - Detailed View or Simple View. There are also personal settings to define the default landing screen when the program opens. These are covered in the user guide, Personal Preference Management. It’s worth noting that some of the content in this article is more advanced and can be revisited later.
System Feedback - Flash Notifications
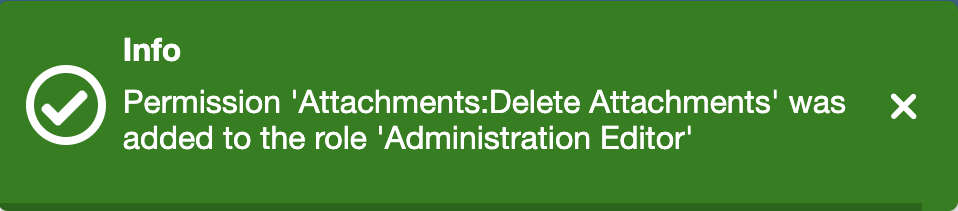
iPassport uses flash notifications (messages which pop up and disappear after 5 seconds) across the system to provide users feedback. Examples of such feedback are when a record was successfully saved, when the action attempted was not possible for a valid reason, or when an action failed.
To close a notification before it auto hides just click the “X” button on the right.
A notification looks like this:
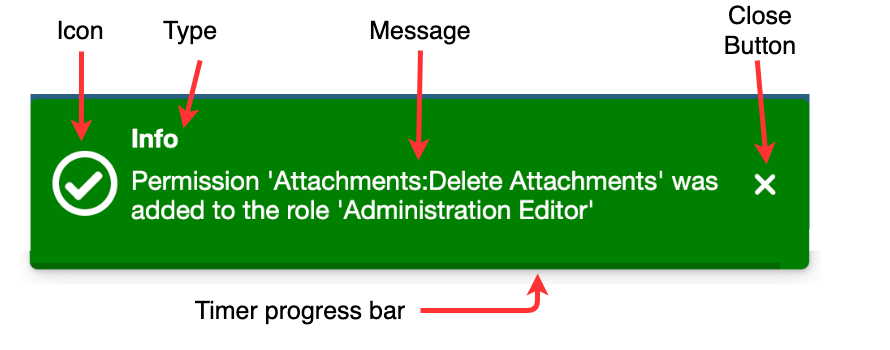
- Icon : Shows the type of the message which matches the notification colour
- Type : The textual description of the notification type; i.e., “Info”
- Message : The message the notification is about
- Close Button : dismisses the notification
- Timer progress bar : This small bar indicates the time left before the notification disappears; it runs down to zero in 5 seconds
There are three types of flash notifications:
-
Info - to confirm that an action has completed or to give the user relevant information
-
Warning - to provide informative feedback that a user should be aware of and act upon - i.e., the message cannot be ignored to move forward

-
Error - to inform a user that something went wrong and an action failed

Common Basic Usage
To get started there are usually three basic areas of interest: how to search content, how to manage notices and how to get help. A section on how to complete a skill task is included below as this is normally the first job users get assigned in iPassport.
Searching Content
Whether in Simple view or in Detailed View, the Sidebar (left menu) offers a Search facility. This global search area covers most of the content in the iPassport account, within the user’s permissions. As such it’s very powerful and can find content inside documents but this can also result in a large number of results from a simple search string. With some practice, search terms can be refined to narrow results to relevant items.
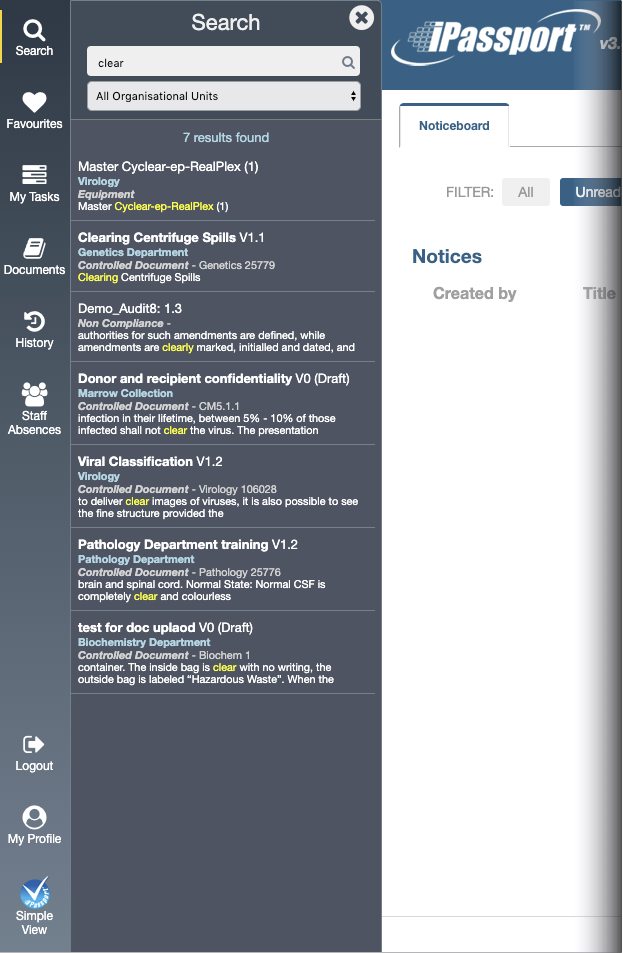
To search for anything in iPassport:
- Click the Search icon on the Sidebar - the Sidebar expands to reveal a search field
- Enter a search term and either click the magnifying glass icon or press Enter/Return on the keyboard
- The search can be limited to a particular OU by clicking, All Organisational Units and selecting it from the dropdown menu
- Click the appropriate result to jump to that record - iPassport will navigate to the selected item and keep the Sidebar expanded to facilitate jumping to other results
- Click the “X” on the top right of the expanded Sidebar to collapse it - the results won’t be cleared and can be viewed again by clicking the Search icon
In Simple View, a Global Search facility is also offered on the Home page. It covers the same content as the global search in the Sidebar. A Back button is available to quickly return to the search page if the wrong item was selected. Click the Home icon at the top of the Sidebar to access this global search area (only available in Simple View).
Reading and Managing Notices
Notices can be widely used to share information with other iPassport users. Some notices are designed to pop up upon login while others can be found in the Noticeboard area. Some notices might require confirmation that they have been read and will have the button, “I have read this notice” at the bottom. If such a notice is discarded by clicking the “X” in the top right, it will persist and pop up again the next time the user logs in.
The Home page in Simple View also has a section for Important Notices with a link to, “View all notices”. This opens the noticeboard page, the same as clicking the Noticeboard button in the Global Menu, when in Detailed View.
The Noticeboard page has 4 filters: All, Unread, Read and System. System notices are generated by the iPassport team to communicate important updates and relevant information about system usage. To read a notice is not to complete a task and in many instances notices can be irrelevant to the user reading them, such as updates on document reviews. Important notices will have an exclamation mark in a red circle next to them.
Getting Help
In Simple View, the Help section is in the Home page under, “Need Help?”. In Detailed View, the Help button appears in the top right corner of the screen. Clicking these links opens a page with 5 or 6 tabs, depending on the user’s settings:
- Who Can Help Me? - this tab lists qualified staff in the user’s facility that can help with iPassport matters; they can be filtered by Organisational Unit (OU)
- Contact iPassport Support - only users whose settings allow contacting iPassport support directly will see this tab; technical queries and unexpected system behaviour can be sent to the iPassport team in this area
- About iPassport - this tab contains the iPassport change log, with all updates and patches listed
- Privacy Policy - this page offers a link to the iPassport Privacy Policy for those who are interested
- Terms and Conditions - a PDF version of the document, “Terms & Conditions for the provision of the iPassport managed service system and associated services” can be viewed online or downloaded
- Service Level Agreement - a PDF version of the document, "iPassport Hosting Service Level Agreement" can be viewed online or downloaded
User Guides
In Simple View, the User Guides link appears in the sidebar, near the bottom. In detailed view, it appears in the global menu near the top right corner of the screen. Clicking the link opens a new browser tab with our privacy policy, a list of release notes (including corresponding validation tests) and a list of user guides. The user guides are organised by module with the first section (General) devoted to articles which apply to items in the global menu and beginner guides.
Completing a Skill Task
iPassport offers a comprehensive suite of document management tools. One of them is to help ensure staff members are reading all the documents (policies, SOPs, etc) that relate to their job. For this, the system generates skill confirmation tasks for the relevant staff members to confirm they have read any particular document. The user normally receives an email with instructions and links to the documents and also, all tasks are easily found within the system.
A typical skill task email:
Dear xxxxx
The following task has been assigned to you:
Please verify you have read and understood the following Controlled Document: policy: Genial Hospital 120: Employee Handbook (Click Complete Task)
Task reference: 817-91366661 Due for completion on, or by: 21-Jul-2019
This task is attached to Policy: Genial Hospital 120: Employee Handbook v1.0 (https
PLEASE NOTE: This document was authorised on 24-Apr-2019 and has an effective date of 24-Apr-2019
Created by Bernardo Velasco on 21-Jun-2019 21:36
Account: test_tgh - https
This is an automated message sent from iPassport, please do not reply.
N.B. This email notification can be disabled at any time by changing the preferences in your user profile. Alternatively, to disable ALL automated emails from iPassport, please click here: https
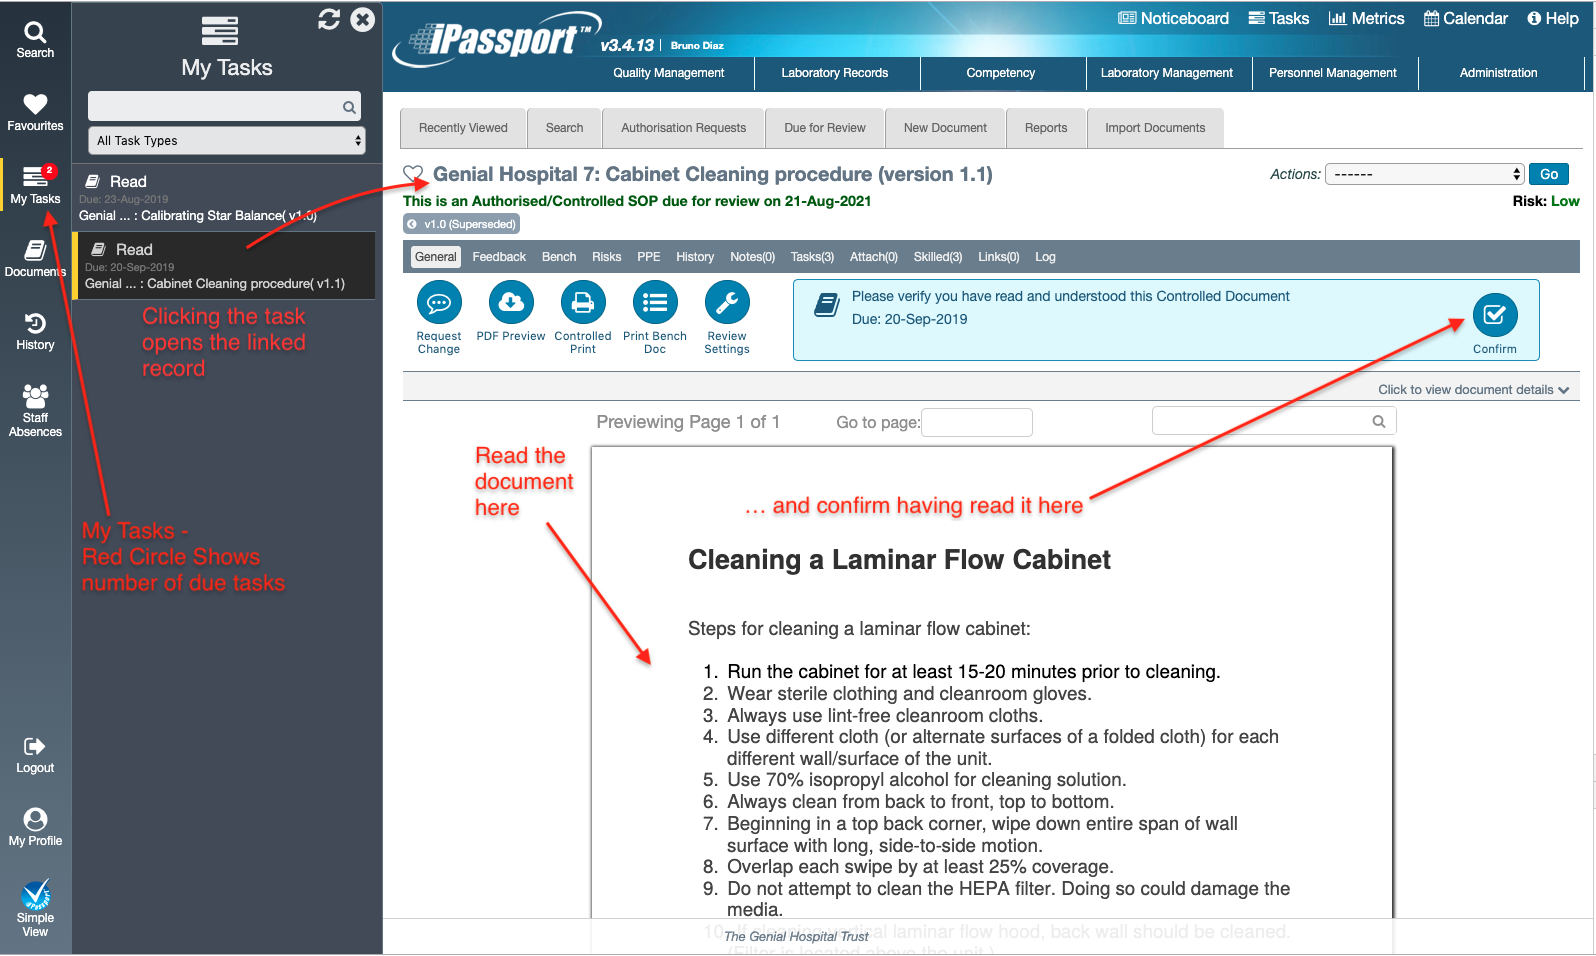
When the user logs into iPassport, the Sidebar My Tasks icon will display the number of due tasks assigned to them in a small red circle.
The quickest route to complete a task is to click the My Tasks button. This expands the Sidebar to reveal all due tasks. When any of the tasks is clicked, the system will open the linked record for viewing. For skilled tasks, the open record will have a box with a Confirm button to acknowledge having read and understood the document.
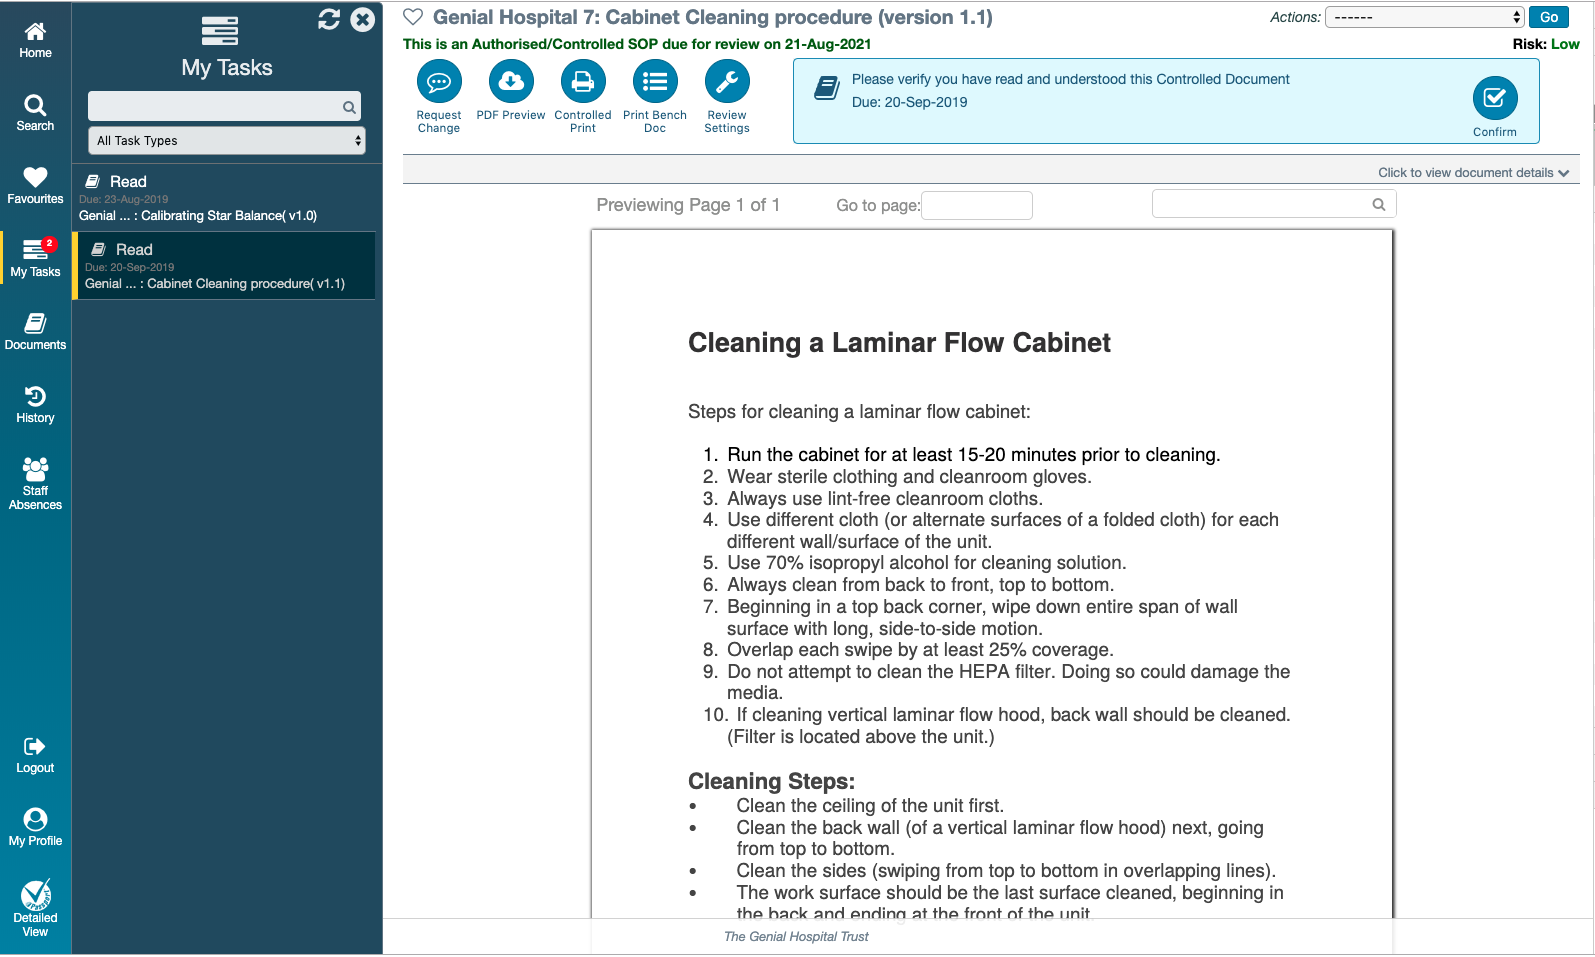
The same page in Simple View:
In the event of a document being assigned to a staff member who doesn’t have access to it, the user will be presented with the message, “Sorry but you do not have the required permissions to access this area. Please contact your local iPassport administrator for further assistance.”. The local administrator will have to either adjust the user’s permissions, make the document accessible or delete the task if it wasn’t intended for that user. Unless there is a real technical issue, the iPassport support team will not be able to directly rectify access issues as they are not employed by the user’s organisation to manage staff permissions and sensitive information. They will happily provide advice for the local administrator if required.
