- Search/Edit User Records
Searching and Editing User Records
Searching User Records
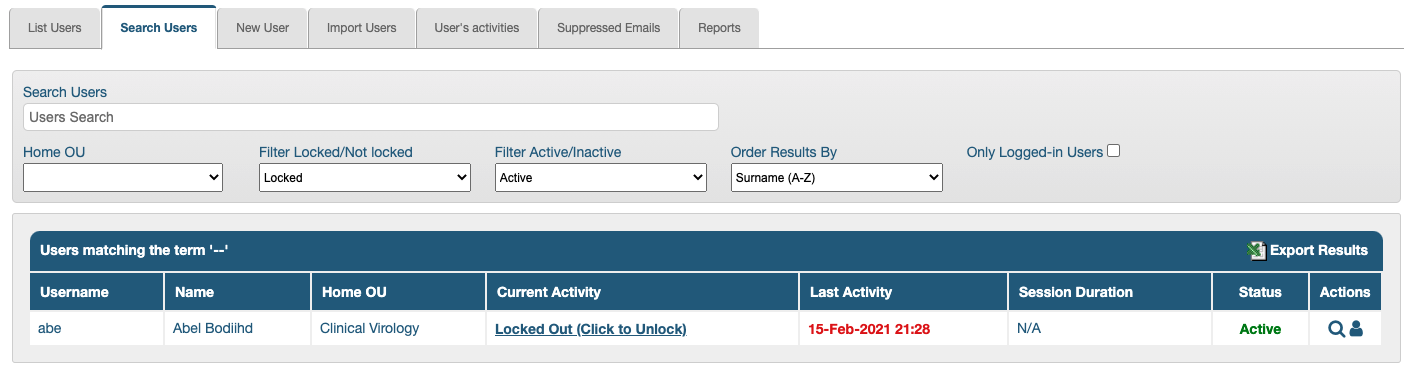
The Search Users tab (which opens by default when navigating to Administration > Users) offers a search area with several filters to allow locating a particular user record.
The permission, “User Accounts:View User Accounts” is required in every OU where user records want to be accessed.
If a user has been assigned a ‘Home OU’, the search will default to that OU but it can be expanded to view the other Organisational Units (OUs) available to that user.
The available search filters are:
-
Search Users - a search-as-you-type field where the first and last name can be entered, as well as the username
-
Home OU - a dropdown list of OUs available to the user; if this field is left blank, all OUs on the list will be included in the search
This field defaults to the logged in user’s home OU, if one has been assigned to them.
Only the OUs where the user has the permission, “User Accounts:View User Accounts” will be available for searching.
The system will assign the account’s default OU to users who haven’t been assigned a home OU but this field will appear blank to them. -
Filter Locked/Not locked - by selecting, Locked, this filter locates any users whose access has been blocked due to too many failed login attempts; administrators can unlock users by clicking the underlined option, “Locked Out (Click to Unlock)" in the Current Activity column.
- Filter Active/Inactive - users whose record has been inactivated can be brought up by setting this field to, ‘Inactive’
- Order Results By - defaults to Surname (A-Z); the other options are:
- Surname (Z-A)
- Username (A-Z)
- Username (Z-A)
- Current Activity (Oldest first)
- Current Activity (Newest first)
- Last Activity (Oldest first)
- Last Activity (Newest first)
- User Added (Oldest first)
- User Added (Newest first)
- Only Logged-in Users - this is a checkbox to select only currently logged in users
Exporting Search Results
Any search results can be exported by clicking the Export Results link in the upper right corner of the results area. An administrator with access to all OUs can generate a list of all users in the account by this method.
The reports include:
- name information
- Home OU of the users
- whether they are active
- email address
- user group memberships
- skilled group memberships
- distribution list memberships
- whether they are currently signed in
- last activity time and date
- facility membership (only in Enterprise Accounts)
Editing General tab Information
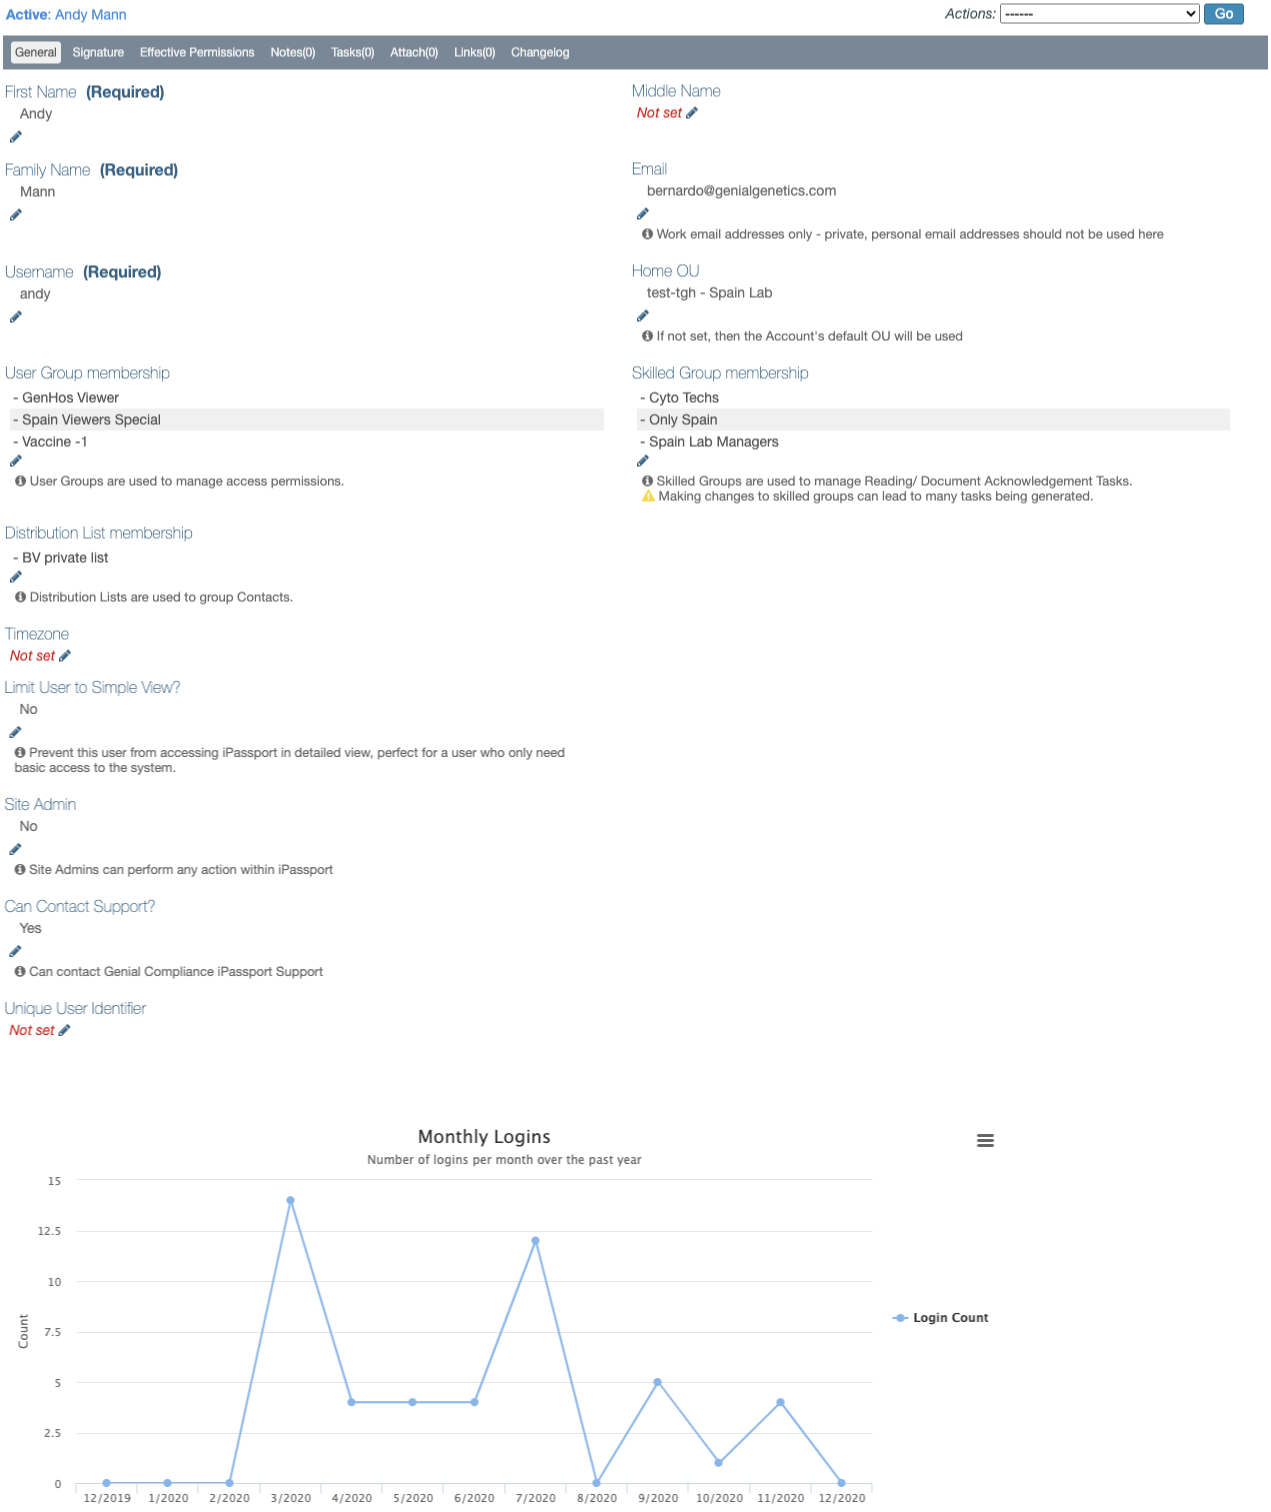
Once a user record has been created it is possible for administrators (those with Administration Editor role privileges) to edit the user record. It’s a good place to adjust the user’s level of access within the system by adjusting their user group membership. It’s also possible to adjust the user’s membership to skilled groups and distribution lists on this page.
Site Admins can also view the field, Site Admin, which they can toggle to give or withdraw this special status.
The bottom of the page displays a graph of monthly logins over the last year. Hovering over the graph nodes brings up a message displaying the number of logins in that period.
To edit a user record:
-
Go to Administration > Users > Search Users
-
Select the user’s Home OU from the dropdown menu that appears when clicking the field; if not known, select the ‘blank’ option
-
Enter the user’s name into the Search Users field
The number of results in the list below will narrow down as you type in this field.
-
When the user’s name appears listed below, click anywhere in its row (or the magnifying glass) to open the record’s General tab
-
Click the edit (pencil) icon next to any field to edit it
-
Click the Save or Cancel button to finish editing the field
All saved changes are then recorded in the Changelog tab.
Signature tab
This tab allows a scan of the user’s signature to be uploaded. If present, the signature will be added in the appendices of controlled prints (for example, when the user authorises the document).
NOTE: If “Require Password to Upload New Signature” is set in the account’s Miscellaneous Preferences, then users will only be able to upload their own signature after entering their login password.
Resetting a Password
The system automatically creates a password for every new user account. Users can reset their own passwords but it is also possible for an administrator to reset users’ passwords at any time, if required.
To reset a user password:
- Go to Administration > Users > Search Users
- Ensure the Home OU filter matches the user’s Home OU or set it to ‘blank’
- Enter the user’s name (even partially) in the Search Users field and results should start filtering below
- Open the record by clicking its row when it appears in the search results
- Click the Actions field (top right of the record) and select, Reset Password from the dropdown menu

- Click Go to open the “Reset Password” lightbox
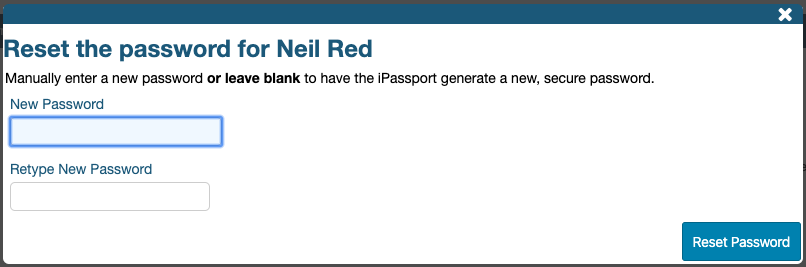
- There are two options:
- Either enter a New Password, Retype New Password and click Reset Password (in which case, the chosen password can be communicated directly to the user when appropriate)
- Or, leave the fields empty and click the Reset Password button to allow the system to generate a secure password automatically
In both cases iPassport will send an email to the user with their new password details and a banner message will be displayed, informing that the user’s password has been reset.

The user should receive their password within 30 minutes of the reset from: [email protected]
If the password has not been received please ask the user to check their spam mailbox.
Set User as Read-only
In accounts that have signed up for ‘View Only Licenses’ licences (additional reduced cost basic licences), the Actions dropdown menu includes the option, ‘Set read-only’. When this status is enabled, the user will only be able to access the system, limited to the permissions included in the role, ‘Global Viewer (excluding admin and personnel records)’. Any other permissions granted through user group membership won’t be acknowledged by the system.
If circumstances change, the option ‘Unset read-only’ will be available to revert the user to the normal permission scheme based on user group membership.
Next Step: Inactivating/Reactivating Users
Previous Step: Creating User Accounts